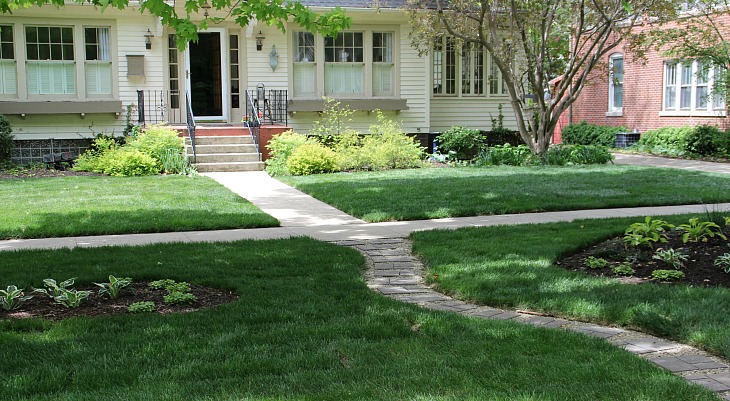
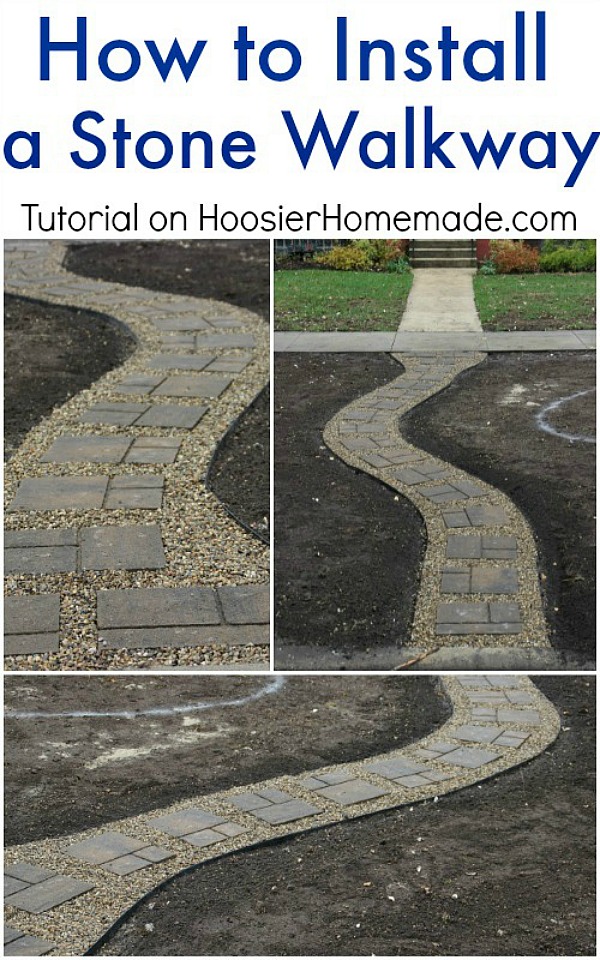
How to Install a Stone Walkway
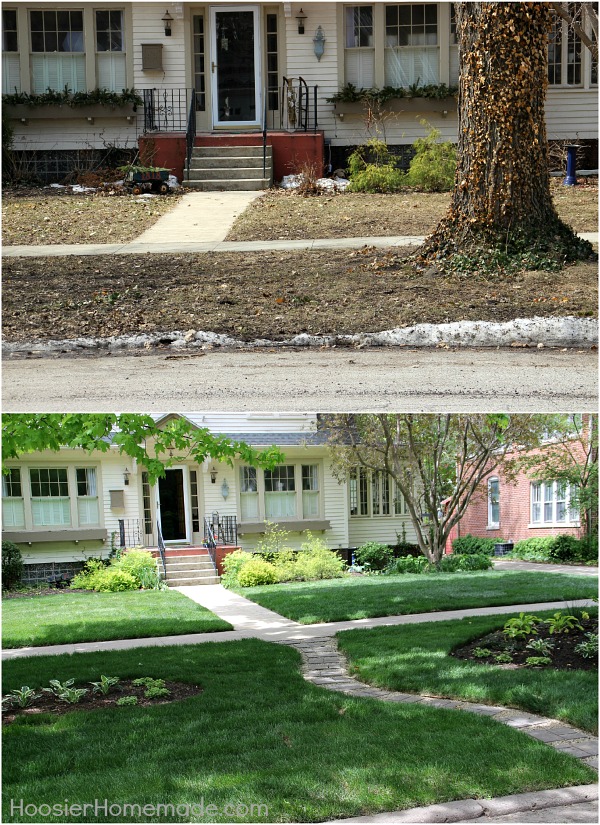
We’ve been taking advantage of the change in weather. After being cooped up in the house this long winter, we are excited to get some of the landscape projects done that we’ve dreamed up the past few months. We’ve always been a DIY couple, enjoying getting our hands dirty and saving a little cash as we add elements to the property that add curb appeal and provide us with some natural beauty.
Today, we are sharing How to Install a Stone Walkway. Whether you are in need of an update to the front of your home or just a walkway between the landscaping beds, a Stone Walkway is not difficult and it’s economical to install.
To catch you up on our plans for the front lawn you can see the before pictures and also see how we started the project with an application of Grass & Weed Killer.
Before we get into the Step-by-Step directions for the Stone Walkway, let’s talk a little about some of the design considerations that went into our decision making process for this project. When deciding on the material of any walkway you build, there are number of elements in the design to consider.
- Cost – Needs to fit into the household budget and a Stone Walkway is an economical choice. Costing less than a straight paver or concrete walk.
- Maintenance – How much effort are you able to put into maintenance over the life of the walkway. There will be ongoing maintenance required, several times during the season to keep it looking it’s best.
- Durability – Correctly installed this style of walkway will last for years, especially if it’s maintained well.
- Feel or Theme – This style definitely gives the area a more casual and inviting feel to the area with smooth lines and limited hard edges.
Once you have taken all the elements into account and gathered the supplies needed it’s time to start Installing your Stone Walkway.
We did a little advance planning and work by applying Weed & Grass Killer 7 days earlier to address some perennial weed problems we’ve had in this area of the lawn and to make the removal of the existing grass easier. It’s not necessary to wait as long as we did, with there being no residual soil activity with the use of the Grass & Weed Killer you could spray and reseed your lawn in the same weekend if that is what you need to do.
Let’s get to work
Helpful Tools
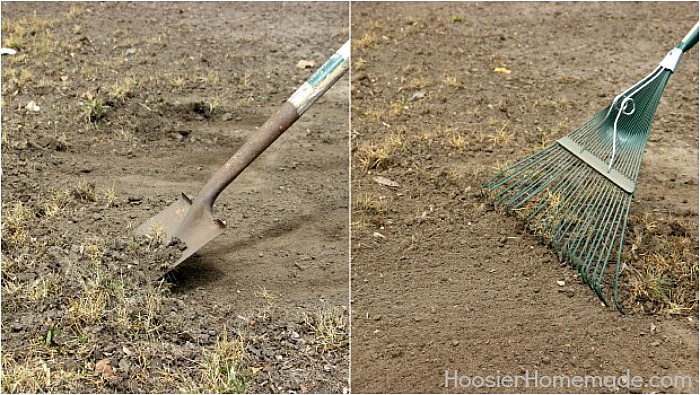
We started by removing all the existing dead weeds and sod with a flat point shovel and raked the debris off to remove from the area. Using the Spectracide Grass & Weed Killer and waiting for the grass to die made this part of the installation go faster since the roots of the weeds and grasses were dead they didn’t provide much resistance.
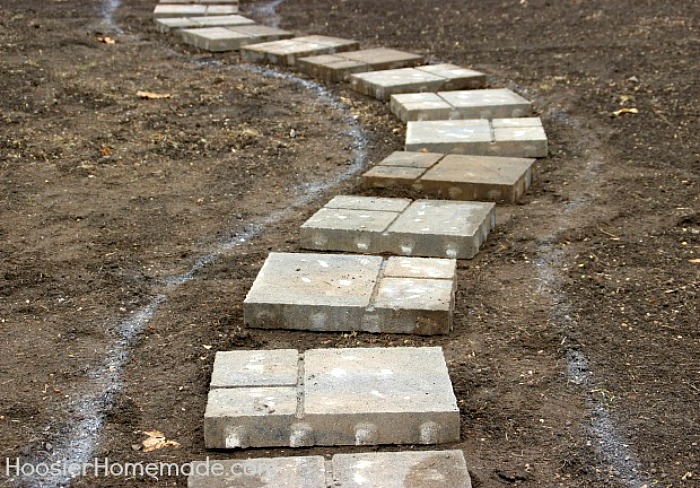
Then we laid out the walk to mark the area to be excavated with marking paint. Allow extra width to make the base as stable as possible, for example if the final walkway is 24 inches wide mark an area 12 inches wider to allow for a stable base. If you don’t have any paint handy you can use a garden hose to get a good visual of the final design. We also placed the stepping stones to make sure we liked the look and feel.
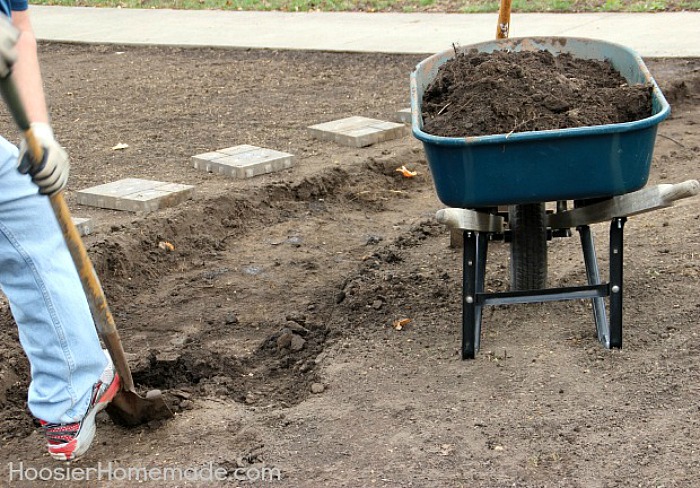
Now for the digging. There’s a little bit of calculation necessary to determine the depth you need to excavate the soil. It’s very simple, take the thickness of your stone, (normally 2 inches) and add an inch for the sand bed and 4 inches for the crushed stone base. As a general rule 6-7 inches deep is sufficient.

Now fill in the excavated area to 3 inches below your final grade making sure you compact it level with a tamper. I used a hand tamper for this project but if I am working on a area larger than 200 square feet it pays in time and energy to use a vibrating plate compactor. You can rent either of these tools from your local hardware store or eqipment rental store.
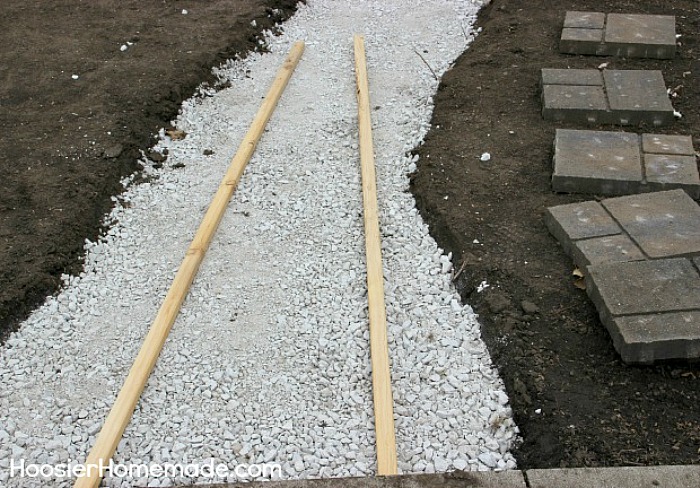
Bonus Tip – For this next step I’m going to share a method that many landscape professionals that install patios and walkways use. We are going to be adding a layer of sand 1 inch in depth, to make this super fast and easy we took 2×4 boards and ripped them on a table saw to 1 inch. Then you use these as guides by placing them on top of the packed crushed stone and backfilling with sand. If you have a large project or are going to do several projects you can purchase 1 inch galvanized electrical conduit to use instead. It will pay for itself in the time and aggravation you save.
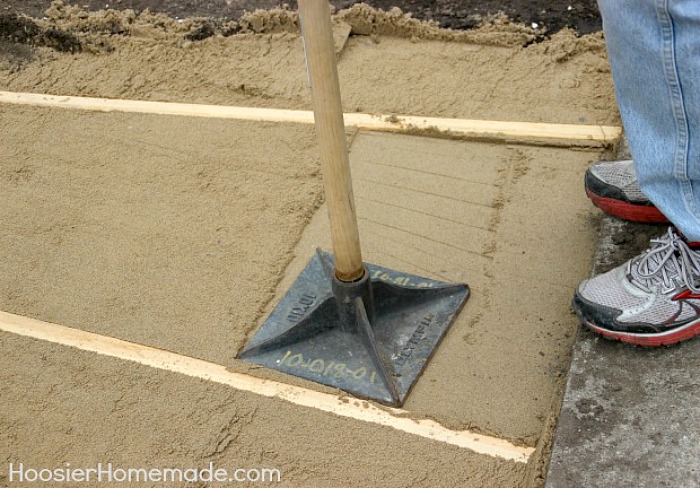
So now that we have the guides in place fill up to the top of the guides and compact with the hand tamper.
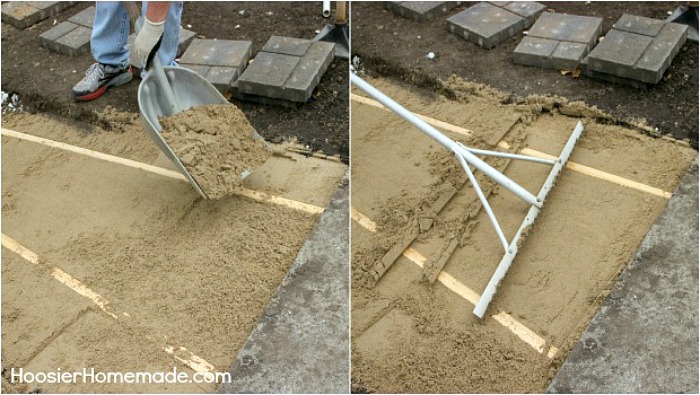
You’ll need to add additional sand one or two more times compacting each time you do to get the firmness you need. You should be able to place about half your body weight on one hand and leave only a slight imprint. Once you have this carefully remove the guides and fill in the channels left with sand and do a final light tamping.
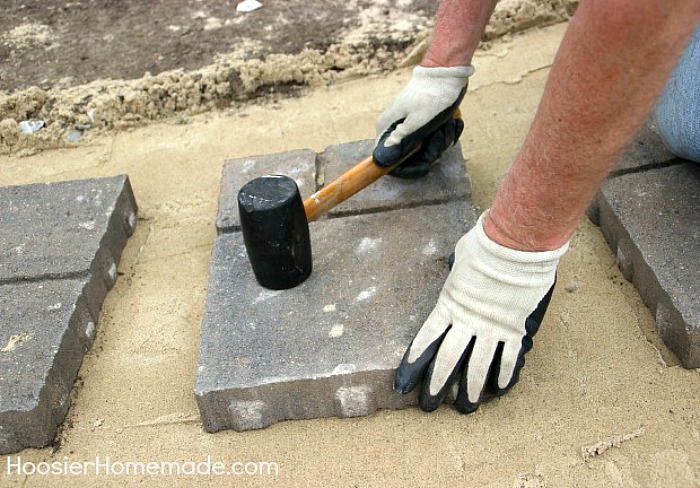
Now add the stepping stones. Once you have the final placement take a rubber mallet and give each of the several whacks to set them in place. Now is the time to make any final adjustments.
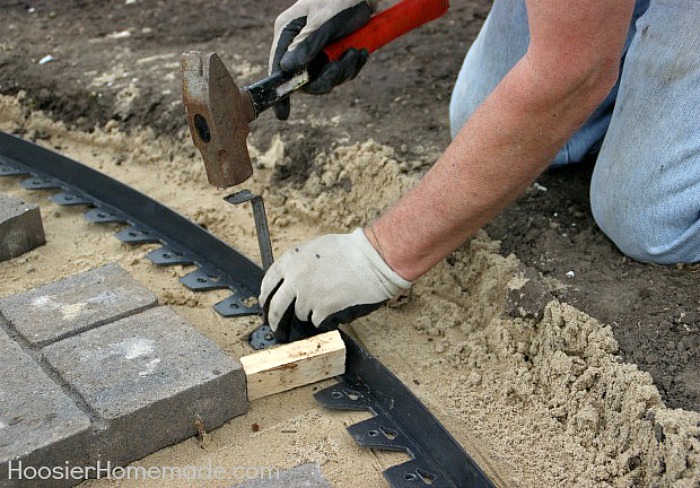
Next it’s time to install the paver edging. Using a 4 inch block of wood as a guide we staked the paver edging to form the edges of the walkway. Bonus Tip #2 – most paver edging comes with 4 stakes per length of edging which is not enough in my opinion to keep it secure so purchase an additional 4 stakes per length to use.
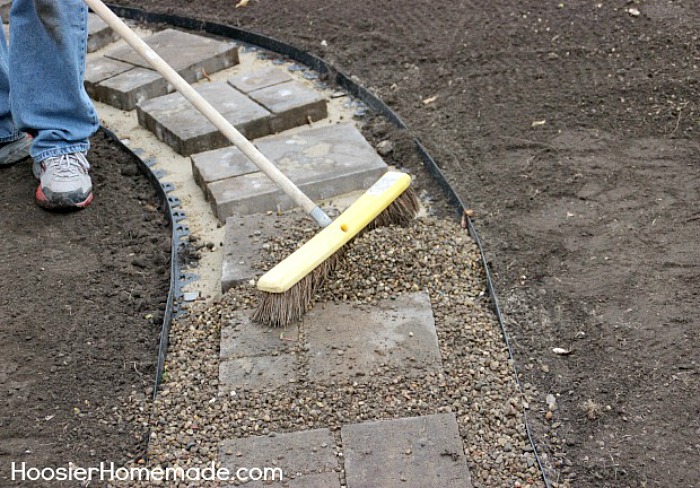
We’re almost done! Back fill in with your choice of decorative stone. We love the look of washed river gravel so that’s what we used. Use a broom to level it off and fill any low places then a quick wash with the garden hose to bring out all the beautiful colors of the stones.
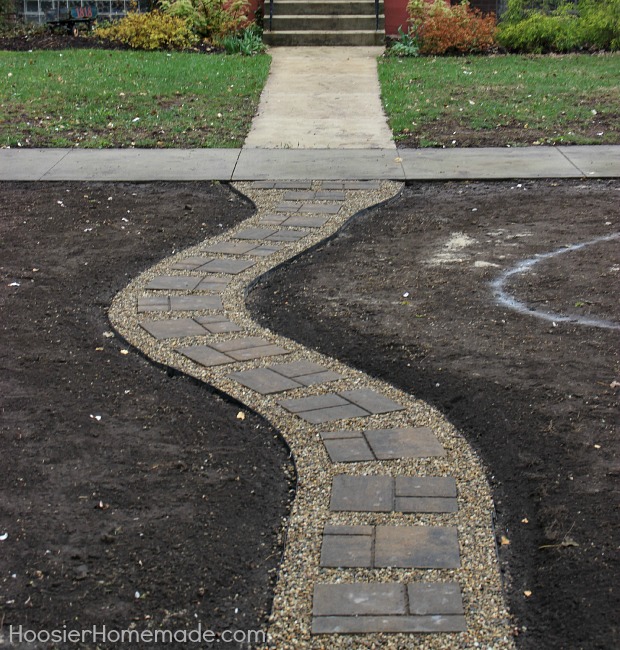
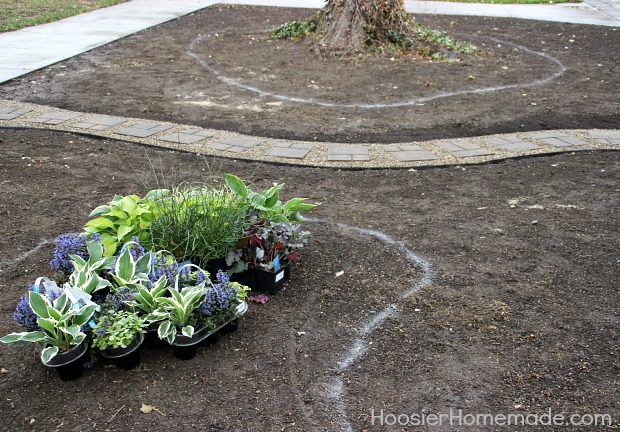
We’re so excited to be sharing our progress with all of you. Be sure to stop back over the next few weeks and see our progress. We have some amazing plants to be added this weekend.
Update: The shade loving plants are in, check out how we planted the first landscape bed.
MORE Gardening and Landscaping help
- Where we started – Weekend DIY Curb Appeal
- How to Install a Stone Walkway
- Shade Plants for Problem Landscaping
- The Reveal – 10 Rules Every Homeowner Should Follow When Landscaping
- Tips for Laying Sod Yourself
- Time to Lay Mulch
- Basics of Fertilizing your Lawn
One Comment