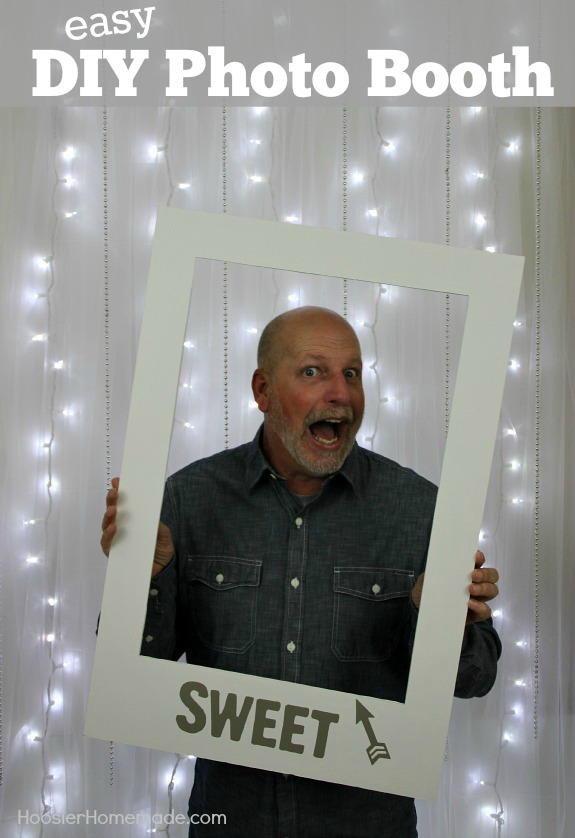
Easy DIY Photo Booth
From holidays to weddings to showers to birthday parties, photo booths are all the rage right now! Why not create one for your next celebration? They are super fun and this easy Homemade Photo Booth is perfect for any occasion!
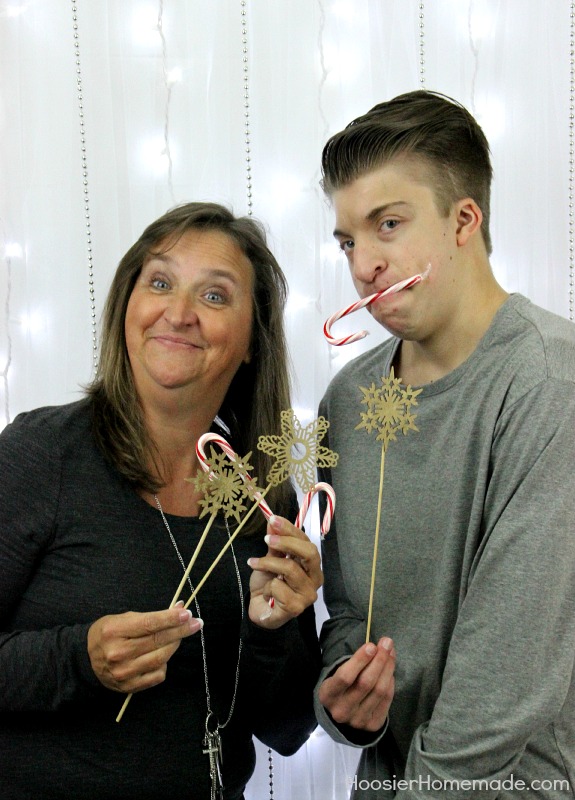
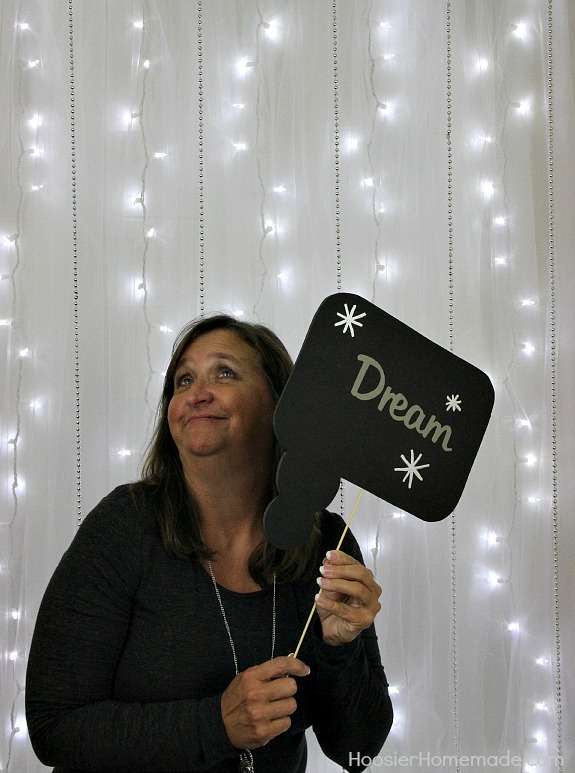
To say we had fun is an understatement, we laughed until we cried! We will be hosting my son’s college friends for a Christmas party in a few weeks, and I can hardly wait to see what fun we have with the Photo Booth. The celebrations and prop ideas are endless. Bored during the Winter and need something for the kids to do? Create a Photo Booth, hunt through the closest for old clothes and let them play. Creativity is a great thing!
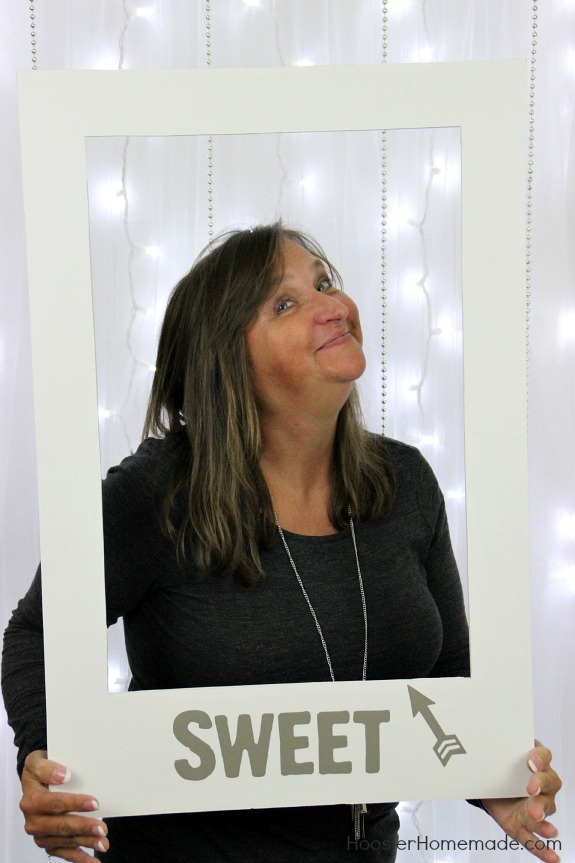
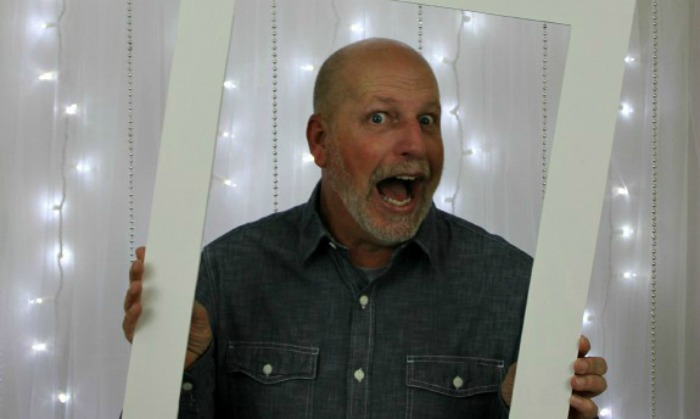
Yesterday we shared the DIY Photo Booth Props, they are simple, easy and take very little time to make. We used foam core poster board and a few other supplies, head on over and learn how to make them!
The Photo Booth was also easy to make, let me show you how…
Homemade Photo Booth Directions
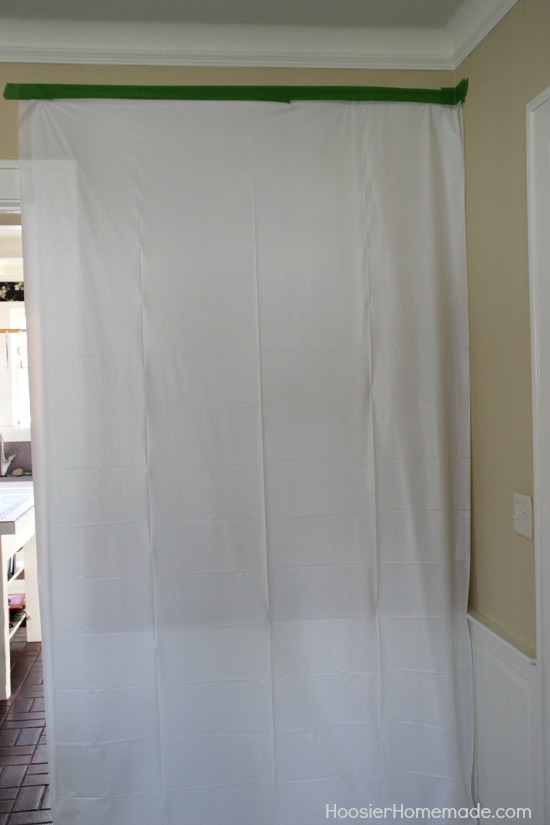
First you will need to choose the location, any wall or doorway should work, depending on the flow of traffic in your home or location of your party. We used a corner in our family room.
To make the Photo Booth, the first thing to do is cover the wall. We used white plastic tablecloths, and used Frog Tape painters tape to attach them to the wall.
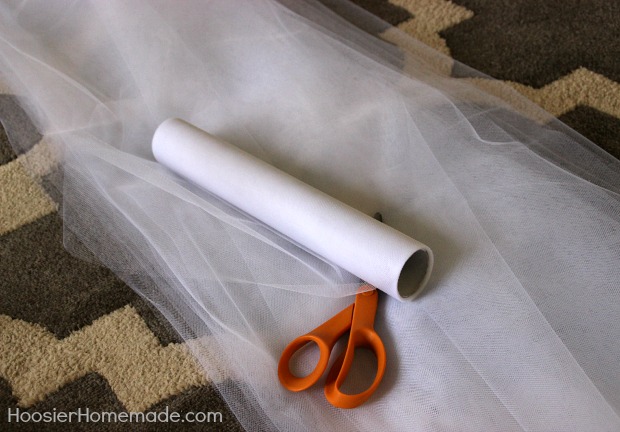
Because we knew the tablecloths would have wrinkles and we also wanted to give the back drop a little texture, so we used 12 inch white tulle (there are tons of other color options there!). We measured the first piece, then laid the other pieces on the floor, stacking them and then cutting.

To attach the tulle to the wall, we laid a long piece of painters tape on the floor, upside down. Then each piece of tulle was gathered and stuck to the tape. This made hanging the tulle a snap.
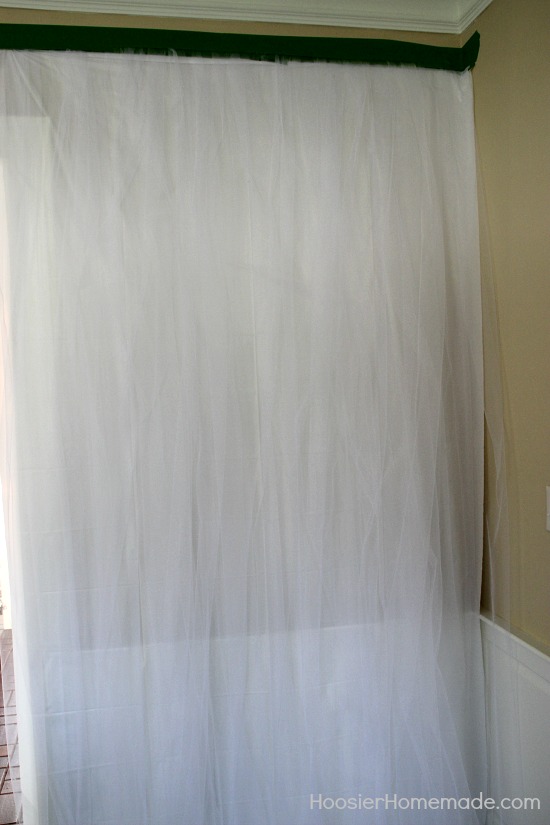
Then we simply attached the painters tape to the wall and straightened the tulle.
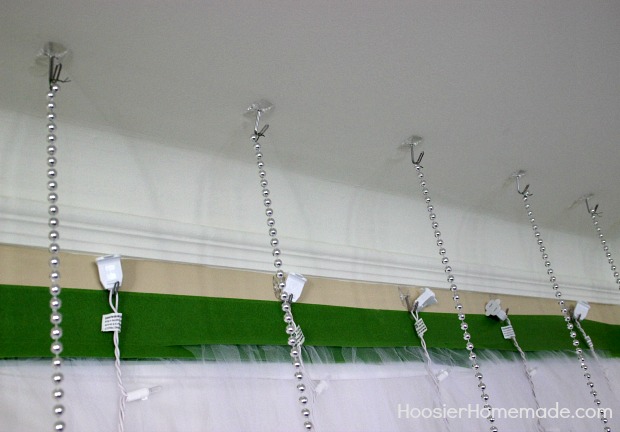
To hang the lights and beads, we attached Command Hooks to the ceiling and wall.
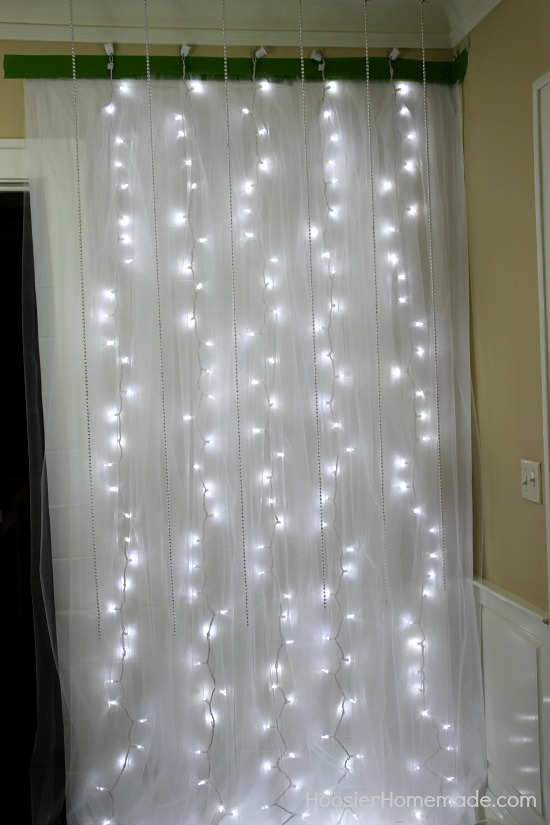
And then the lights and beads were hung. We used strands of 50 cool white LED mini Christmas Lights and hung them so the plug was at the bottom, making it easier to plug them in. And the silver beads were from the Christmas decorations at Walmart, they are 18 feet long, so we cut them into thirds and have 6 strands.
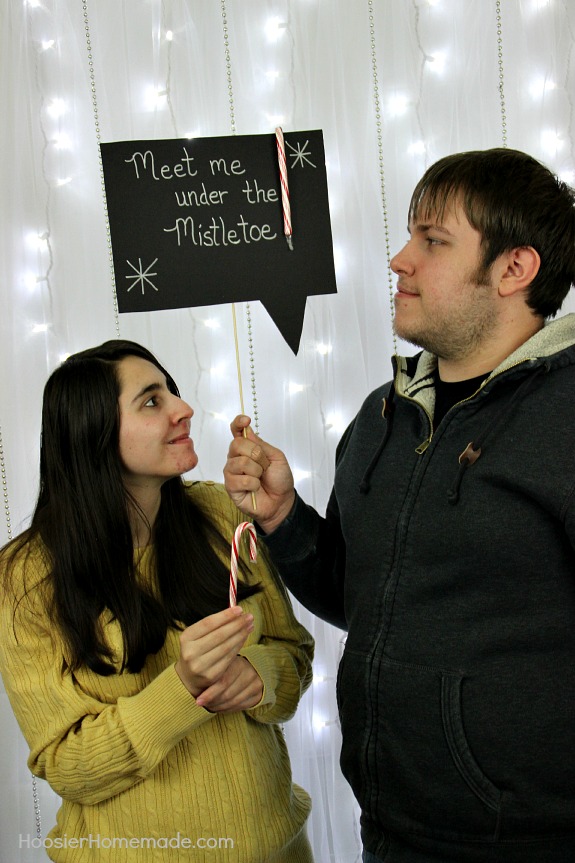
Then the fun came, we gathered the kids and had a blast taking lots of pictures.
![]()
- DIY Photo Booth Props
- White Plastic Tablecloth – we used 2 for extra coverage
- 12 inch White Tulle –
- 50 strand cool white LED mini Christmas Lights
- Silver beads
- Command Hooks
- Frog Tape painters tape
- Scissors
- Wire
I’m dreaming of a wonderful Christmas!

What length is the tulle? The 12 inches is for the width right?
Hi Freda, the length will depend on where you are hanging it from. So measure the area you are using, and then duplicate for all the rest of the pieces of tulle. Hope that helps!
-Liz
Thanks!!
My question is …what do you do with the camera? Do you have someone taking the pics? Do you have it on a tripod with a shutter release cord?
Hi Tammy, we just took the photos manually. But yes, you could certainly put the camera on a tripod and use a shutter cord.
~Liz
I love this idea and want to do something like this for an upcoming party, but how do you take the pictures themselves? Are they instant?
Hi Nicole, we took our photos with our DSLR camera. I’m not sure what they have now for instant photos, although there are several 1 hour photo shops.
~Liz
I’ve always wanted to make one of these! Great job, Liz!
Liz, this is great! I pinned this and will be using your tutorial in the near future, because it turned out awesome!
So excited you liked it Jennae! Thanks!
~Liz
Love this idea! One little tip–if you have your guests stand a little farther away from the background you won’t see the light cords as much I don’t think.