She Shed: The Roof: Part 4 of the Backyard Makeover

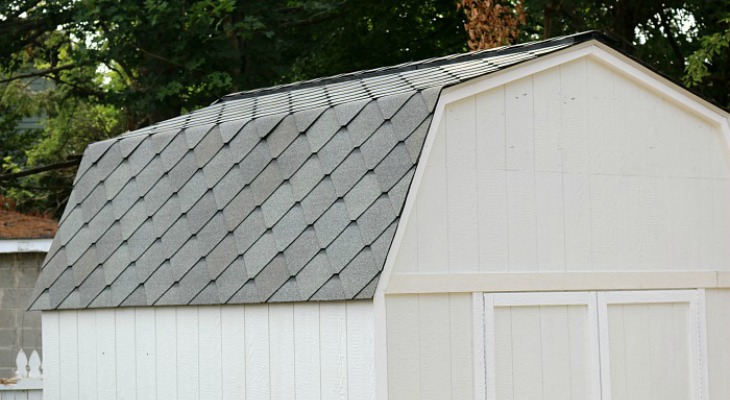
We are moving right along with our She Shed. The roof and shingles have been added and we are sharing the step-by-step process with you today.
Doug has been doing all of the building of the She Shed. If you have been following along with our Facebook Live videos, you can see a glimpse into the building and what it all looks like. And you can catch up on the other posts we have shared on the She Shed. I’m going to let him tell you how to add the shingles to the roof.
I’m really happy with how the roof turned out. To be honest I was a little worried that I might have tried to tackle a job that would have been better left for a professional. I’ve helped shingle a couple of roofs in the past but it’s been a few years and roofing technology has changed a bit.
But just look at the GAF Sienna® Harbor Mist shingles you chose for the She Shed. I was sure that it was going to be complicated and I’d have to call in a contractor to do the job, but we decided to visit our local Home Depot. With a few tips and suggestions from The Home Depot ProDesk associate, I was able to finish the job.
The Home Depot has all the GAF Lifetime Roofing System supplies you will need. And their ProDesk associates are a big help with any questions you might have.
I placed a special order for the Sienna® Harbor Mist shingles and the Timbertex Ridge Cap shingles, and it was a seamless process. We will be able to pick them up at the store in 10 business days, maybe sooner.
Let’s face it, I’m just a diy-er that likes the satisfaction of doing the job myself. I made a few mistakes along the way but I was able to correct them, I call them learning experiences.
So let me show you how we went about installing the roof on Liz’s She Shed using the GAF Lifetime Roofing System with the Sienna® Harbor Mist shingles.
We purchased other roof system components like the FeltBuster Synthetic Roofing Felt, QuickStart Peel & Stick Starter Strip and Cobra Snow Country Ridge Vent to qualify for the GAF Lifetime Roofing System while we were there. I also picked up some new gloves, I’m really glad I got them.
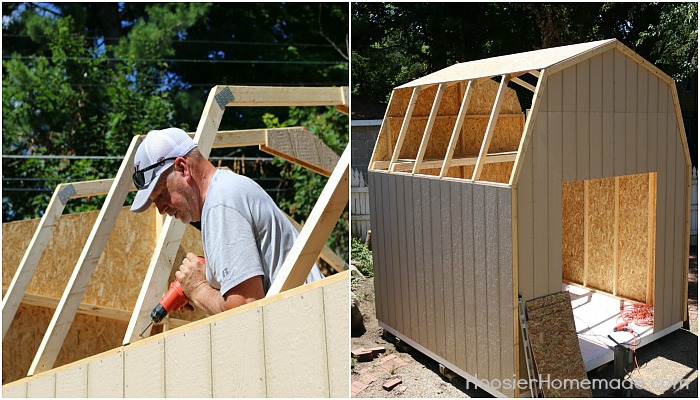
While we were waiting for the shingle order to come in we continued building the She Shed.
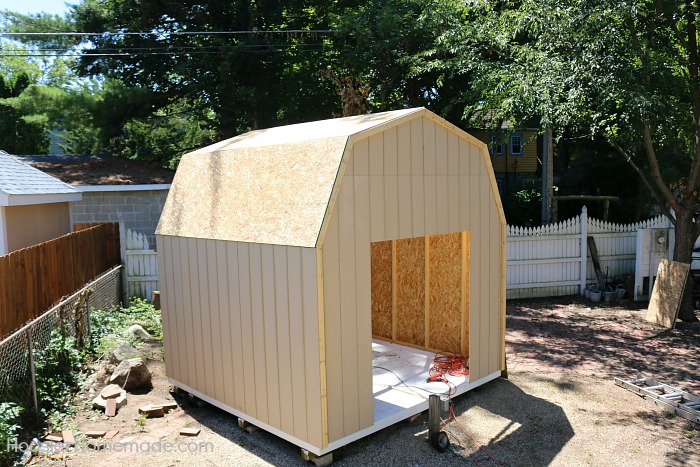
After building the rafters we put them in place and then started adding the OSB roof sheathing.
It only took a few hours to get the roof decking in place and ready to get started with shingling.
The first step was to add the metal drip edge and GAF FeltBuster Synthetic Roofing Felt. I’m glad we decided to spend a few extra dollars on the GAF FeltBuster Synthetic Roofing Felt. Not only because it’s part of the GAF Lifetime Roofing System but it also doesn’t get as hot as regular felt paper and it doesn’t wrinkle when it gets wet. Both came in handy during the installation, we had temperatures in the mid 90’s and it rained twice while we were shingling.
Next we added the GAF QuickStart Peel & Stick Strip. The purpose of using this is to enable the edges of the shingle to seal tightly along the edges of the roof. It went on really quick and easy, just cut to the length you need and peel off the backing to expose the adhesive and stick it in place.
Do the eves first, then the rakes making sure you overlap the rakes strip over the eves strip at least 3 inches. Also, see those bright shiny asphalt dashes along the edge. Make sure they are along the outer edge when you apply the GAF QuickStart Strips.
Everything we have done up to this point is what I call the backbone of a good roofing job. We made sure the rafters and roof deck was secure and square and we install the best GAF roofing products to go under the Sienna® Harbor Mist shingles. Now it’s time to make the roof look pretty by adding the shingles.
I’ll admit this is where I started to get nervous. Did I do everything right up till now? These shingles are different than any other I’ve ever worked with before. But once I read the instructions I realized these shingles are going to be just as easy to install as any other you might try.
Just follow the directions. Start at a lower corner, get the stagger of the shingles right and have the right tools for the job.
You are going to be cutting quite a few shingles so splurge on a good utility knife and hook blades designed for roofing. It makes the job so much easier.
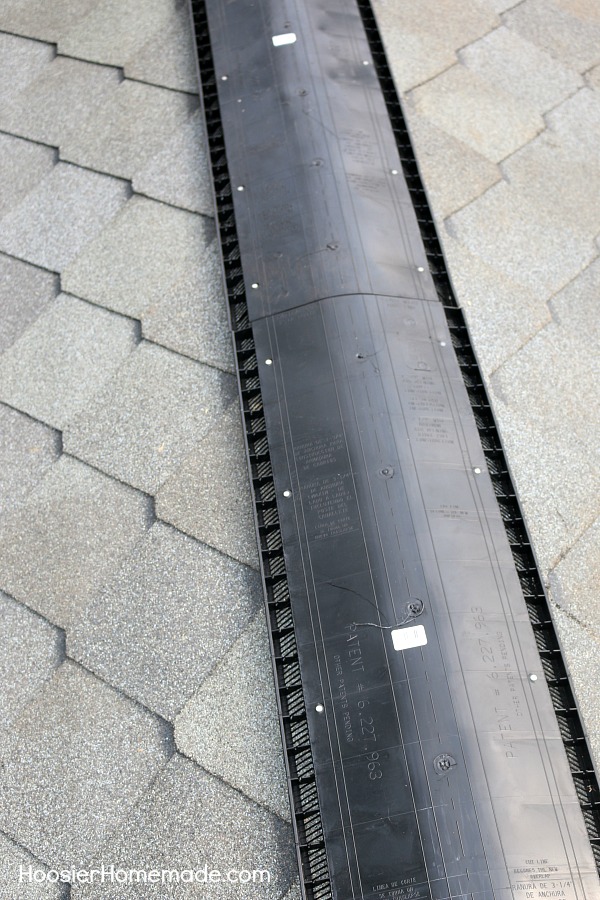
So once the shingles are in place it’s time to cap off the roof with the final part of the GAF Lifetime Roofing System. The Cobra Snow Country Ridge Vent and Timbertex ridge cap.
If you ever questioned when you might use high school math after you got out of school. This is where it comes in handy. The first step in installing the Ridge Vent is cutting an air slot in the peak of the roof. The length of the air slot is determined by a few factors such as the size of your building. There’s a couple of calculations you need to do that are included in the directions. Cut out the width and length as directed in the installation directions.
Then you center the Cobra Snow Country Ridge Vent over the peak and nail it in place. For the best finished look place the Cobra Snow Country Ridge Vent the entire length of the roof peak.
The Cobra Snow Country Ridge Vent comes in 4 foot sections. It is easy to customize and fit to the length of your peak without having to cut the vents with a knife.
Once it’s in place all that’s left to do is nail the Timbertex ridge cap shingles in place. Timbertex is a multi-layer ridge cap that not only delivers a great looking finishing touch, it provides maximum protection at the hip and ridges. Just follow the directions for the proper exposure and nail placement.
Now that all the shingles are in place, it’s time to get the rest of the She Shed done. Stay tuned for the final reveal – Doug will be adding windows, turning the doors into Farmhouse Barn Doors, the rest of the Wood Pallet Deck will go in, the inside will need finished, the sod will be laid and the landscaping will be added. Then I get to do the fun stuff and add all the decorating to the inside and outside.
We have teamed up with GAF Roofing Products to share the She Shed with you! GAF has earned the Women’s Choice Award consecutively since 2012 because they’re highly recommended by 9 out of 10 contractors and their female customers. When choosing what roofing products to use, they were a no-brainer for this project.
Keep up to date —


Hello – do you happen to remember all of the colors that you painted your shed? the main color, trim and gray?
Hi Kathleen, I’m sorry we don’t remember the colors.
Here is the post with the reveal and final photos, it might be a little easier to see.
https://hoosierhomemade.com/she-shed-farmhouse-reveal/
-Liz
Thanks for sharing and inspiring! It is beautiful! Can you share where you ordered your shed? I love the way you redid the doors. I can’t wait for weather and break ground on my She Shed!!
Hi Donna, we got the shed at Lowe’s. Thrilled you like it.
~Liz