How to Build a Ground Level Deck
Are you ready for a fun and simple weekend project? Learn how to build a ground level deck with these step-by-step photos.
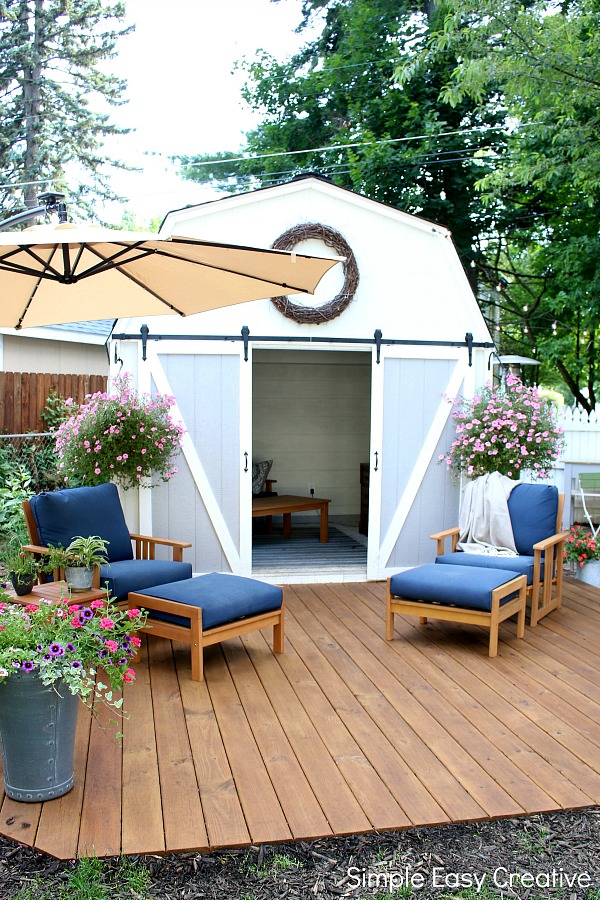
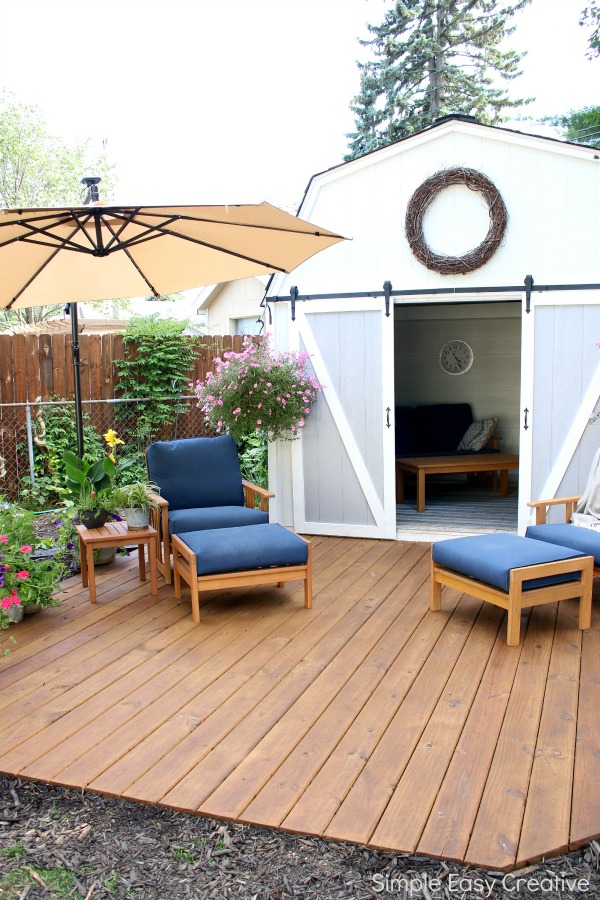
After our trip to the Deck Party of your Dreams last year, we have been talking about adding a deck to the She Shed. Little by little we have been working on the back yard, and the new deck is working out perfectly!
Thank you to Thompson’s WaterSeal for sponsoring this project. As always, all opinions are our own.
These directions are for a ground level deck, but can easily be modified for an above-ground application.
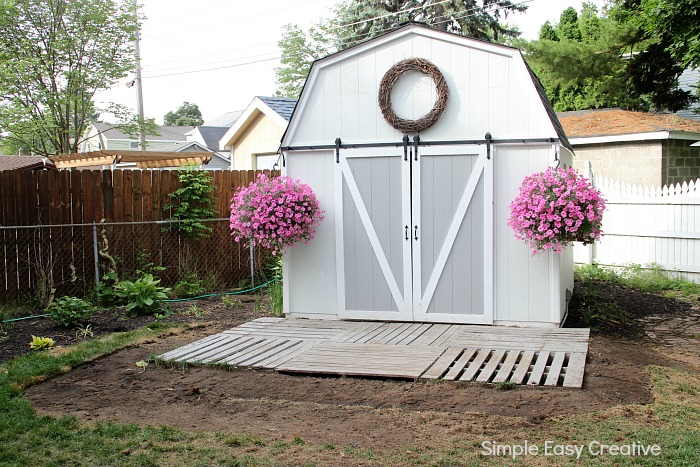
Our wood pallet deck has served us well. We have used it for four years and it’s been relocated once, but it was time for an upgrade. I started by marking the perimeter of the new deck and removed the sod, so you can see we are doubling the deck area with this upgrade.
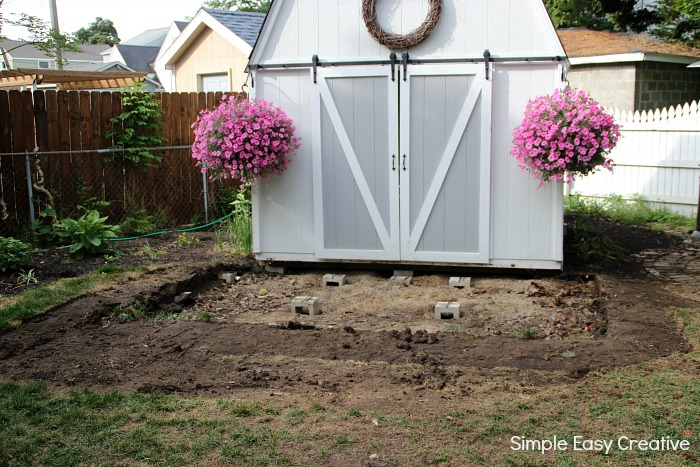
We then removed the old pallets and stored them away, (I’m sure they will be repurposed sometime in the future). We are already talking about using them to make some wall planters.
After removing the old pallets and concrete blocks I had used to support them, I moved on to the most labor intensive part of building this type of deck, excavating all the unneeded soil. I started by choosing one edge of the deck as the starting point. I used treated lumber in all of the construction of the deck.
Material List:
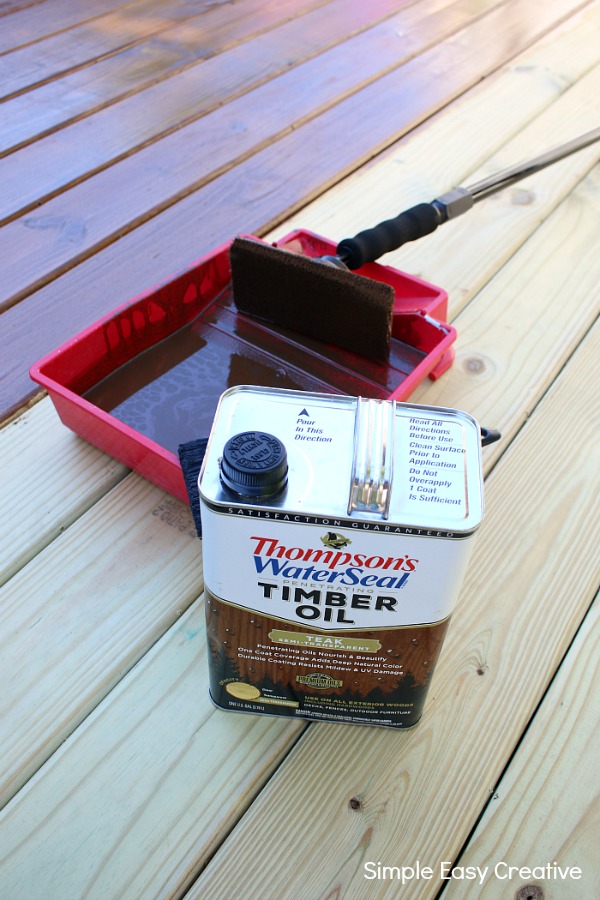
- Thompson’s WaterSeal Penetrating Timber Oil Semi-Transparent in Teak
- Thompson’s WaterSeal Deck Wash
- 2 x 8 AC2 pressure treated internal and rim joist
- 5/4 x 6 pressure treated thick deck boards
- 4-inch outdoor rated screws
- CAMO 2-3/8″ ProTech coated deck screws
Tools:
- CAMO Marksman Edge hidden deck fastening system
- Drill/driver
- Paint tray
- Paint pad applicator with pads and pole
- Brush
- Circular saw
- 48-inch level
- Tape measure
- Shovel
- Wheelbarrow
- Speed square
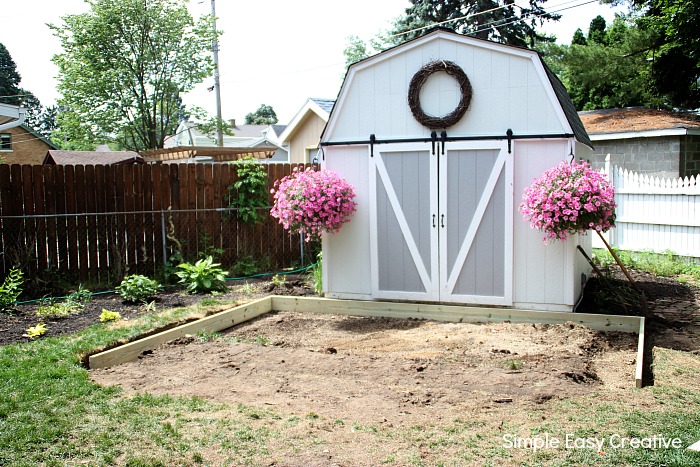
Start by building your outer frame, using AC2 pressure treated lumber. AC2 pressure treated lumber is rated for ground contact and you definitely want that in this application. Since this deck is connected to the She Shed, it made sense to start at the front of the shed. I started by leveling the AC2 pressure treated 2 x 8 joist nearest the shed, then attached the side AC2 pressure treated 2 x 8’s. I used three 4-inch screws at every joint.
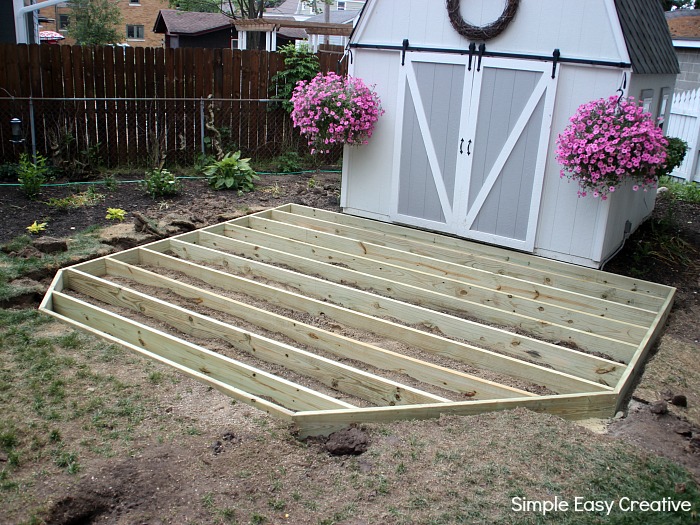
Then I proceeded to build out from there, attaching the AC2 pressure treated 2 x 8 joists on 16-inch centers with three 4-inch screws, and making sure everything stayed level across the entire framework of the deck.
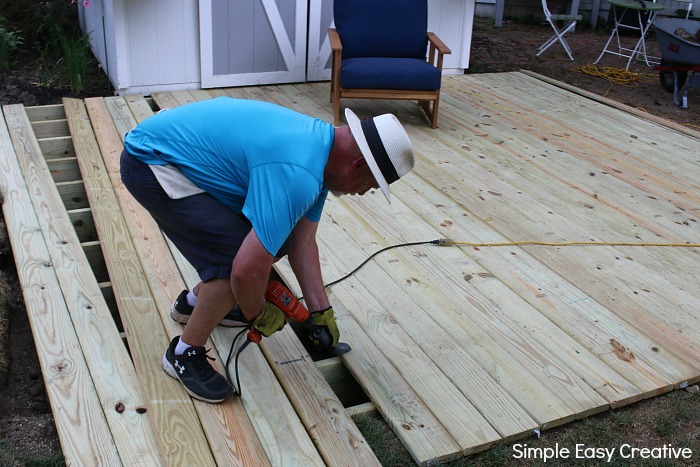
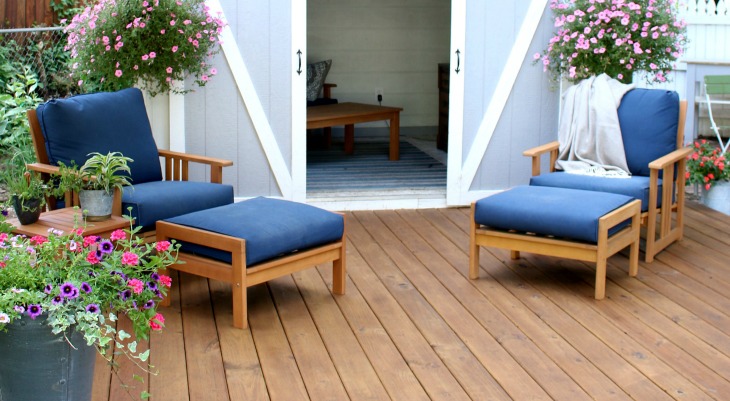
Now it’s time to attach the deck boards. I marked the center of the deck and worked out from the center line so that the deck would look symmetrical. I used 5/4 x 6 inch pressure treated deck boards, not only so it lasts, but also because using thicker deck boards limits the bouncy feel you sometimes get and you don’t have to worry too much about them warping later on.
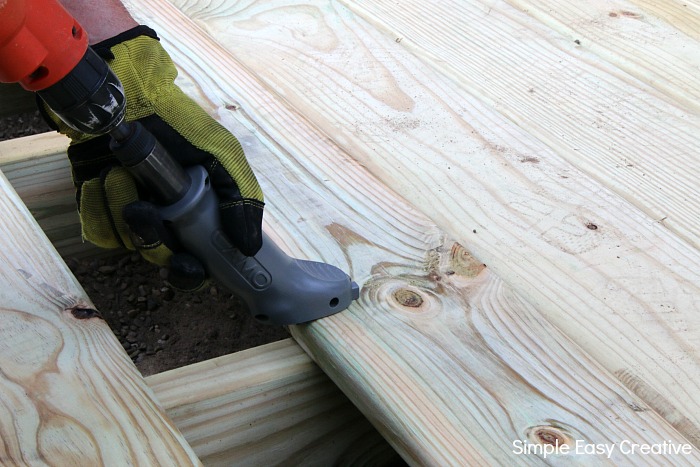
I’ve always found obvious screw holes in deck boards to be ugly, so when I found the Camo Marksman Edge hidden deck fastening system that is designed specifically to camouflage deck screws – I had to give it a try. It works really well.
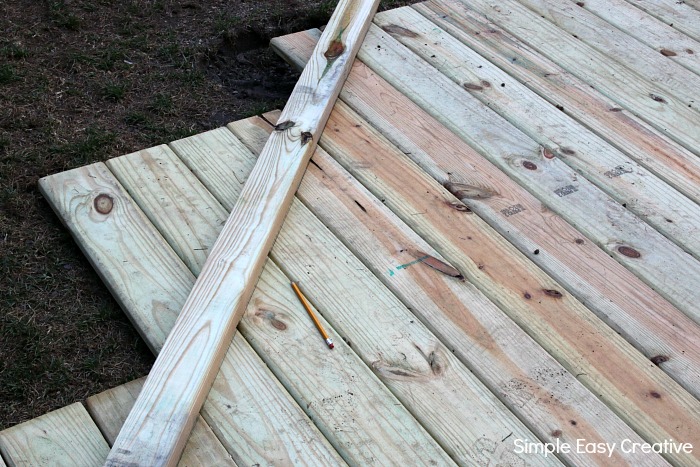
We love to be different, and some of my designs reflect that. To make our deck unique and to enable us to maximize the deck size in the area we are building it, I made it geometrical by cutting off the outer corners.
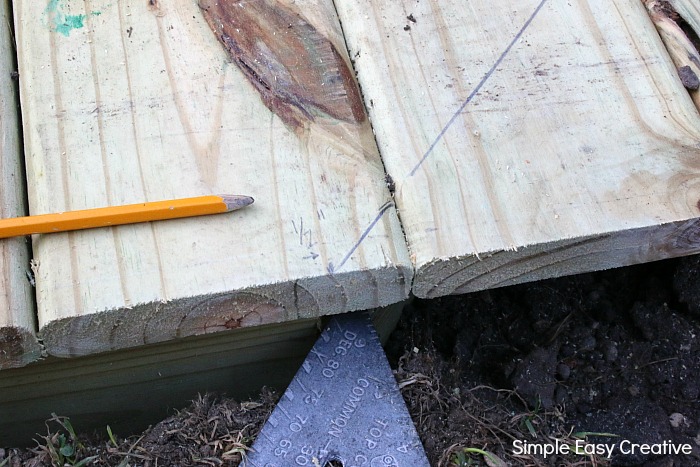
To do this, – find the outer edge of the 2 x 8 frame and make a mark on the board above it. Then make your cut mark so you have a inch overhang. (This is an arbitrary decision, you can make it smaller or greater depending on your taste).
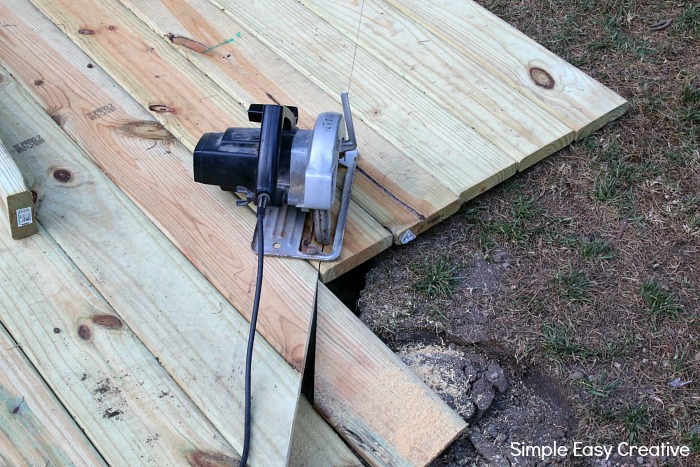
Then cut along the line.
After all the boards were cut, I washed it with Thompson’s WaterSeal Deck Wash and let it dry according to the container. Then it was time to stain the deck.
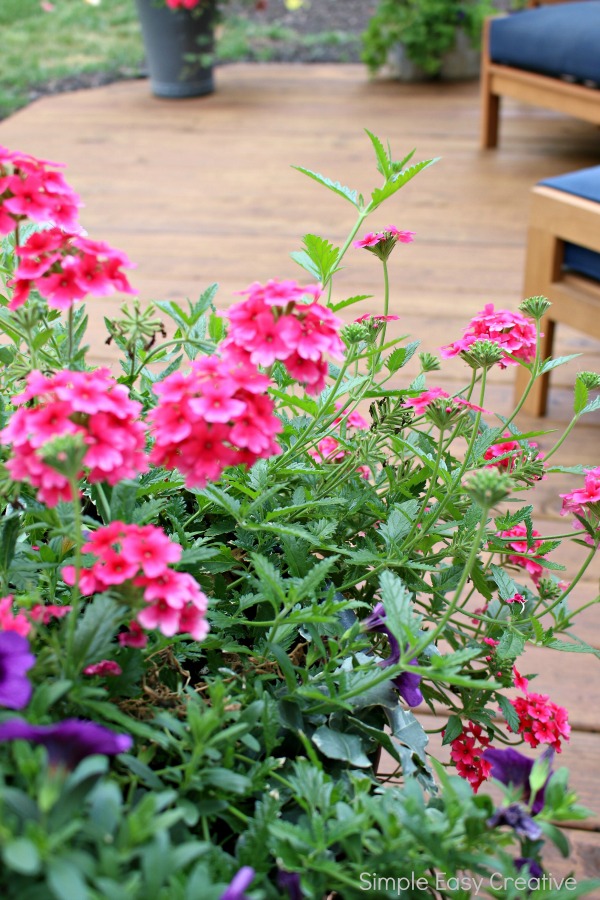
We chose the Thompson’s WaterSeal Penetrating Timber Oil Semi-Transparent in Teak as the stain for the deck. The semi-transparent stain has a rich color, but it also allows the wood grain to show through, which we like. It also highlights the colors of the She Shed, the window boxes, and the furniture.
Be sure to test a small area with the stain, since as it dries, the stain can appear lighter.
If you are using more than one gallon of stain you’ll want to combine all the individual containers into the 5 gallon bucket. Using a paint tray to hold the Penetrating Timber Oil was really easy. The stain pours smoothly out of the can, and doesn’t splash everywhere.
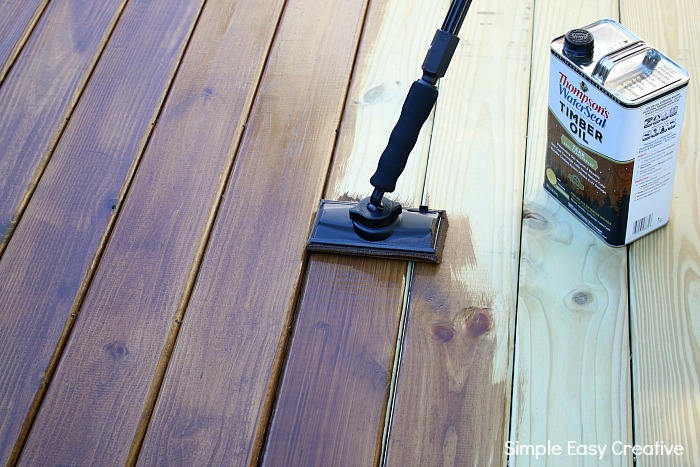
You can apply using several ways, either by brush, sprayer, paint pad, or roller. I’ve stained a couple decks before and have found that applying it with a staining pad enables me to get the look I desire easier than spraying. It may take a little more time, but the final result is worth it to me. After staining the deck, we let it dry for 24 hours before adding the furniture and planters.
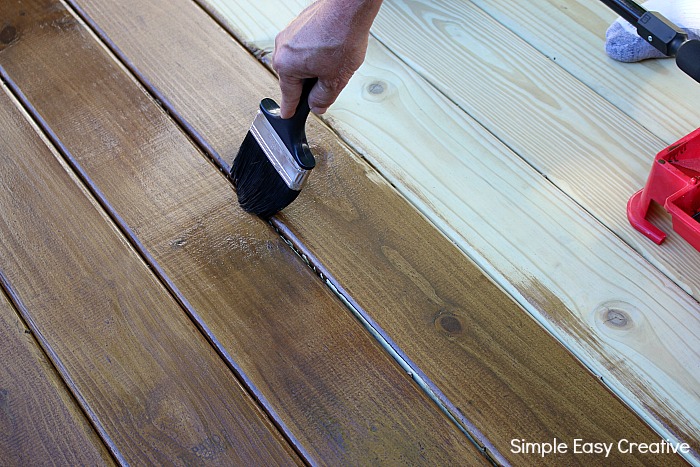
Always have a brush handy to get into the cracks, along the ends and edges, and for any final touches.
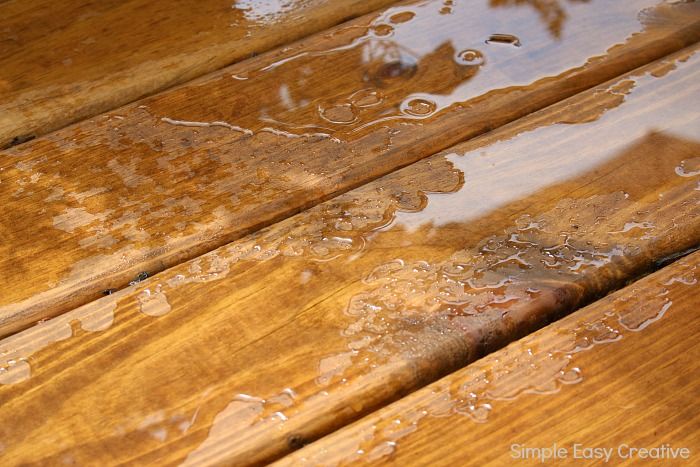
The Thompson’s WaterSeal Timber Oil will help protect the deck for many years from water and sun, and provides a mildew-resistant coating. A few years ago we cleaned and stained a deck for a friend, and her deck still looks gorgeous today.
It’s 2025 now, it has been almost 8 years since you posted this. How is it holding up? Do you have any current pictures? Have you had to replace any boards? Great job btw!
Hi Ryan, thank you for your comment and questions.
We have moved to a different city, so unfortunately I don’t know how the deck is holding up.
-Liz
Hi…like this because basic and no blocks etc…looks great! Wondering how long the boards are and what the final dimensions of the deck are? Also, did you put gravel under the frame or just on the dirt? Thanks, Kathy
Thanks for the questions Katherine. The final dimensions were 16 feet by 14 feet. We had an existing base of gravel from a previos above ground pool that was removed and place the wood framing directly onto the existing gravel and leveled.
How do you keep grass and weeds from coming up through the deck boards?
There are several ways to keep weeds from growing under the deck. I’ve found the best solution is to cover the ground with landscape fabric when you are constructing the deck. If you continue to have weeds escape and grow through the deck boards using a non-selective weed control will be necessary.
Hi, did you lay the joists directly on the ground below? Or are there concrete footers below for support? And would this design be affected by the ground freezing and thawing?
Thanks!
Hey KC, there was a gravel base that we laid the joists on so I was confident that using ground contact lumber would work. There are no concrete footers used but you can certainly add those into your design if you feel they are needed. We did not see any issues with frost heaving of the deck.
Hi! Thinking of doing the same thing in our back yard. Was wondering how this project has held up over the years. Great job by the way!
Since we used ground contact rated lumber it has held up really well.
Quite an improvement!
My wife wants a porch out front. About a 20′ extension to the concrete stoop in front of the entrance door. I only have about 9″ of height to work with. Conventional deck construction like box beam won’t work – I don’t have enough room. I was thinking of using those concrete deck blocks but then saw your deck.
Do you think your “floating” deck with the floor joists on the ground would work? I’m in the midwest and have season changes like you – I think.
Hi Michael,
As long as the lumber you use is rated for ground contact you should be fine.
Hi, I had read that you aren’t supposed to paint or stain pressure treated lumber until you had let it “season” for about a year. Did you have any problems with staining yours so soon?
The stain we used was an oil based product so we didn’t have any issues. If you use a water based product then it is recommended to let the lumber age at least 3 months. You should delay using a water based product until water no longer beads on the wood.