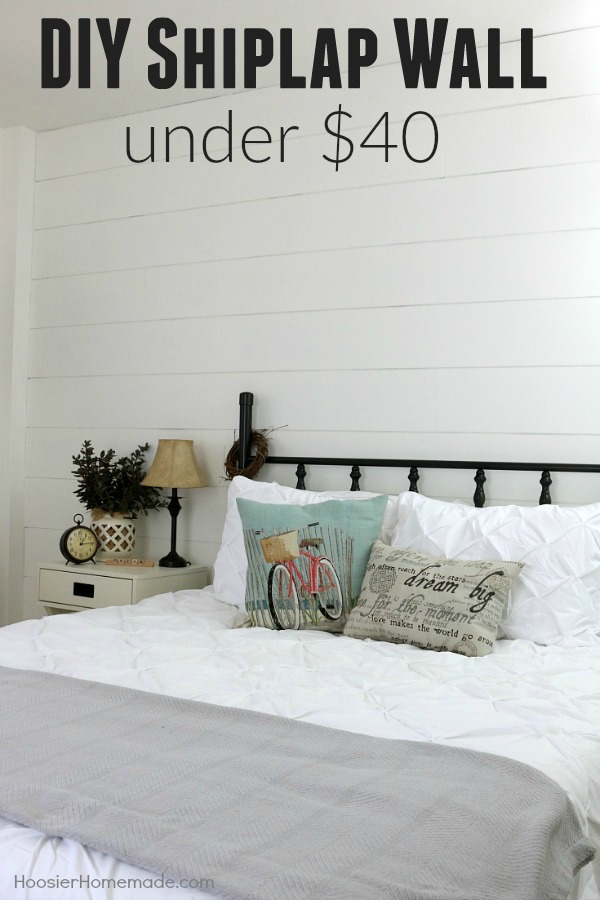
DIY Shiplap Wall for under $40
Are you in love with the show Fixer Upper? Do you love Shiplap Walls? Wish you could have one? Well, now you can! Follow these easy instructions and transform your own space for UNDER $40 with this DIY Shiplap Wall!
Get started NOW! Skip this post and grab your detailed plans for ONLY $2.88
Last week we shared our new Farmhouse Decor in the Bedroom, including the Shiplap Wall that we created for under $40. I was so excited to see that you all were just as excited about the new space as we are. We are planning to remodel the whole house, next up is our dining room, so stay tuned for that in July. And of course, we are also building the She Shed which will have Farmhouse Decor as well. I guess I just can’t get enough of this style of decorating.
Are you ready to create a special Shiplap Wall in your own space? Let’s get started —
We created a set of detailed plans for you! They include – photos with step-by-step instructions, supply list with prices and FAQ’s. Everything all in ONE place for you! Click on the photo below.
ONLY $2.88

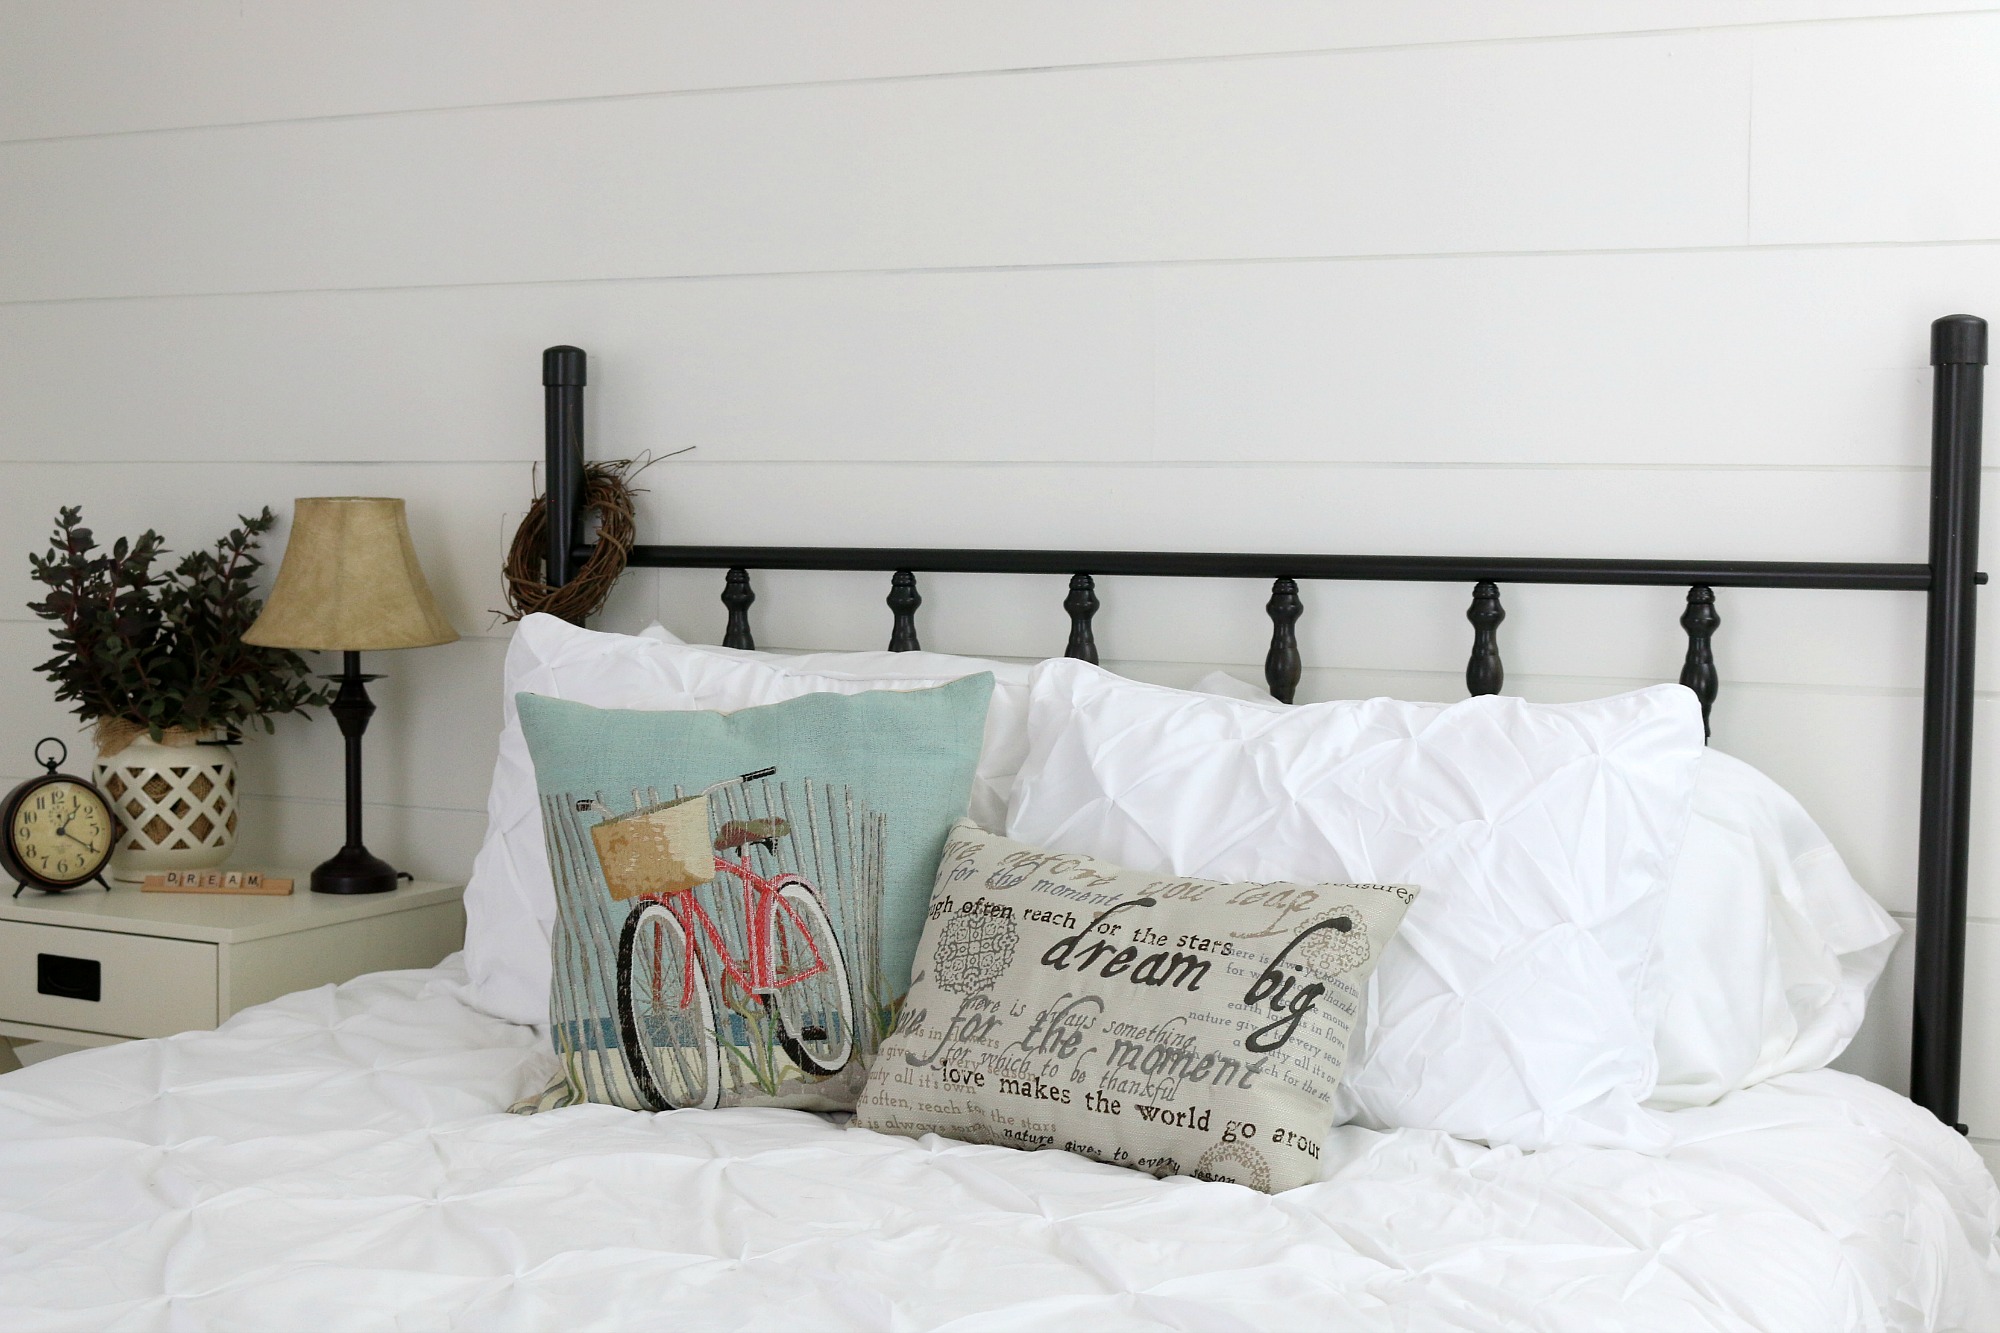
This is where we started. This bedroom was painted a bright blue with tan trim, and we were ready for a change. Even though we were painting the whole room white (including the shiplap), we did not paint the wall prior to hanging the wood. I’m glad we didn’t waste time and materials, because it turned out just fine.
The first step is to gather all your materials and tools.
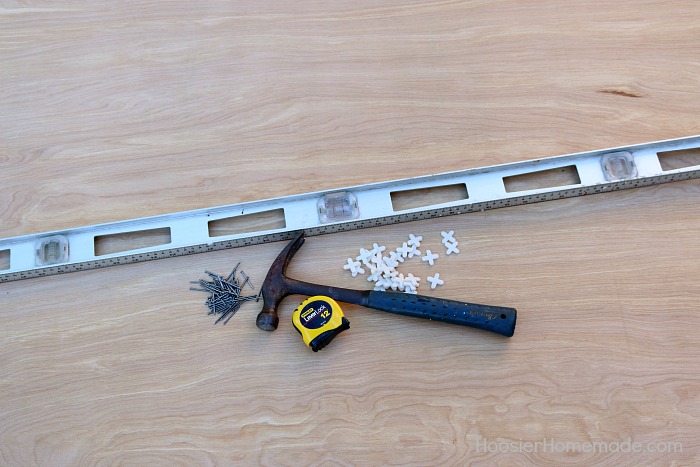
Shiplap Wall Supplies
- Wood – we used 1/4 inch Luan Plywood from The Home Depot (cost $11.97 each)
- Nails – 1+1/4 inch finishing or paneling nails
- Tile Spacers – 1/4 inch
Tools Needed
- Table Saw
- 4 foot Level
- Hammer
- Tape Measure
- Pencil
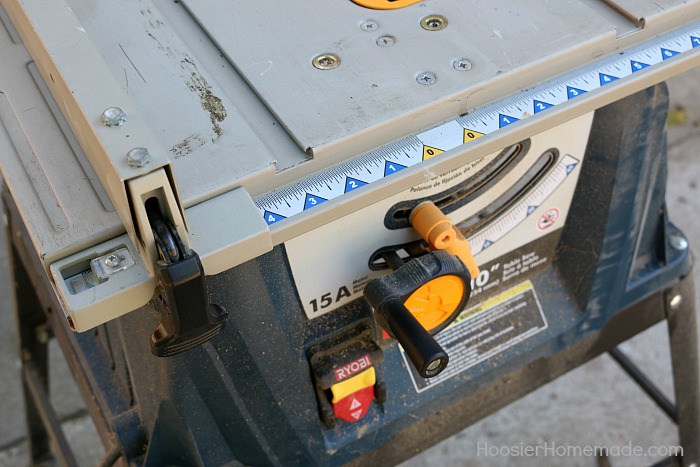
Step 1: Getting the Table Saw ready
Set the table saw to cut 8-inch width strips
Note – you can also have the wood cut at your local lumber store. The prices vary from store to store, but most are under $1 per cut.
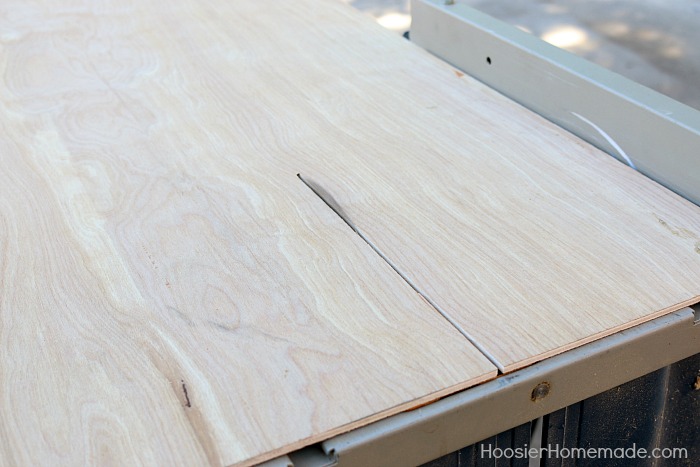
Step 2: Cutting the wood
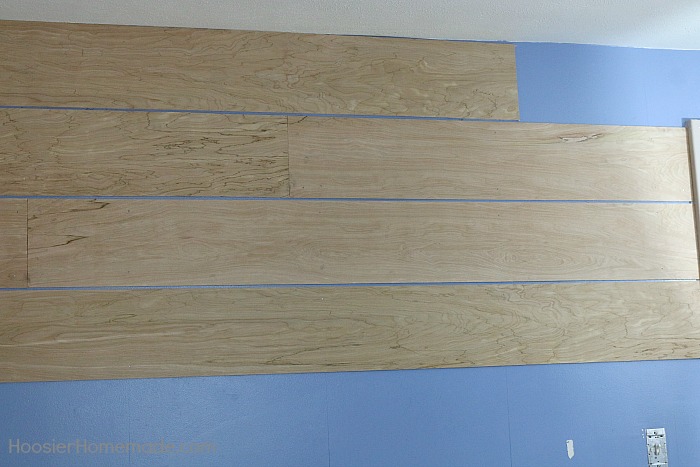
To keep the cost down, we used Luan Plywood. We cut the plywood into 8 inch wide pieces. You can also use 6 or 10 inches if you like the look better. We found that the 8-inch width made the room appear a lot bigger.
The only thing we had trouble with while cutting was that the Luan Plywood was a little flimsy because it was thin. We learned we needed to have 2 people – one to do the cutting and one to stabilize the wood. I think next time, even though Doug has a saw, it might be worth the extra $1.50 (or so) per piece of wood to have it cut at the store.
To stagger the seams, we cut the plywood into different lengths – 8 feet, 6 feet, 4 feet and 2 feet.
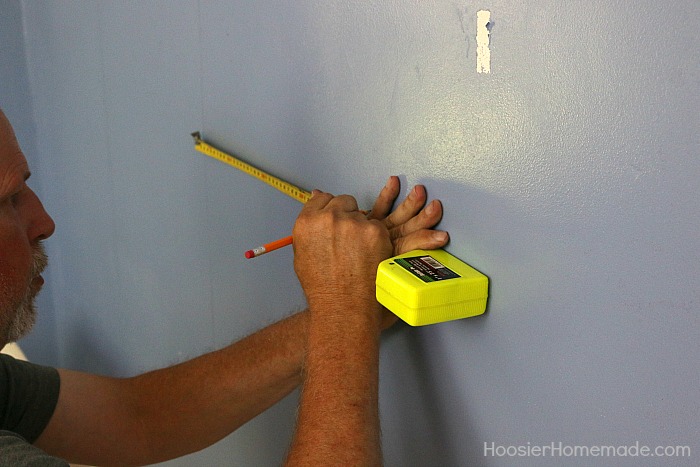
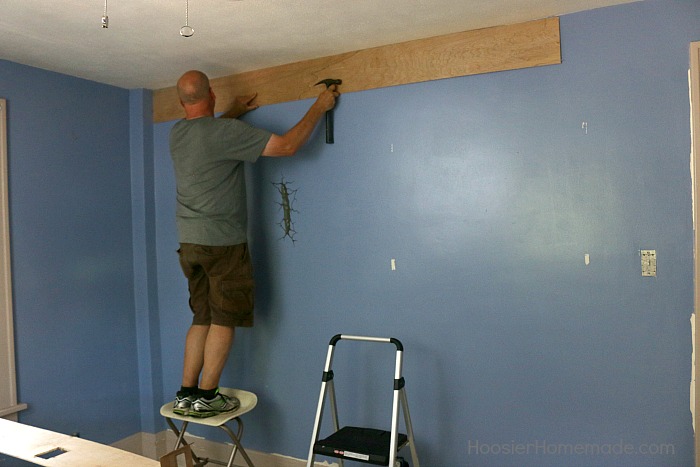
Step 3: Finding the Studs
The next step is to find and mark the studs. Our home is very old (1926). When we hammer into the wall, we often can hear the plaster falling down, so it was really important to find the studs. And because it’s so old, the new tools that are on the market to find studs in a wall have not worked for us. So Doug measured and marked all of the studs- our studs are approximately 18 inches apart.
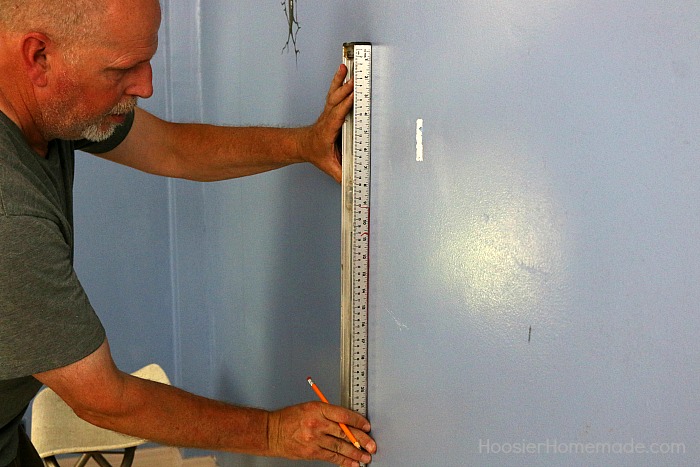
Step 4: Marking the Studs
After the studs are found, use your level to mark vertical lines on the wall where the studs are.
Step 5: Nailing the boards
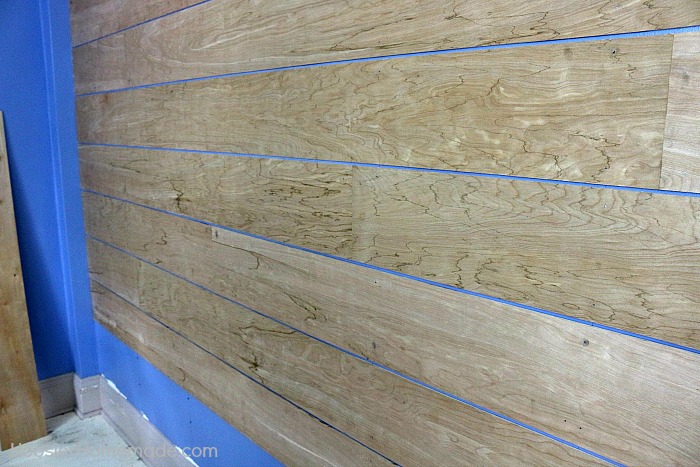
Now it’s time to add the boards. We started at the top, so there was a full piece of a board showing and staggered the seams. The bottom won’t show much because of the bed covering it.
Note – you can also glue the wood to the wall, we chose not to and have not had any issues. There were a couple spots that we needed to add an extra nail.
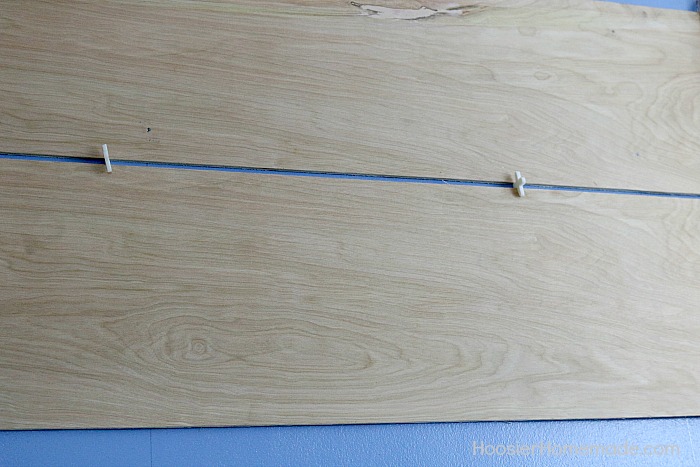
We used tile spacers to make the spacing in between the boards all the same.
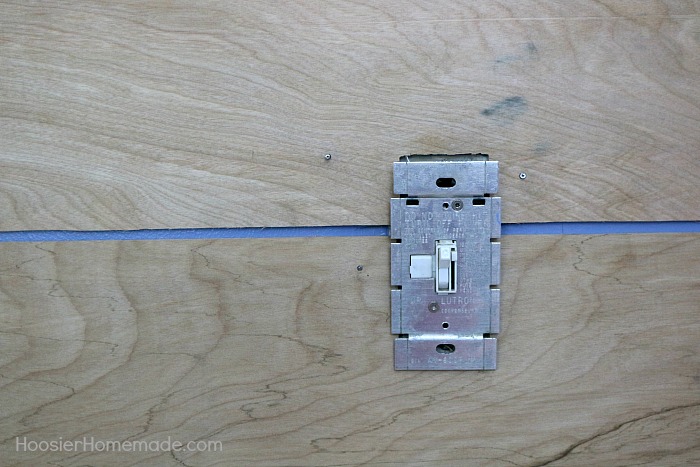
Step 6: Making cutouts for light switches
More than likely, you will have some type of cut out that will need to be done, like a light switch and electrical outlet. Depending on your wall, the outlet made need to be moved out a bit so that the outlet can set on top of the wood.
Step 7: Finishing the wall
To finish the wall at the bottom, you will need to measure the space and cut the width and length of the boards accordingly.
We created a set of detailed plans for you! They include – photos with step-by-step instructions, supply list with prices and FAQ’s. Everything all in ONE place for you! Click on the photo below.
ONLY $2.88
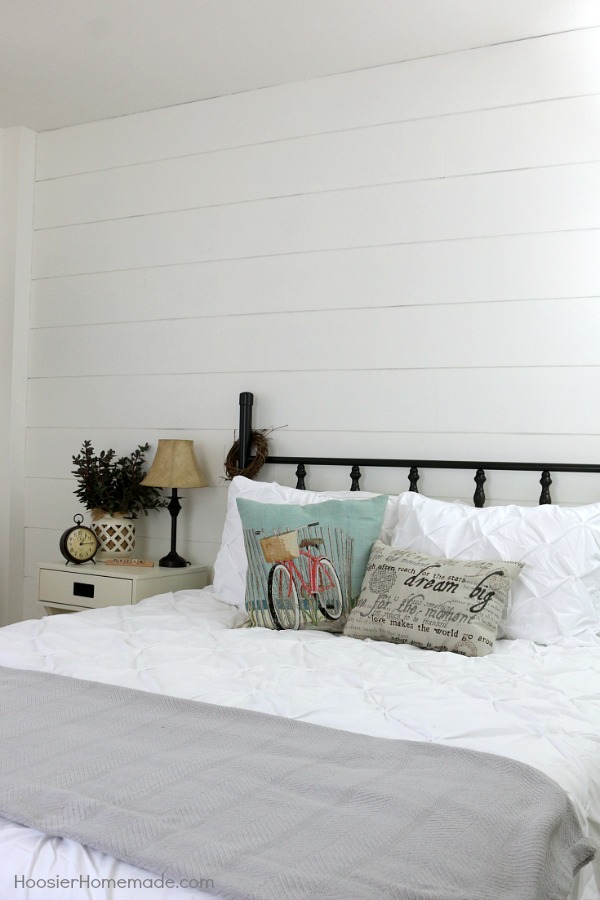
After the wall is complete, it’s time for paint. We used a primer on it first, then painted with an off white color. I’m absolutely thrilled with the way it turned out, and can’t wait to work on the other rooms in the house!
Shiplap Wall Final Cost
Luan Plywood – 3 sheets @11.97 = $35.91 (12 x 8 foot wall)
Nails – .50 cents – we used less than 1/4 of the box of nails which was $2.68
Spacers – only used a few that we already had – you can also make your own spacers with pieces of wood, coins or other items
Paint – $3.00 – 1 gallon of paint divided between the 4 walls
Note – these are the prices that we found here in the Midwest, prices will vary across the country

I’m not certain how old this posting is, but I’m just seeing it today. What a beautiful job. Is the plywood you used thin enough that It would be useable on a wall where the ends/edges would be visible? I have a small wall opposite a game room. Therefore, it has open ends. Would this work as long as the ends were painted? Thanks for your help.
Hi Cheryl,
Yes I would think that this would work very well on your wall and I’m sure just painting the ends would help blend it all together.
Thank you for the tutorial. It really was a good reference for us when adding slip lap to our dining room. I’m Harding a hard choosing a paint color. What did you use?
The color we chose for the wall is from BEHR brand paint. It’s called Winds Breath, the color number is GR-W06. It’s my favorite shade of white. We even used it on our She-Shed this year.
What color/paint did you use to paint the wall?
Sorry, I don’t remember the exact name of the paint. We used off-white color.
-Liz
Did you to just the one wall? Or did you do the entire room (all 4 walls)?
Hi Tiffany, we did just one wall.
~Liz
Absolutely love, love, love this! Well done. So calming and yet such a simple solution. Thanks for the excellent tutorial. I’ve got to stop looking and get working! Beautiful!
Did you just roll the paint on with a thick roller? Did you need to use a small brush to get between?
Hi Kristie, Yes you will need a brush to get in between the boards and I used a 3/8 inch nap paint roller cover.
Hi Guys-
I want to do a wall in my kitchen like this, but am worried about what to do when I get down to the baseboards/trim. Is the luan thin enough that I can run it right down to the top of the baseboards, without an overhang? I’m worried that if I go under the baseboards, then my other walls that meet up with it, that those baseboards won’t meet in the corners properly. I hope that makes sense?
Hi, Rhiannon,
This is one of the reasons we chose to use the luan. So yes it is thin enough to match up with your baseboard.
What about walls that are part of a larger room with no definite end- just run a board vertical to separate rooms?
Yes Von, that would be a perfect solution. I would recommend using a board that looks similar to the woodwork and baseboards. Most common choice would be a 1×6 placed vertically.
you talk about finding and marking the studs, but what do you do with that? Why do you need to mark them?
What did you use to cut out the light switch?
I’m guessing you didn’t use chalking along the ceiling and the corners?
I’ve always heard that you should fill the nail holes, you didn’t do that? can you see the nails?
Hi Beth,
You want to mark the studs so when you are nailing into the wall you can easily find them and it’s more secure. I used a utility knife to cut out the light switch. No I did not caulk around the ceiling or corners, there was no need to since I cut them to fit snugly. And yes you can fill the nail heads, I didn’t because after painting They are not noticable.
You all did a great job. It looks like it was supposed to be there.
This is absolutely beautiful! I live in a rental, so I can’t use nails or glue 🙁 We also have plaster walls- do you think some industrial strength velcro would work at all? Not sure how we’d attach it to the wall (maybe some Command 3M strips…?), but we plan on being there a long time, and I can’t get over how this looks!
Awesome tutorial- you could not have explained it better had you been doing the project with me in my own home 🙂
Hi Alexis,
This is a great question. Your idea of using industrial velcro might work, depending on how large the wall is that you would do this on. But I do have a few concerns. First is cost but I haven’t looked into how much that might cost for enough velcro. You would need to run strips along the entire length of the boards to ensure they stay. Also when it comes time to remove them it might damage the wall more than a few nail holes.
I would try talking with your landlord first and seeing if they would make an exception this one time.
Do you think this can be done in a bathroom?
As long as there wont be any direct contact with water, I think so!
I did shiplap look with Hardiplank siding in my bathroom. It’s already a weather proof treatment
This looks awesome! I even believe I could do this. I have one question. Can this be done without the spacers? Why the spacers? Thanks-a-million!
Hi Saundra- you can totally do it! You need some sort of spacers to keep the spacing between the boards even. If you don’t have spaces between them, then it doesn’t have the shiplap look. You can use things like quarters or paint sticks as well- anything that is a consistent thickness! Good luck!
It turned out great. Thanks for the details.
You promised a tute on the shiplap wall and YOU DELIVERED! Many hanks…I can’t wait o get started.
That makes such a big difference in the look of the room. I showed this to my husband and I think we are going to do this for our tv wall. I am a blog follower so I saw it here first but your wall is also featured on Hometalk.