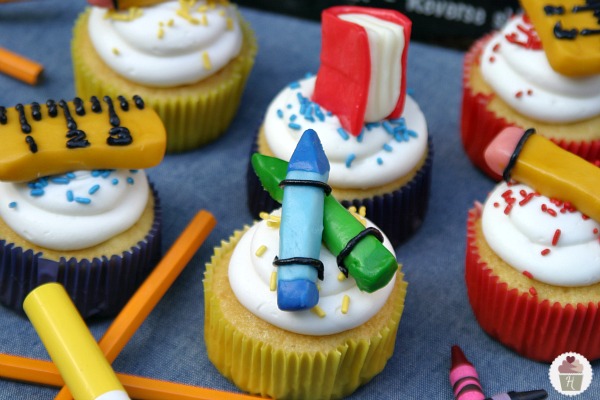
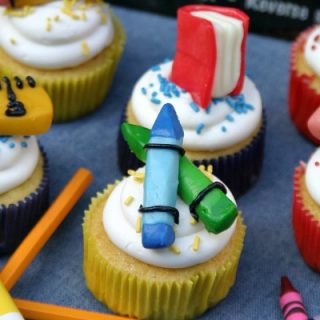
Back to School Cupcakes with School Supplies

Welcome to Cupcake Tuesday! I’m so excited you are here! Be sure to check out the ALL NEW Cupcake Heaven page! And if you are in need to a special cupcake design, use the “Be a Hero” area!
Well my youngest is off to High School, today is the first day of school here and although we are out of the crayon stage, Casey will still enjoy these Back to School Cupcakes with School Supplies!

Made with my favorite, Candy Clay, the school supplies are quite easy to make, and actually something the kids could help with as well. It’s kind of like playing with Play Doh, but they can eat these.

You can get the recipe for Candy Clay at the bottom of this post, or head on over and get the instructions from when I shared before. After the cupcakes are baked and cooled, frost them how ever you like and add some sprinkles.
Back to School Cupcakes Supplies:
- Cupcakes baked and cooled, frosted and sprinkles
- 1 batch of Candy Clay {recipe and directions at bottom}
- Airhead candy {red}
- Decorator bag and #3 tip
- Frosting
- Black, Buttercup Yellow, Pink, Blue and Green coloring {or other colors for the crayons}
Now it’s time to start working on the School Supplies…

Back to School Cupcakes: School Supplies – Book
- Using a small piece of white candy clay, mold it into a square
- Flatten out a red Airhead candy and shape it around the candy clay. Cut off excess Airhead
- Using the back of a knife, make some lines in the book for the pages

Back to School Cupcakes: School Supplies – Ruler
- Color a piece of candy clay with Wilton Buttercup Yellow coloring, mix it very well. Tip: if you don’t want your hands dirty, you can wear plastic gloves. Knead the clay a lot, until all the coloring is blended in.
- Using a small piece of candy clay, form a rectangle
- Color a small amount of frosting with Black coloring, fit a decorator bag with a #3 tip and fill with black frosting
- Pipe on the numbers and lines with black frosting

Back to School Cupcakes: School Supplies – Pencil
- Use a piece of the yellow candy clay and make a cylinder shape
- Color a piece of which candy clay with Pink coloring, kneading it until completely blended
- Use a small piece of pink for the eraser and a small piece of white for the tip
- Using the black frosting, pipe on the lines next to the eraser and a little black for the lead of the pencil

Back to School Cupcakes: School Supplies – Crayons
- Color the candy clay using the same method as above, color a piece whatever you like for crayons, then tear off a small piece and color it with the same color but darker
- Mold the crayon into a cylinder shape
- Then using the darker color, add the tip and end of crayon
- Using the black frosting, pipe on the lines on the crayon

Candy Clay
Candy clay can be used in place of fondant, and taste a whole lot better. Recipe from HoosierHomemade.com. Originally shared in Cupcakes, Cookie & Pies, oh MY! Cookbook
Ingredients
- 1 bag white candy melts
- 1/3 cup corn syrup
Instructions
- Melt candy wafers in the microwave, stopping every 20 seconds and stirring. It should take about 1 minute total. I stop when there are a few small pieces left and stir until completely melted, that way I don’t over cook it.
- Add 1/3 cup corn syrup and stir until well combined. It will look a little grainy.
- Place clay on a piece of plastic wrap, cover and let set for at least 3 hours at room temperature.
- Add color if you are using white candy melts, add a little with a toothpick, it doesn’t take much {I learned that really quickly}
- Need clay with your hands. You can wear plastic gloves if you want, the coloring did wash off my hands, but you may want to.
- After the clay is completely colored, wrap in plastic wrap and let set about 15-20 minutes. I found it was a lot easier to work with after it had firmed back up.
Notes
It's best if the clay is made the night before you need to use it. Be sure to allow, 3 hours for it to set and an additional 15-20 minutes after you color it for it to firm back up.

Original school supply inspiration from Woman’s Day
Original candy clay recipe from Cupcakes, Cookies & Pies! oh my!
Linking to…Positively Splendid
These are super cute – way beyond my level of baking but cute!!
@CupcakeLady: Thank you so much for your reply. I put it in the refrigerator and it did firm up but it’s really sticky. I am not complaining just trying to learn how to do this. I love the idea of using candy. I used color candy that I already had available just to try it out. I am making cupcakes for a baby shower next week and I rather use the candy instead of fondant because I know it will taste so much better.
Really nice school cupcakes collection! Really homemade! So cute ! If you agree I would showcase them on my cupcake recipes and ideas blog. . Regards
Hi: I tired making the candy clay and I am not sure what I did wrong but it’s really soft and I am not able to shape it into anything. Do I need to add more candy to make it more firm so that it can be shaped into different objects?
Just let it set for a few hours, it should firm up. Did you color it? If so, you need to let it set for a bit after coloring to firm up. Also, if you hands are really hot the clay will get too soft.
These are so creative and cute. Bet everyone loved them!
Your back to school cupcakes are absolutely adorable!
Hugs,
Susan and Bentley