Pinwheel Garland ~ How to Tutorial
This Pinwheel Garland was such fun to create! I can’t take credit for the idea though, Leanne, the Craft Queen from Organize and Decorate Everything came up with this cute idea! I first spied her Patriotic Garland when she linked up to my Fourth of July Party over at It’s A Blog Party. She has such great ideas, you NEED to check out her blog.
When I spotted the Pinwheel Garland, I already had all my Fourth of July decorating done. The wheels started turning, and I thought it would be fun to still do the Garland, but use bright colors for Summertime.
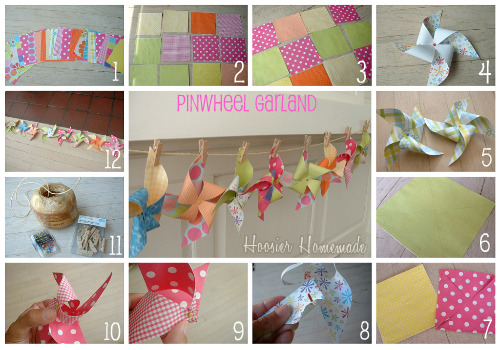
Here is how I created this fun little Pinwheel Garland…
- Cut squares of scrapbook paper, 4 1/2 inches x 4 1/2 inches
- Because my paper was not double sided, I glued 2 coordinating papers together, and laid them out to dry
- Then I trimmed the edges so there was no white showing
- This is how the Pinwheel looked with just white for the opposite side
- I did have 1 piece of paper that was printed on both sides, which made it a little quicker and easier to create the Pinwheel, but most of the paper I found at Hobby Lobby was not printed on both sides
- Then I connected each corner, drawing a line with a pencil
- Using a small pair of sharp scissors and a cutting board, I poked holes in each corner and the middle, you could also use a very small hole punch, like Leanne did, but I didn’t have one. Then cut along the lines, being sure to leave about 1/4 to 1/2 inch from the center point, not cut.
- Put a brad into one corner
- Feed all corners onto the brad
- And then thru the middle hole
- To assemble the Garland, I used twine and small clothespins that I found in the Office Supply department at Walmart, they were $1.88 for a box of 12. This picture also shows the brads that I found at Hobby Lobby, they were $3 for 100 and I used a 40% off coupon.
- Then I laid them out of the floor to make sure I liked the color combinations
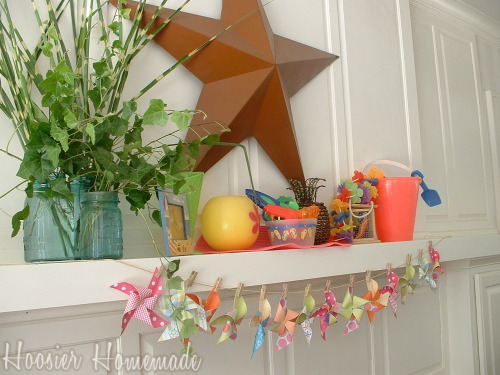
The ideas for these Pinwheels is endless. I used my Pinwheel Garland on my Summer Mantle.
I had such a fun time creating this Garland. And for less then $5, I think it makes a BIG statement.
I’m linking to Weekend Wrap-up Party, Saturday Night Special, Tutorials & Tips Tuesday, Mingle Monday


I love how yours turned out! I don’t have a lot of time for crafty projects these days – but this looks super easy and achievable. Thanks for sharing! 🙂
Thanks for stopping by Heidi! I totally agree, quick & easy is the best!
~Liz