Laundry Room Makeover
Do you feel like you are always doing laundry? I know I do! And my laundry room was not so inspiring. Finally, I was tired of it- if I was going to be doing laundry so much, I at least wanted to do it in a pretty space! This Laundry Room Makeover will inspire you to change your space.
Our basement and laundry room area has been on our to-do list since we moved into our home 9 years ago. It’s not a space that is comfortable by any means, so it has ended up becoming a drop and go area. You know – the space that you drop something and run really quickly so you don’t see the mess? Although our main living area is clean, neat and organized, the basement and attic aren’t. I blame that on being busy, but honestly, we probably just have too much stuff.
Can you relate?
Well, this Laundry Room Makeover will definitely inspire you. As always, we kept it simple, so you can create a laundry room like this in your own home!
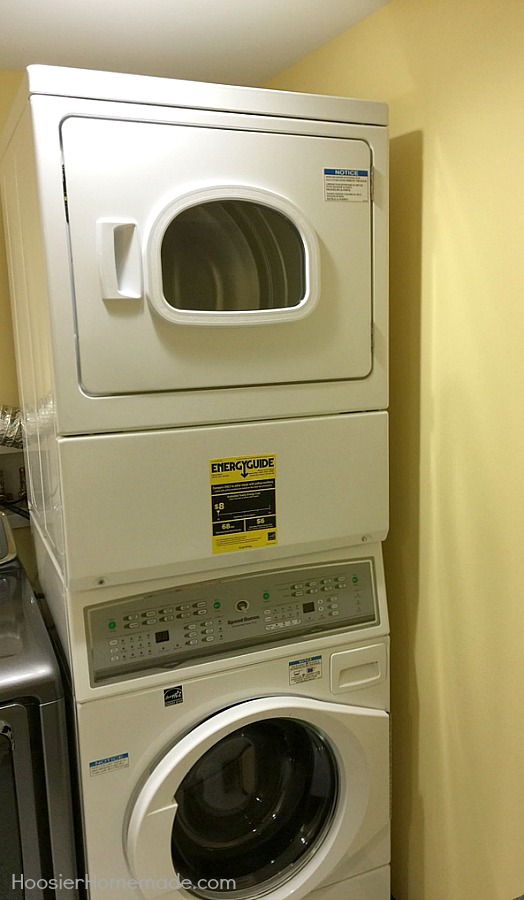
Originally we thought we would like the laundry area on the back entryway. We had plans to get a stacked washer and dryer and keep everything up there. Actually, I thought that would be better, because I just could not imagine how the laundry room in basement could possibly look good. Well – I was totally wrong.
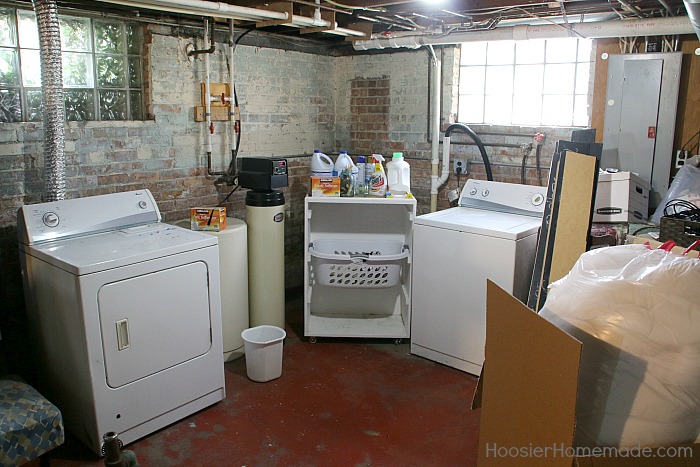
I know it comes as a shock, and believe me, every time I went to the basement, I hated it. But this is the before. The walls, floor and ceiling were in bad shape. The water softener was in a bad location, and yes – there was stuff everywhere. Really, the only good thing about this space was our mobile laundry station – and windows.
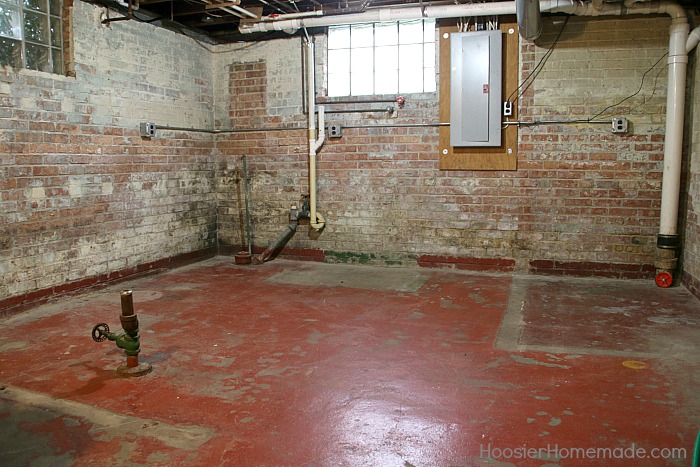
So the first thing that Doug did was clear everything out and clean. The ceiling, walls and floor all had to be cleaned before the painting.
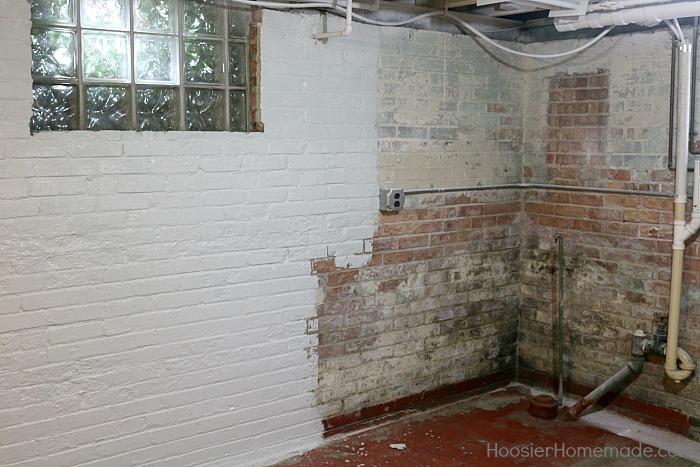
This photo is pretty unbelievable. I have heard time and time again – a coat of paint will change a space. Well seeing is believing here. Doug used Behr Basement and Masonry Waterproofer Paint on the walls, and Behr 1-part Epoxy Concrete and Garage Floor Paint on the floor. The ceiling was painted with regular white ceiling paint.
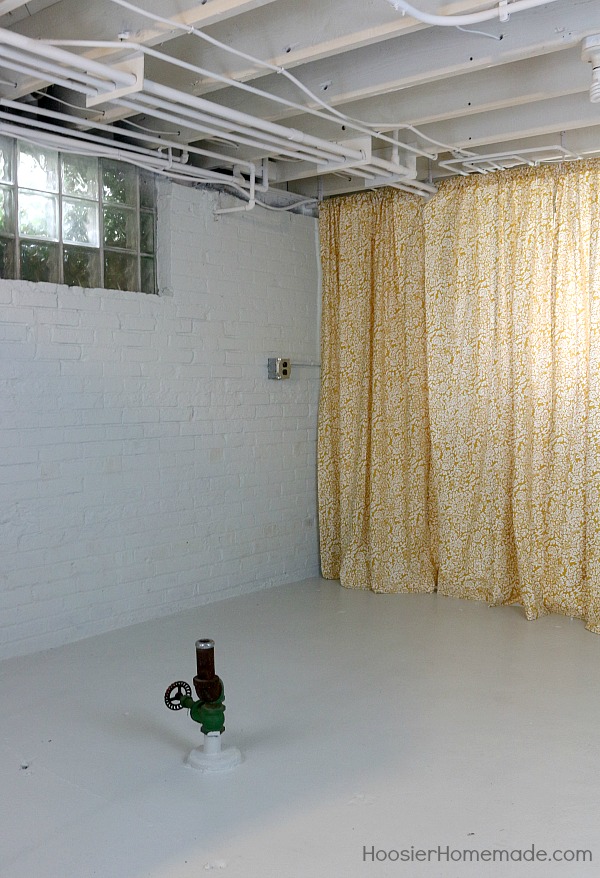
After the walls, ceiling and floor were all painted, then it was time to hang the curtains. And the pipe (that apparently had no reason to be there) needed to be removed.
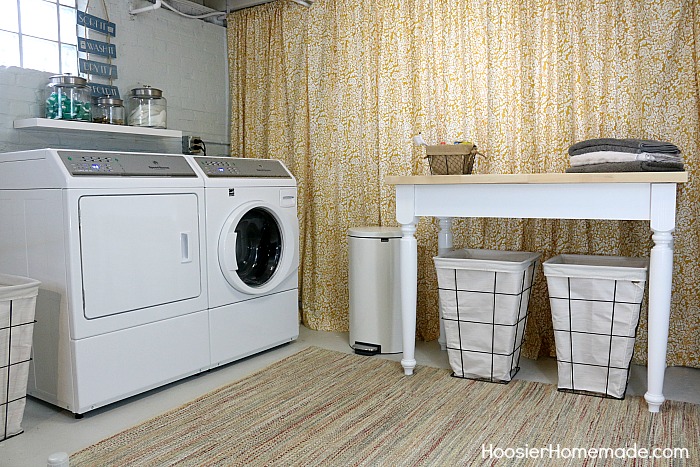
The curtains ended up being one of the best decisions we made. First they hide all the pipes and electrical box, but they also just add a sense of comfort and home to the space. There is only so much cosmetic work you can do in a basement with all the brick and concrete. I think the curtains soften the space nicely.
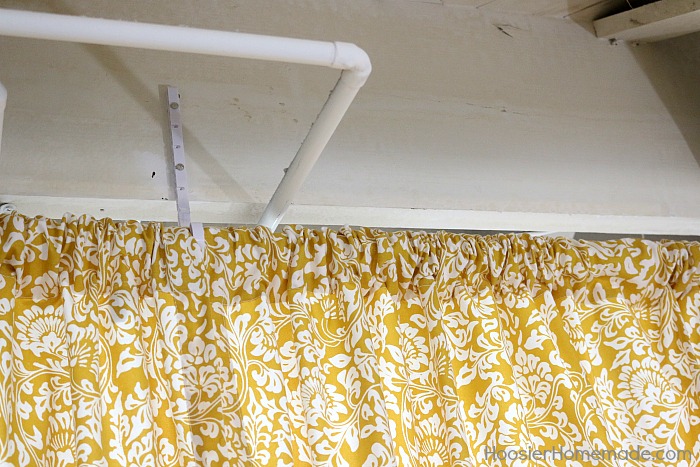
Often times curtains and curtain rods can be the most expensive thing you will purchase for your room. I knew that the price of the curtains was going to be a big chunk of the budget, so we decided to cut back on the curtain rod. Doug used 3/4 inch PVC Pipe for the curtain rod and 1 inch CTS Pipe Hangers to hang the rod. We bought the curtains at Target.

After the laundry room was ready, then it was time to bring in the new Speed Queen washer and dryer. A couple months ago, I asked a neighbor of mine if she was familiar with Speed Queen, she has one of their washers and told me she is hoping her dryer goes out pretty soon so she can get a Speed Queen dryer. She said that they are the best machines she has ever had and she will never buy anything else.
I would have to agree. Even after using it a short time now, I was shocked at how clean our clothes looked. Not only were the white clothes brighter, but all of the other clothes looked brighter and cleaner.
Washing Machine and Dryer
The Front Load Washer is built with the combination of durability and technology never before seen in a front load washer. They are built to last longer and deliver exceptional wash results. Each front load washer is perfectly balanced to minimize vibration and operate so quietly, you’ll forget it’s even running.
Speed Queen front load washers are designed, tested and built to deliver 25 years of commercial-grade performance in your home. In fact, the Speed Queen front load washers that you put in your home are the same durable, long-lasting washing machines used in laundromats and other commercial applications, like hotels and military bases. Constructed with metal components where others use plastic and rigorously tested to ensure reliable performance, Speed Queen front load washers are built better to last longer.
As the perfect companion, the Speed Queen Dryer has the same outstanding performance as the washer. It’s built with the same durability and technology to last a lifetime. The dryer has a Moisture Sensor and Moisture Level Selection that allows you to present the dryness level of each load. There is a time remaining display that eliminates guesswork by clearly showing when your laundry will be finished. It is built with a Commercial-Grade Steel Cabinet that provides three layers of protection for maximum durability.

A couple more cool features that I love – the front load washer is Energy Star Certified to ensure high-efficiency operation, and there is also a control lock that allows you to lock the control system, preventing children from starting the machine.
And the dryer has an interior light for clear visibility and there is an up-front lint filter that allows for fast and easy cleaning.
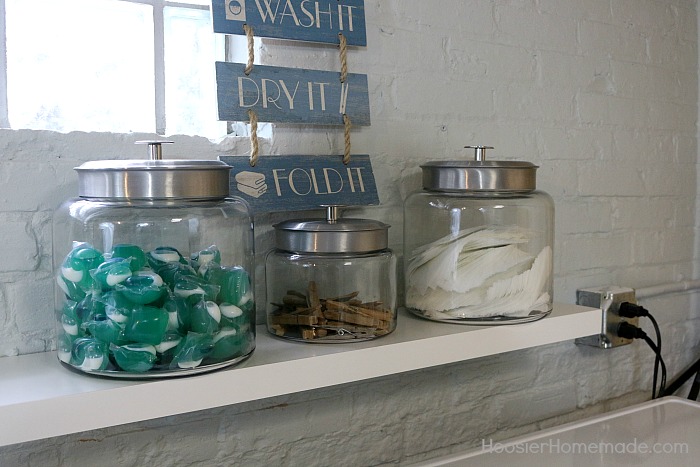
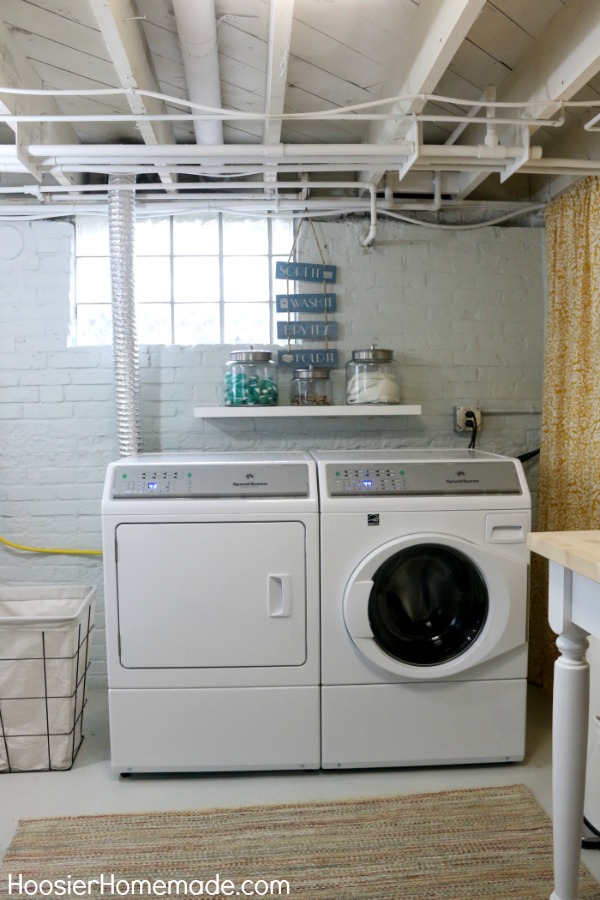
Above the machines, Doug added a 36 inch hidden mount floating shelf then we filled jars with soap, dryer sheets and clothes pins.
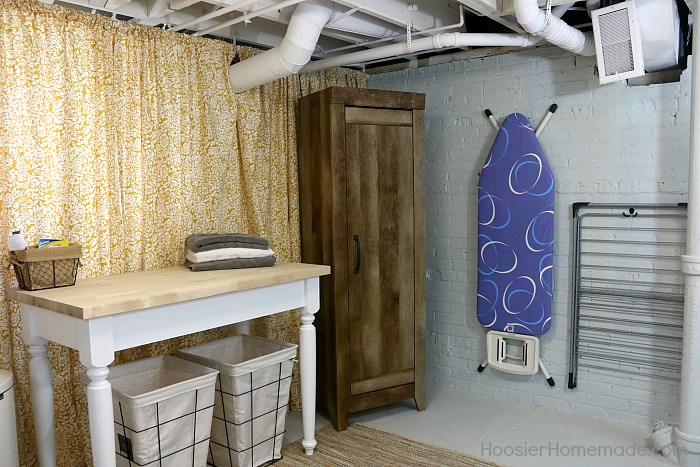
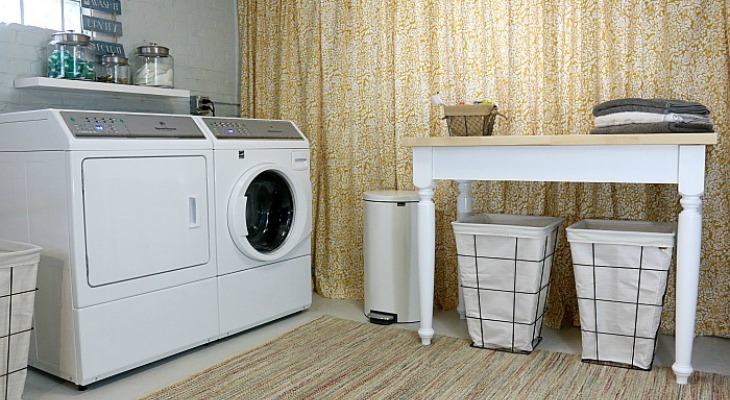
Then it was time to start adding some pieces that would be both functional and make the space look nice. To stay with the Farmhouse style that we have been using throughout our home, Doug built a folding table using a butcher block counter top. Watch for directions and plans on how to build your own!
Like with most big projects, we had a hard time deciding on the shelving unit. We were planning on getting an open shelf unit and using baskets, but when I spotted the narrow storage cabinet, I just had to have it. It’s perfect in the space, and with the door on it, all of the extra laundry supplies are hidden.
The ironing board and drying rack were hung on the wall for more organization and to free up floor space.
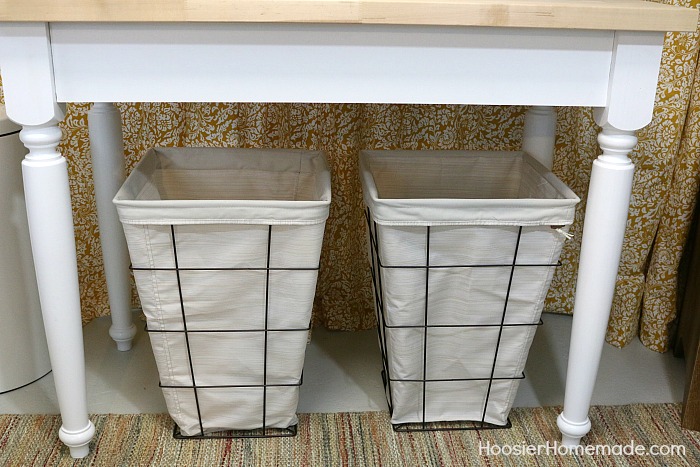
Of course, a laundry room would not be complete without baskets. Even though we used our mobile laundry station everyday (and loved it) I wanted to stay with the Farmhouse theme. I found these wire laundry baskets at Target.
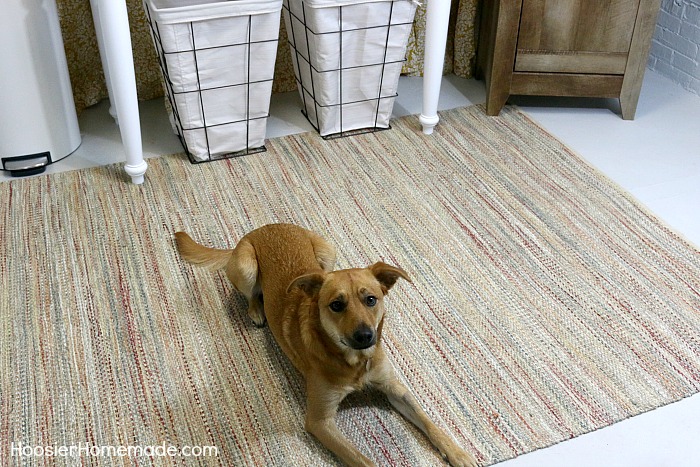
Even Miss Tiki loves the new space. The woven rug is also from Target.
Related: Small Laundry Room Ideas
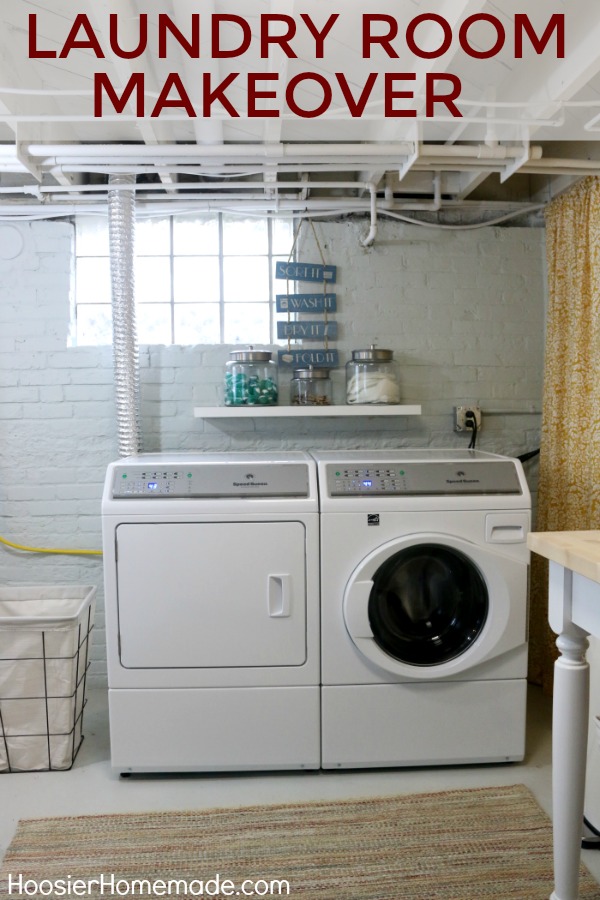
Overall the space is so much better! The walls and floors feel clean and bright while the curtains add some softness. We have a place to fold clothes and store extra supplies. There is nothing better than a laundry room that functions great and looks good too!

Hi where did you get the sort it wash it dry it fold it sign?
Hi Kristen, I’m pretty sure I bought the laundry sign at Hobby Lobby.
However, it was several years ago.
-Liz
Hi I noticed you relocated your washing machine to the other wall, did you add plumbing and electrical to do so? Or did you buy a washer extension cord? Our machines are separated in our rental-basement and I really dislike it. Also what happened to the pipe that was sticking out of the floor I dont see it in the after photos and i feel like it should be peeking out somewhere based on angles, maybe im off.
Hi Samantha, the pipe that was sticking out of the floor was a non-functioning vent pipe, we cut it off at floor level and capped it off. Which explains why you don’t see it in the photos. to relocate the washer to the other wall I did not need to relocate the electrical, there was an existing outlet on the wall that we were able to use. To extend the plumbing we used longer supply hoses and discharge hoses. While this wasn’t ideally what I wanted to do it did work.
This is perfect! I’ve been trying to come up with a solution for our “laundry room” (read area) in the basement of our 110 yo farm house and this is IT! I’ve been looking for the last 6 years for ideas and I’ve never seen anything done in the basement. My ceiling isn’t has tall as yours and I don’t have a dedicated corner, but I think it’ll work. Now I just have to sort and get rid of the old junk and properly store the other stuff and my “laundry room” is going to be perfect, light and bright! Thank you for the inspiration!
Awesome! Thrilled that is it helpful for you! I’d love to see photos when you are done!
Thanks for letting me know!
-Liz
Very nice makeover! Can you talk about how you mounted the floating shelf on the brick wall above the washer/dryer?
Hey Cassi, We used a floating shelf that came with its’ own mounting hardware that included the support brackets. They provided a template that made it very simple to mark and drill the pilot holes into the brick. Then we used masonry screws to attach the bracket to the wall and the shelf just slides onto the bracket. Here’s a link to the shelf we used… https://amzn.to/2t8WCIH
I saw that you used a paint sprayer to tackle the ceiling. How did you maneuver around the electrical and plumbing? We’d love to paint the ceiling in the basement but there is quite a bit of wiring and pipes and I am not sure how to negotiate a sprayer around everything.
Hey Dawn, to spray around the electrical and plumbing I used a Wagner brand paint sprayer like this… https://amzn.to/2JPDN6Q It allows you to spray at difficult angles to get into the nooks and crannies.
Your renovation looks great! I have a similar basement situation I’m working on right now. Luckily it already has epoxy floors.
I’m actually commenting because I’m concerned about your washing machine drain. At least in the “Before” pictures, it’s draining into the standpipe that’s right next to an electrical outlet. Check and make sure that all those outlets are GFCI
WOW Jennifer! Thanks for catching that. As you probably have guessed this is an older home and I hadn’t changed out the outlets prior to the makeover. Rest assure that it has been corrected.
Hello,
I came across your laundry room makeover(LOVE!) while googling for ideas for my new laundry room. Would you mind sharing where you bought the glass canisters you used for you detergent, dryer sheets, etc? Thank you in advance!
Megan
Hi Megan, I found those containers at Target.
Thrilled you liked the makeover! Thanks for stopping by!
~Liz
Love the makeover! We just closed on an older home and are in the process of making it our own. Curious…what are the paint colors you used foe the wall and floor?
Hi Teresa, Both colors were custom color matches. I’ll try to make sense of the formula here. The Floor is BL-114, CL-69, VUL-4 ; the Walls CL-165, EL-150, IL-135. Hope that helps.
Hi there and thank you for the inspiring ideas! We are curious about how well the paint has held up on the walls? We recently added outside french drains, really good gutters and drainage pipes, and a sump pump. Our basement is very dry now. Are the walls still looking good? Thanks Gregg
Hi Gregg,
The walls are doing great! One of the problems I’ve had in the past since our basement walls are clay brick is the water penetrating from the exterior and causing fluorescence on the interior. So far I have not had that happen in the laundry room.
What kind of prep did you do to the floor before using the 1-part Epoxy Paint? We’ve got a similar project coming up and are working on how to approach a painted concrete floor…
Hi Katy,
I prepped the floor by cleaning it and removing any loose paint.
You’ve inspired me to makeover my basement laundry room! I definitely want to paint my ceiling and I’m curious if you did this by hand or used a sprayer? Any tips here?
Hi Taylor,
I used a sprayer to paint the ceiling and highly recommend you do as well. I purchased an inexpensive one from Harbor Freight Tools. If I recall it cost me less than $30 for the sprayer, paint filters and disposable masks.
Just be sure to paint the ceiling prior to applying any of the wall or floor coverings and cover anything you don’t want overspray on. Paint applied through a sprayer tends to find its’ way onto everything
Doug
I’ve been reading great review session about SQ. I’m just concerned about the front load capacity. It seems small to me. The largest I’ve seen is 3.4. That’s not large enough for my family. How is it working out for you?
We absolutely love it. And I’m not just saying that, it’s really the best machine I have ever had. As for size, it’s fine for us. We have a son in college and he crams it full when he comes home on the weekends.
~Liz
Hoosier Homemade, This is a fantastic transformation! What an inspirational template to motivate others to ban the chaos and clutter to makeover their laundry area into a delightfully designed room.
Thanks so much! I’m thrilled you like the laundry room!
~Liz
Looks great! What a transformation! A stamp of approval from Miss Tiki sells it for me!
Thanks so much Patty! Oh yes, Tiki stamp of approval is always important 🙂
~Liz