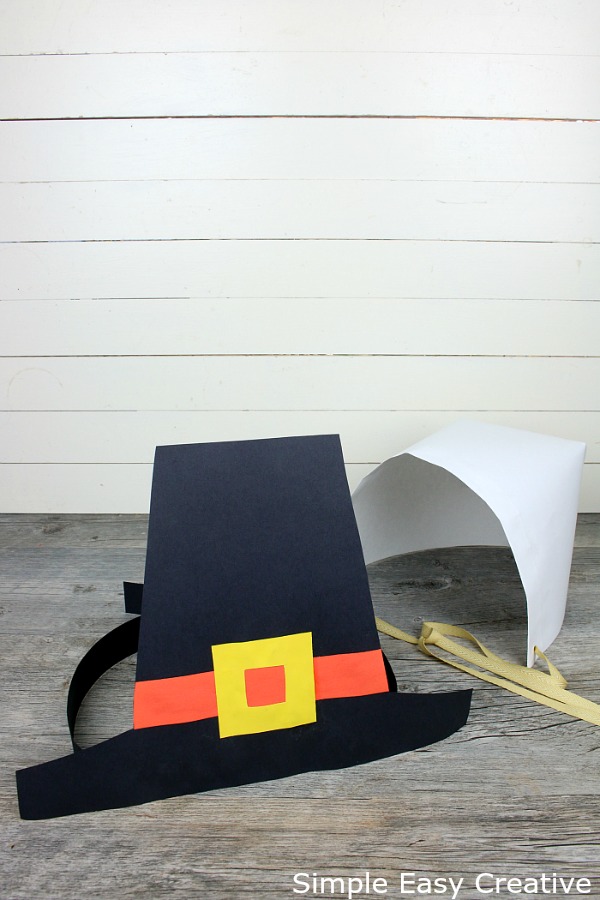
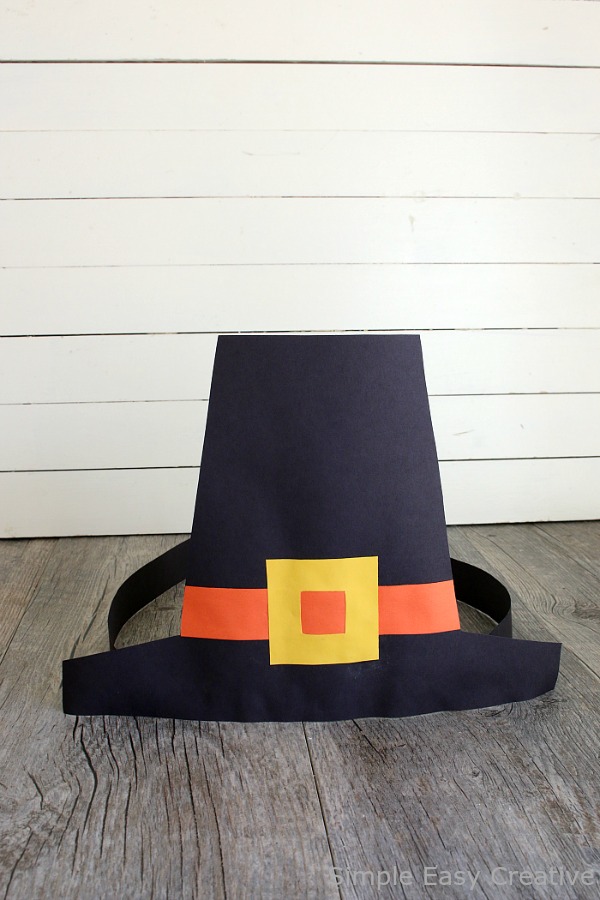
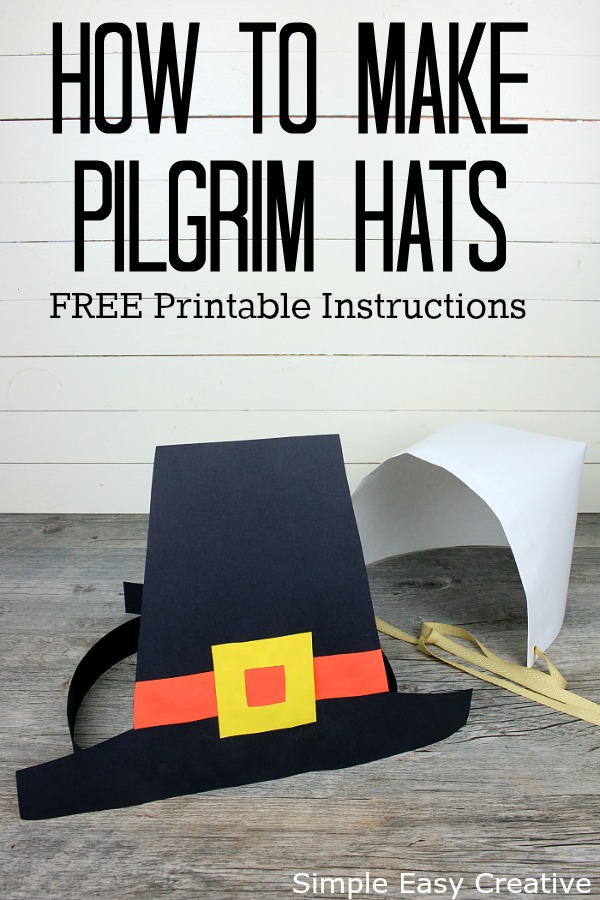
How to make Pilgrim Hats

Grab the kids! It’s time to learn how to make Pilgrim Hats! This fun Thanksgiving craft is sure to keep the kids busy while you are preparing Thanksgiving dinner.
This fun craft is brought to you by Dixie Crystals.
A few years back, I shared a Thanksgiving Kiddie Table with a Pilgrim Hat crayon cup, straws with Mayflower flags and Turkey Pinecones. These Pilgrim Hats would be a great addition to that table for the kiddos.
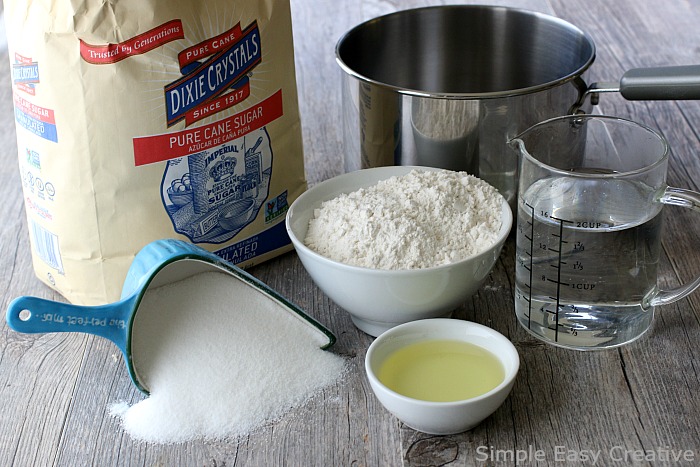
The first thing you will need is Sugar Glue. This is super easy to make, and I think the kids will find it really interesting that you can use flour, sugar, oil and water to make glue. You can grab the recipe over at Dixie Crystals Kids in the Kitchen.
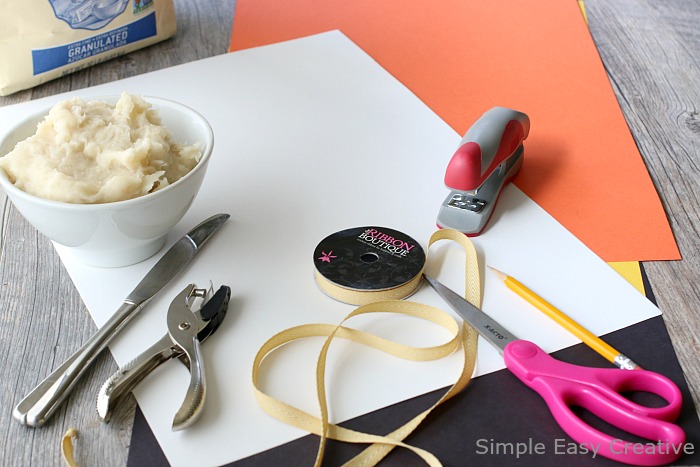
Now it’s time to gather the supplies to make the Pilgrim Hats. You will need –
- Construction Paper – 11 x 17 (I bought 11 x 18) – black, white, yellow (or gold) and orange (or another color for the hat band)
- Scissors
- Hole Punch
- Stapler
- Pencil
- Ribbon
- Ruler (not shown)
- Sugar Glue
Let’s make the Pilgrim Bonnet –
I created step-by-step photos with instructions for you. You can also click HERE to download the printable instructions for FREE!
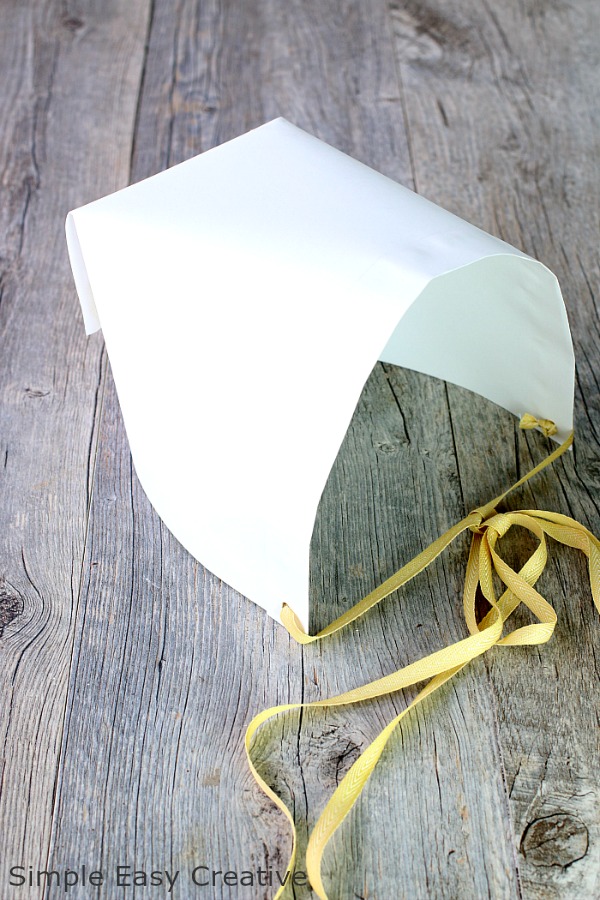
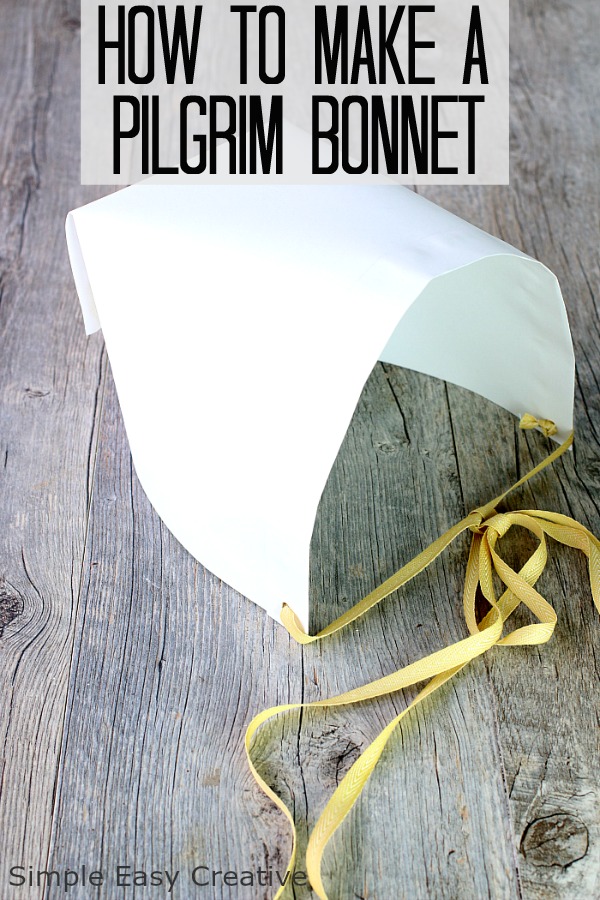
How to make a Pilgrim Hat Bonnet
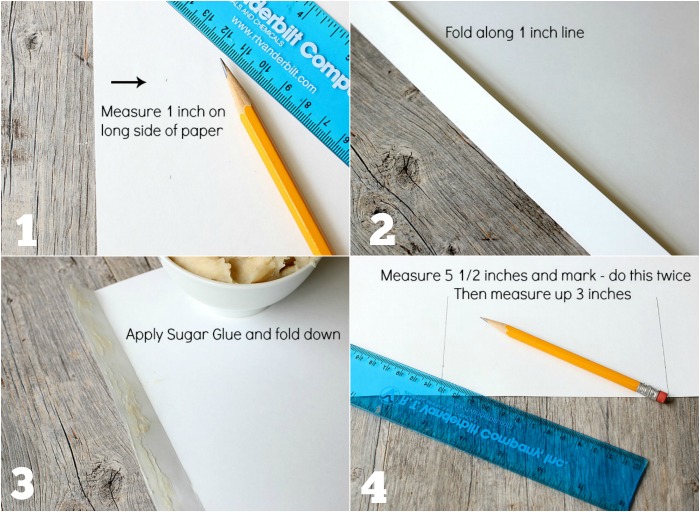
- Begin with a sheet of white construction paper – 11 x 17. Then measure 1 inch on long side of paper
- Fold along the line
- Apply Sugar Glue and fold down
- Along the bottom – measure 5 1/2 inches from the left side, and then another 5 1/2 inches – then measure up 3 inches at each of those marks
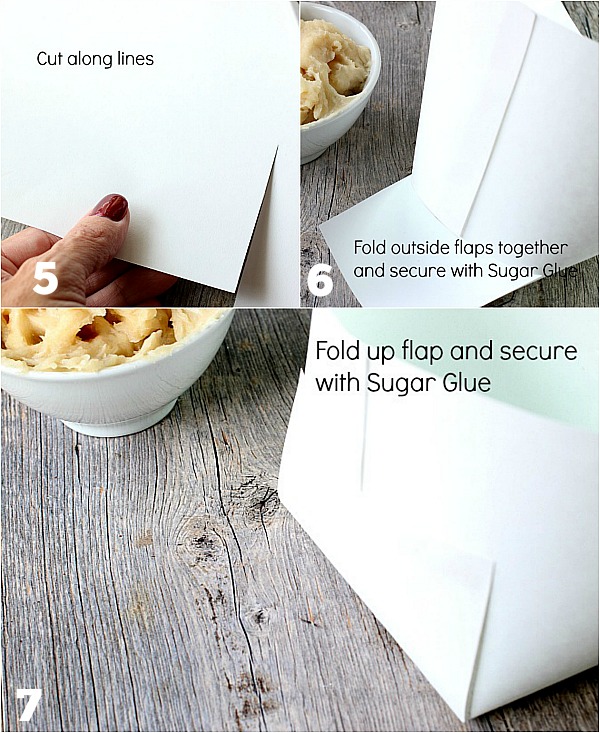
- Cut along the lines
- Fold the outside flaps over each other and secure with Sugar Glue
- Fold up flap and secure
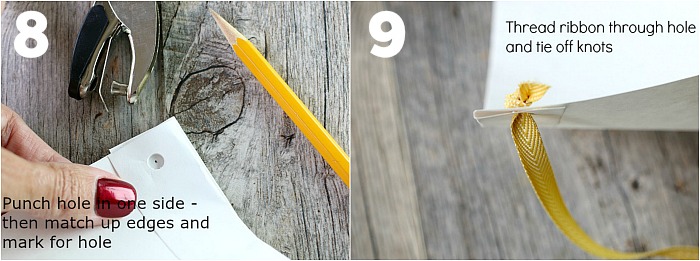
- Punch a hole in the front bottom of the bonnet, then match the edges and mark – punch the second hole
- Thread ribbon through hole and tie off knots
Now let’s get the boys ready. The Pilgrim Hats are a little more involved than the Bonnet, but they aren’t difficult.
Grab the FREE printable instructions for the Pilgrim Hat HERE
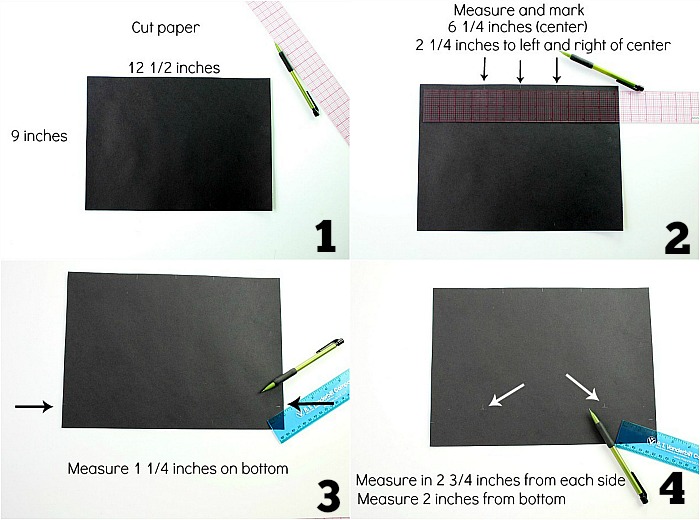
How to make Pilgrim Hats
- Cut black paper – 12 1/2 x 9 inches
- At the top – mark 6 1/4 inches (this is center) – then mark 2 1/4 inches to the left and to the right of that mark. This will create 4 1/2 inches at the top of the hat
- On the bottom – measure 1 1/4 inches on each side of paper
- Measure in 2 3/4 inches from each side. Measure 2 inches from bottom
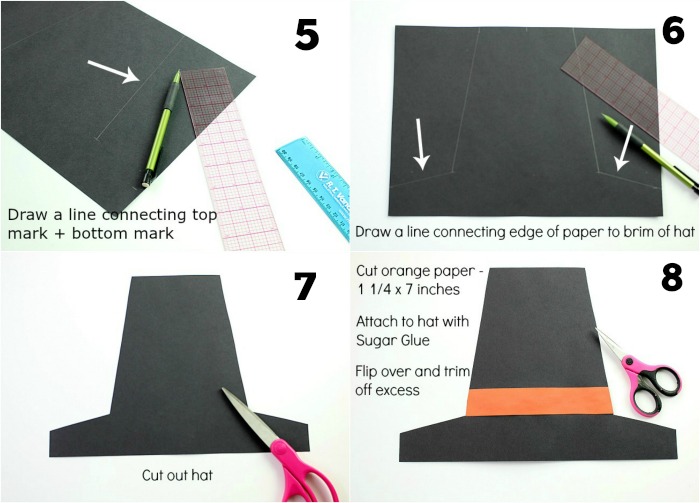
- Draw a line connecting the top mark to the bottom mark (the last one you made)
- Draw a line connecting the edge of the paper to brim of hat
- Cut out hat
- Cut out orange paper – 1 1/4 x 7 inches. Attach with Sugar Glue. Flip hat over and trim off excess orange band.
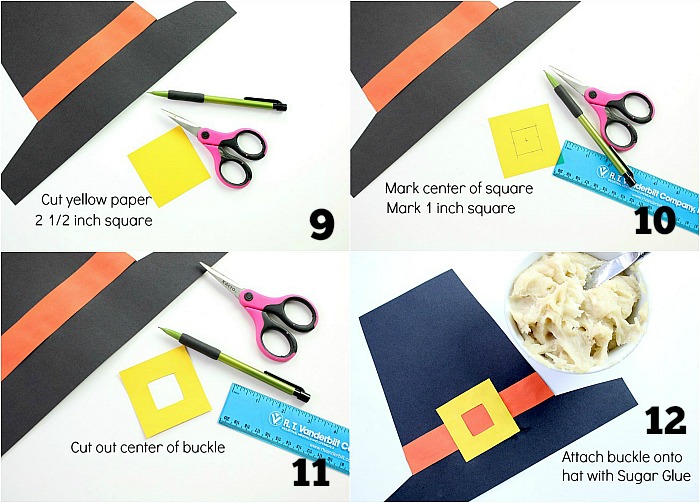
- Cut yellow paper – 2 1/2 inch square
- Mark center of square. Mark 1 inch square in the center
- Cut out center of buckle
- Attach buckle onto hat with Sugar Glue
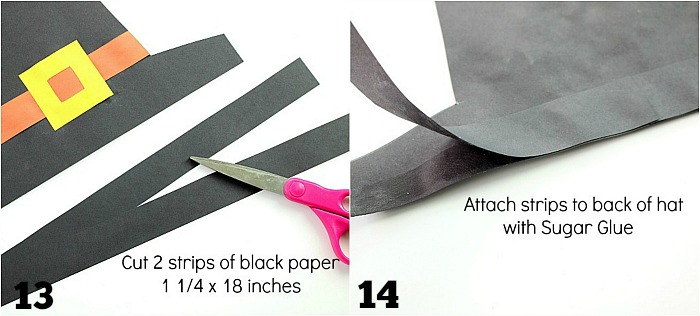
- Cut 2 strips of black paper – 1 1/4 x 18 inches
- Flip hat over and attach strips with Sugar Glue to center of hat. NOTE – at this point you can glue the strips completely down all the way across the bottom of the hat, or leave part of the strip unattached – this way the hat will set straight and not wrap around the head
6 Comments