How to make Paper Snowflakes
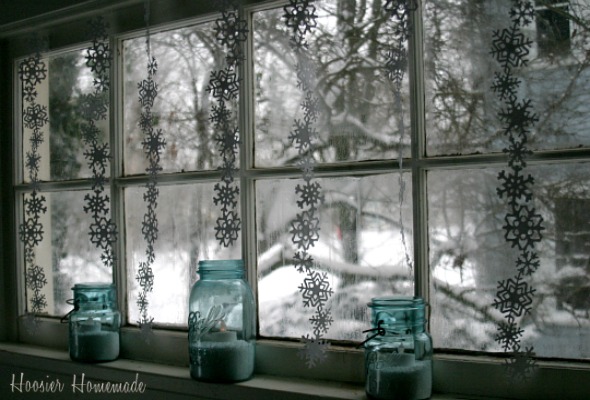
Even though my Paper Snowflakes didn’t turn out exactly how I wanted, I still wanted to share with you how to make them. I hope it’s not just me, but making paper snowflakes are not as easy as they look.
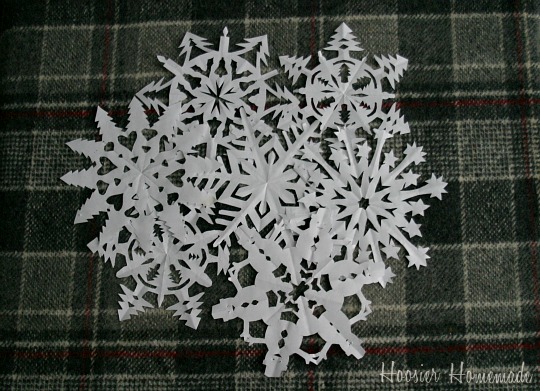
First, let me show you how to cut the snowflakes, then I will share with you the snowflakes I ended up decorating with.
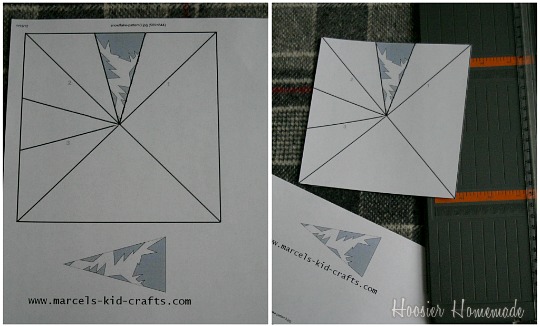
There are lots of websites that offer free snowflake templates, including where I found these, Marcel’s Kids Crafts. The first thing you will need to do is find the pattern or patterns you would like to use and print them off on either copy paper or cardstock. I would suggest copy paper, as the folding and cutting is difficult, at least it was for me.
Before we get started, I need to tell you the mistake I made. I printed and cut out all the paper snowflakes, and then later realized that if I wanted to hang them in the window, there was going to be a line on the back. So, if you don’t want a line on yours, you will either need to trace the template or fold the paper and then lay the design triangle {see it at the bottom of the pattern?} on top and then cut.
For the purpose of showing you how to fold and cut the snowflakes, I left the lines on this one.
Step 1:
- Print out snowflake pattern and cut it out
Step 2:
- Fold in half on the diagonal
Step 3:
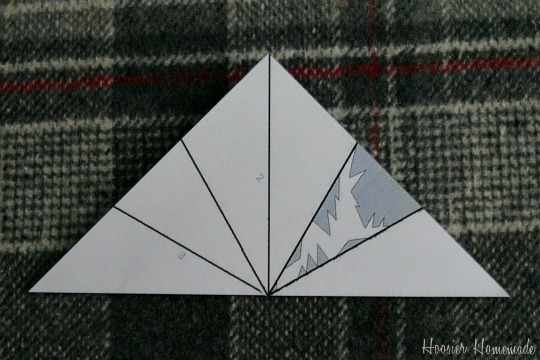
- Fold again to form a triangle
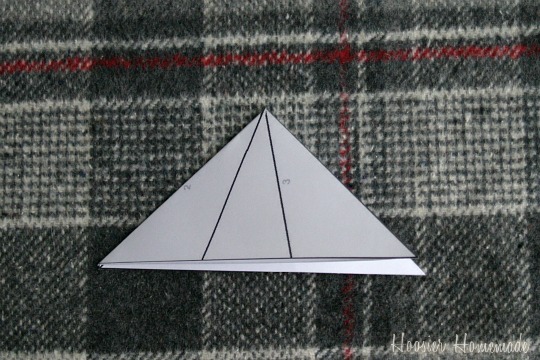
Step 4:
- Fold in thirds. You will have 2 little wings on the bottom
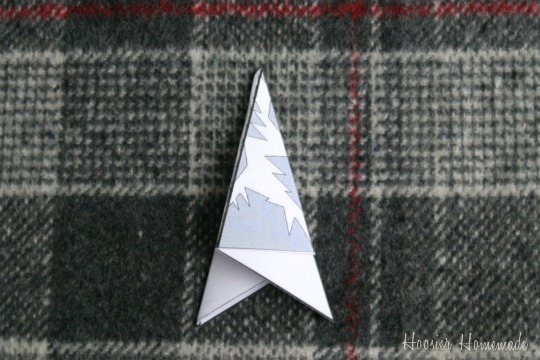
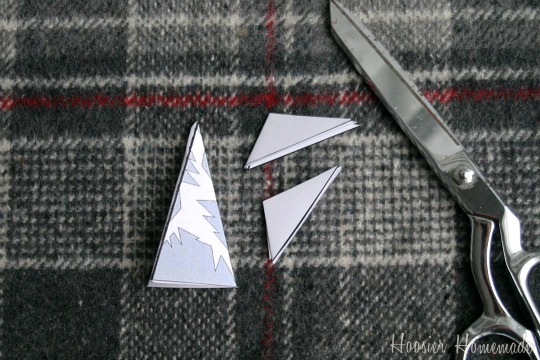
Step 5:
- Cut the wings off so you end up with a skinny triangle. This is where you would lay the pattern on top or trace it on
Step 6:
- Cut away all of the shaded area. This step was difficult for me, I did have small sharp scisscors, until they broke that is.
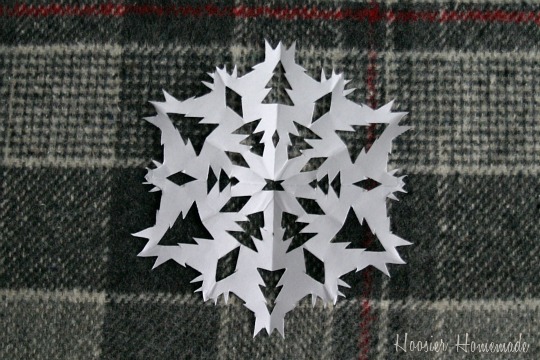
Step 7:
- Open up the snowflake and see how you did. Mine, clearly isn’t perfect, but that’s okay. You will want to lay the snowflakes under heavy books for at least overnight to flatten them.
This is how the back looks, which is fine if you aren’t going to hang them up in a window. I also tried cutting them from a coffee filter, which was MUCH easier to cut, but not thick enough to hang in the window.
So…here’s what I ended up doing…
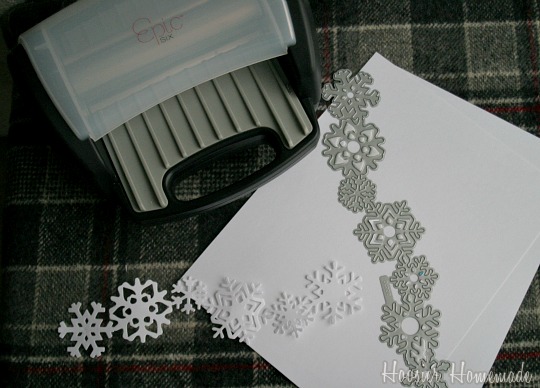
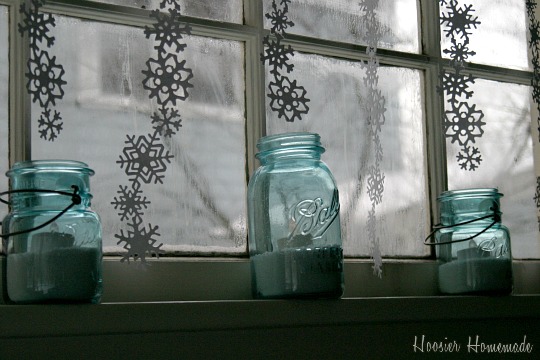
Do you remember the Paper Lanterns that I shared at Christmas? I should have thought about the die cuts in the beginning, but I really wanted to cut the snowflakes for the window. I’m REALLY happy with how it turned out though.
I used my Epic Die Cut Machine and Snowflake Die Cut from Lifestyle Crafts, super easy…and lots easier on my hand.
I added a few Aqua Mason Jars filled with Epsom Salt and a battery operated tea light. In the end, it was an easy Winter Decorating project.
Interested in these cool products from Lifestyle Crafts? Head on over and be sure to use Promo Code…HOOSIER to receive 20% off your order!
Disclosure: I received some products to try from Lifestyle Crafts and as always, the opinions are my own.
Do you have any helpful hints for paper snowflake making?
Linking to…Saturday Night Special, Saturday Seven Party, Sundae Scoop, Made By You Monday, Tip Me Tuesday, Get Your Craft On, Transformation Thursday




Wow those are GORGEOUS!!! I would like to invite you to share this post with our readers for Fun Stuff Fridays. https://www.toysinthedryer.com/2012/01/fun-stuff-fridays-7.html
The pictures of your window with the snowflakes are stunning! So pretty…I think I will make some paper snowflakes today 🙂 Thanks for the inspiration!
Love this post! I’m having a linky party, and would love for you to join! Here is the link https://www.thesouthernproductqueen.com/one-stop-shoppe-linky-party-3 Thanks for sharing!!!
Very pretty snowflakes- love how the windows look!
So pretty! Who knew they were so easy?
Sounds like a fun project to work on with my daughter!
Your snowlakes are beautiful! I love how your window came out. Thank you for this – I have been wanting to make some with my daughter and always seem to forget. We will be doing it this weekend!
These are really neat! I love it with the Ball jars.