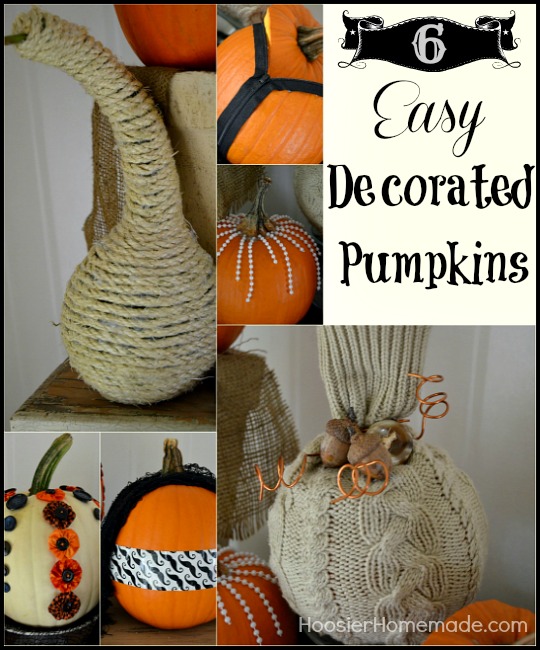
6 Easy Decorated Pumpkins
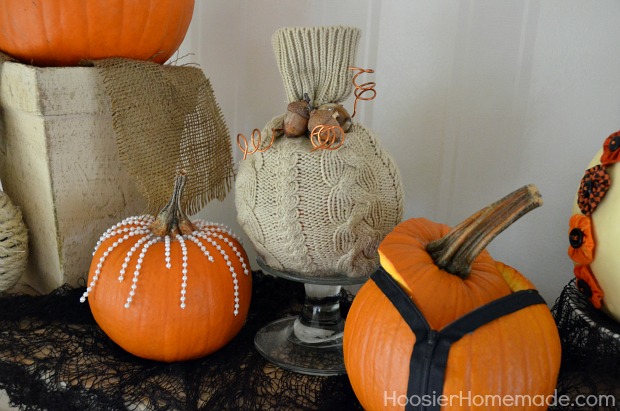
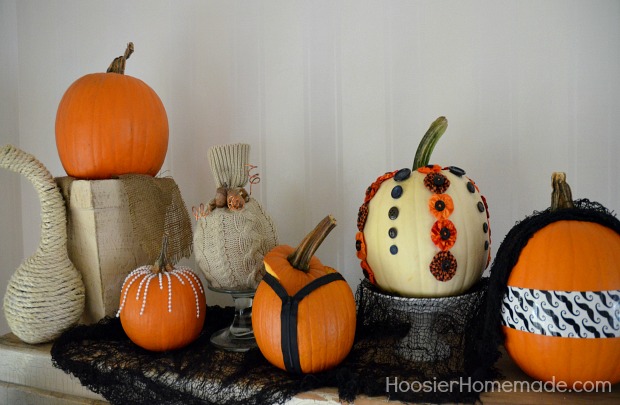
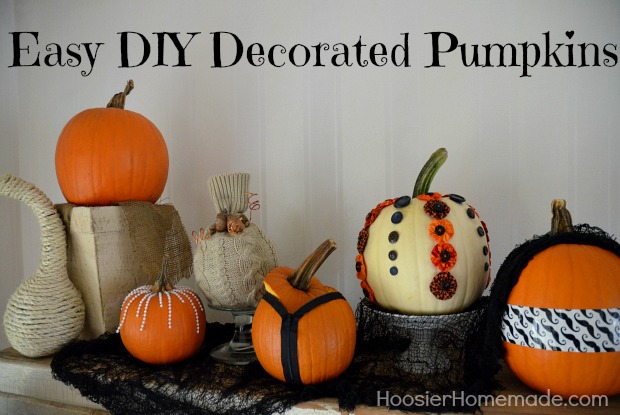
As you probably know already, I love decorating…especially during the holidays! Since the outside of the house and front yard are done, it was time to start on the inside. After seeing inspiration in Midwest Living and Better Homes and Gardens magazines, I came up with 6 Easy Decorated Pumpkins. They are displayed on the Hoosier Cabinet along with Potion Bottles and other Halloween Decorations…stop back tomorrow to learn how to make the Potion Bottles!
The pumpkins were decorated with items that I had on hand, some of them took minutes and although they were all easy, the rope covered gourd was a little time consuming. But I think the results are well worth it!
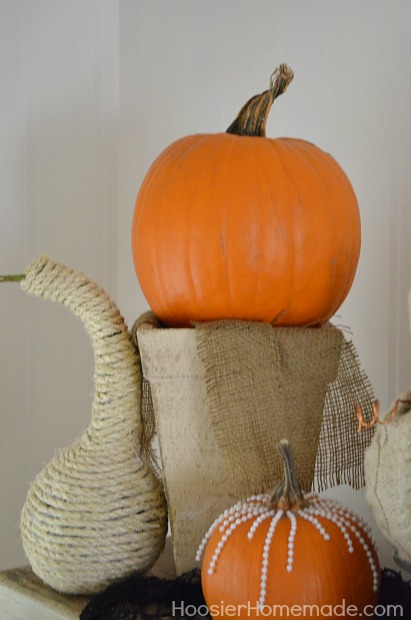
Let’s start with the very easy, actually not even decorated pumpkin on the left. To add height, I brought in a tall rustic vase, added some burlap and placed the pumpkin on top. Easy peasy!
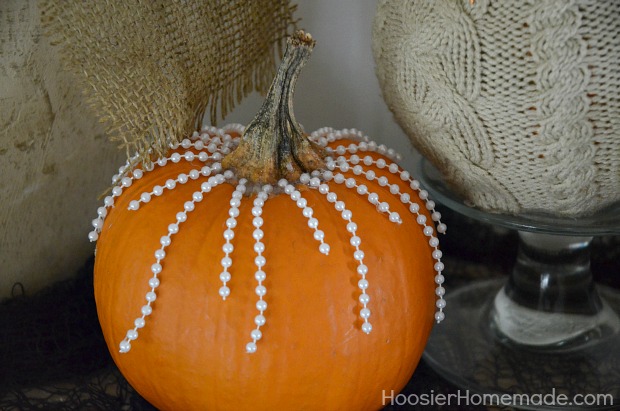
This little pumpkin has a little “Bling” added with a String of Pearls. You can find them in the floral section, usually near the wedding supplies. They come on a roll and you simply cut them apart to the length you need. Using the hot glue gun, I attached the pearl strings around the stem. There were a few that needed to be attached at the bottom as well, so I added a little hot glue to a popsicle stick and attached them to the pumpkin with a drop of glue.
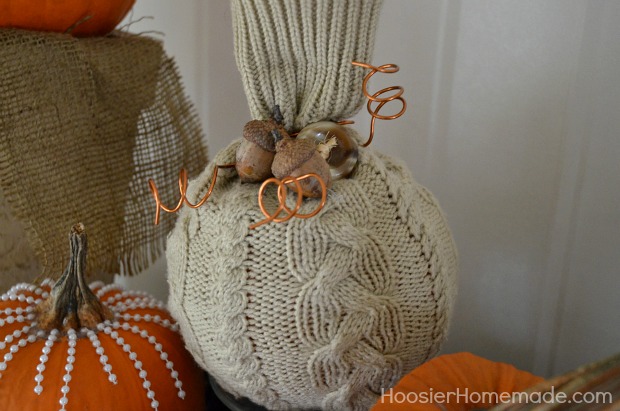
One of my favorite stops while looking for deals is Goodwill. This pumpkin is covered in a sweater that I found while on a thrifting trip there. Slip the pumpkin into the sleeve and push it up until the stem is showing a bit. Then tie it off around the stem with twine. For the bottom, I just used the hot glue gun and attached the sweater to the pumpkin. For the embellishments, copper wire was curled around a marker, then wrapped around the stem. The button and acorns were just glued on.
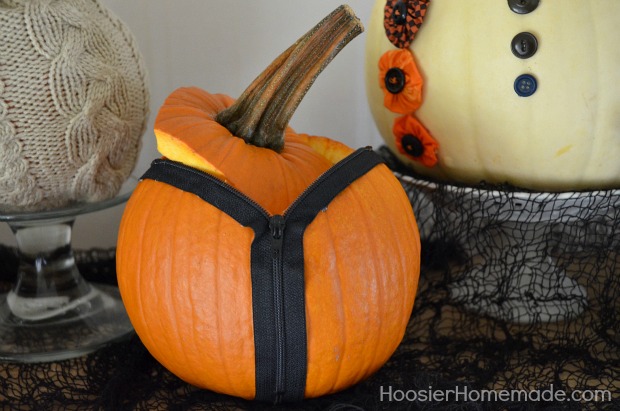
Dig around in your sewing supplies for the next pumpkin! This little guy has a zipper glued on to him! First, position the zipper on the pumpkin and trace the edge with a pencil. Cut the pumpkin top and clean it out. Then using the hot glue gun, add the zipper. I started at the bottom and worked my way up.
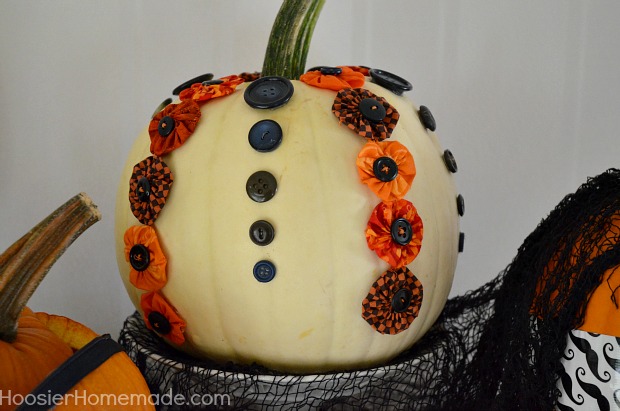
Yo-Yos are a fun way to add a special embellishment to clothing and other items. I happen to have these orange and black Yo-Yos in my stash from a purse I made years ago. Doug often thinks I’m crazy for holding on to things, but it’s times like this when I’m happy that I don’t throw everything out. I can’t tell you how many times I need something, and then remember that I got rid of it already. Do you do that too?
There are several ways to make Yo-Yos, the “old fashioned” way is to cut a circle of fabric, and using a thread and needle, run a basting stitch around the edge, gather it up and tie it off. The “new fashioned” way is to use a Yo-Yo maker, Kelli from Nest of Posies teaches you how to make them in the Splendidly Homemade Winter edition.
After the Yo-Yos are made, glue them onto the pumpkin and add some more buttons for extra interest.
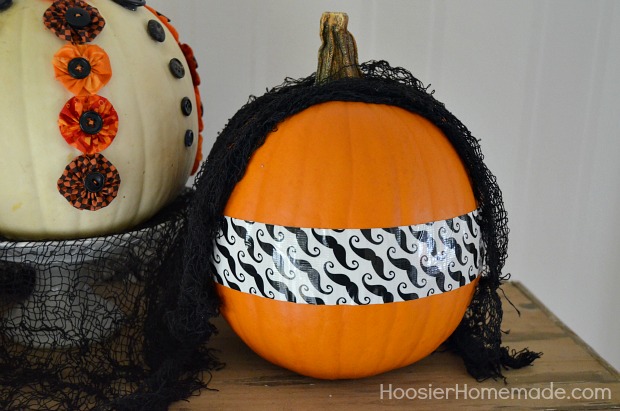
This pumpkin was given a whimsical look with Mustache Duck Tape! There are tons of different designs from Duck Tape now, and you can decorate your pumpkin in minutes with them.
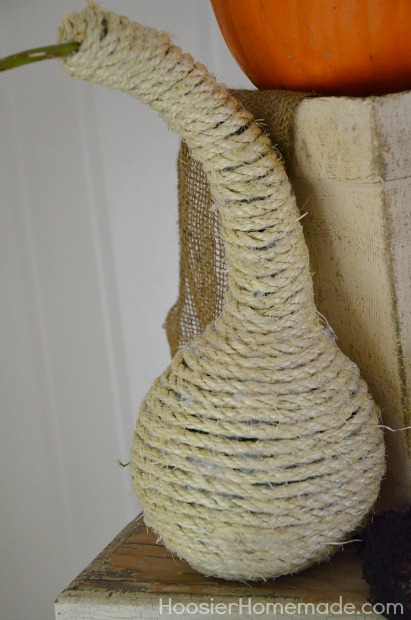
So this little guy was the one that took some time. I was actually shocked that it took me a couple hours, I’m not really sure why, but I’m totally thrilled with the outcome. I started with a gourd that I had on the Front Porch, used the hot glue gun and rope. Starting at the bottom, I wrapped and glued and wrapped and glued until the gourd was covered.
Here is a big tip if you are working with a glue gun, especially if you decorate a pumpkin or gourd with rope…find yourself some rubber tips for your fingers. I have some from Plaid Crafts that Mod Podge makes and they are awesome! If you are a crafter…these are MUST haves!
Linking to…Made By You Monday, Fall Nesting Party, Saturday Night Special
I love the sweater pumpkin – so simple and so cute. But the zipper pumpkin is so fun. I also like the cord gourd – it’s so hard to choose which one I like best. Stopping by Saturday Night Special
I love everything about that sweater covered pumpkin, the copper works perfectly with it! Thanks for sharing your creative ideas with us. I’m visiting from The Inspired Room, and having lots of fun looking around!
Visiting from Made By You Monday…these pumpkins are all so cute!! I would love if you would share this (and some of your other fun ideas) at my link party going on right now:
https://sewingbarefoot.blogspot.com/2012/10/the-weekly-creative-3.html
Hope to see you there!
Shannon @ Sewing Barefoot
Looks like you’ve been on a very creative kick lately. I’ve been loving all the decorated pumpkins this year. I like your sweater covered one the best. How simple to decorate, yet oh so pretty! Thanks for sharing your ideas with us.