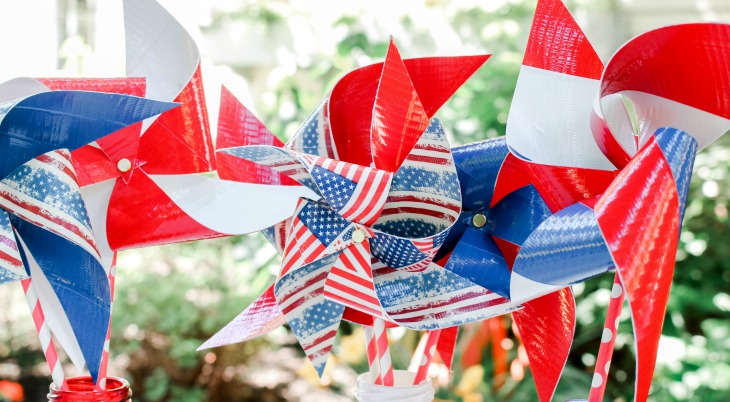
4th of July Table Decorations

Thank you to Duck Tape for sponsoring this project. As always, the opinions are our own.
It’s time to celebrate our nation! These 4th of July Table Decorations are fun and simple! The kids can even help make them.
4th of July is one of my favorite holidays – family, fireworks, entertaining and of course, food! We like to keep everything simple though, especially when entertaining. We all want to spend time with our family and friends and not fussing over the decorations, table setting or food.
We put together these fun 4th of July Table Decorations using the seasonal patterns from Duck Tape. We have shared our love for Duck Tape with Halloween Decorations, Back to School Games and Easter Crafts for Kids, to name a few. Now it’s time to put on our patriotic hat and have fun for the 4th of July!
We created 3 simple projects for you to add to your table. You could also use them anywhere in your home. The pinwheels would work well for planters outside, the holders can easily be used in the kitchen for napkins, silverware or straws. And the banner would be really cute on a mantel or shelf.
We will start by sharing How to Make Pinwheels –
I have made pinwheels several times in the past. I shared how to make them using scrapbook paper, but today we are adding Duck Tape to them.
How to Make Pinwheels
Supplies:
- White Cardstock Paper (heavy paper, available most department or craft stores)
- Duck Tape
- Cutting Mat
- Ruler
- Pencil
- Scissors
- Metal Brads (not shown in this photo, available in the office supply area)
Step 1:
- Fold the paper so that the sides match. You will be creating a square.
- Then mark with a ruler to create the size of square you need. We used various sizes.
Step 2:
- Cut along the line to create a square.
Covering the Pinwheel
- Lay the paper out flat on your work surface or cutting mat
- Completely cover one side with Duck Tape
- Turn the paper over and cover the back side
- Use the ruler and a X-ACTO knife to cut off the edges
Step 4:
- Find the center of the square.
- Mark it and use sharp scissors to create a small hole.
- Cut each diagonal to the center, STOPPING about 1/4 inch from the center mark.
Step 5:
- Using the sharp scissors, make a small hole on every other corner
Step 6:
- Push the metal brad through each hole and then the center
Step 7:
- Fold the prongs over in the back to secure the metal brad
Step 8:
- Using a small piece of Duck Tape, secure the straw to the back of the straw.
Add the pinwheels to small glasses or vases. And add them to the table.
Next are the clay pot holders, we added silverware, napkins and straws to these.
- First, spray paint a clay pot with white spray paint. Let it dry completely.
- Then wrap the edge with Duck Tape, and fold it over. Easy enough!
To add a little color to the front of the table, we created a very simple banner. We used Duck Tape and twine.
- Begin by measuring a piece of twine or heavy string the length of your table. Be sure to add a little to each end to use for securing the banner.
- Then find the center of the twine and begin adding pieces of Duck Tape. At this point we were not specific on size, it was easier to just get the piece taped together and smoothed out.
- After all the flags are on the banner, then find the shortest piece, measure it. Then cut the rest of the pieces the same length.
This banner is super easy and could also be made in a variety of colors for others holidays or parties.
If you love Duck Tape, like we do, you will also love these ideas..


