String Art Project for Valentine’s Day
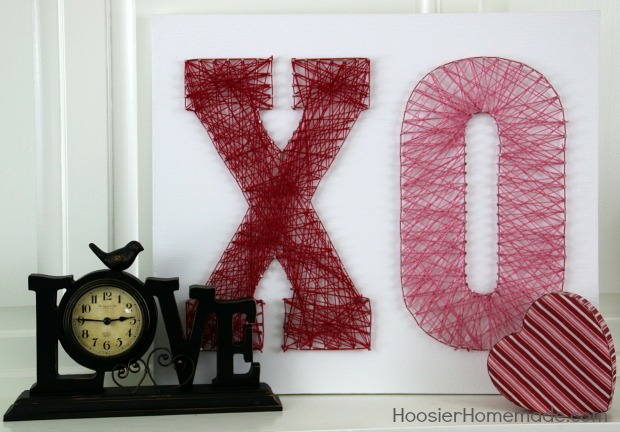
All you need are a few supplies to create this cool String Art Project for Valentine’s Day. It’s the perfect valentines art for Valentine’s Day decorating or even give as a gift!
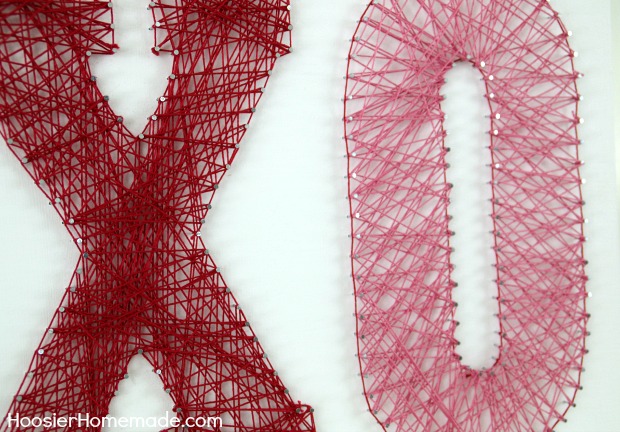
String Art is one of those crafts that I loved as a young girl. Many moons ago they were all the rage, and I’m happy to see that they are getting popular again. There are some absolutely gorgeous pieces of artwork made with string and nails.
This valentines art project is definitely simple, easy, and creative, however, it did take a little time, mostly from the time trying to figure out how to fill in the “X” to make it look even. But after I figured that out, it went pretty quickly.
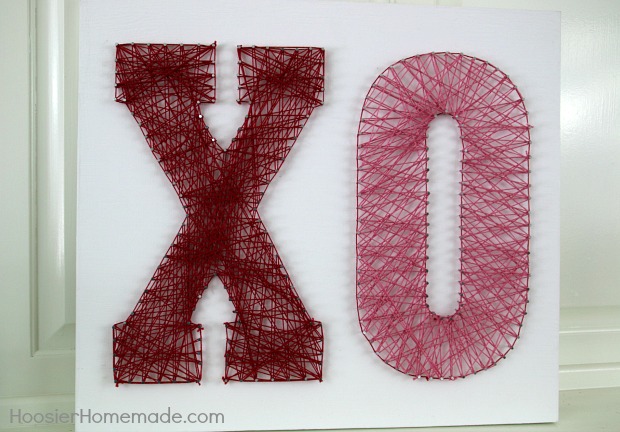
The string art pattern of X and O are perfect for Valentine’s Day. They are the main focus of our Valentine’s Day Mantel. (coming soon) There is a lot to cover, so let’s get started…
First, you will need to gather your supplies. There are many different supplies to choose from, here is what we chose and why.
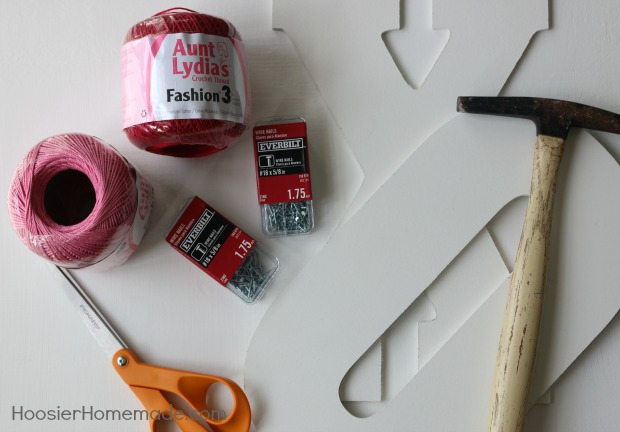
String Art Project Supplies
- Wood – we used a piece of scrap wood that we had, it’s 3/4 inch plywood. We decided to use a little thicker wood so the nails would not go through on the back.
- Paint – you may need to paint your wood
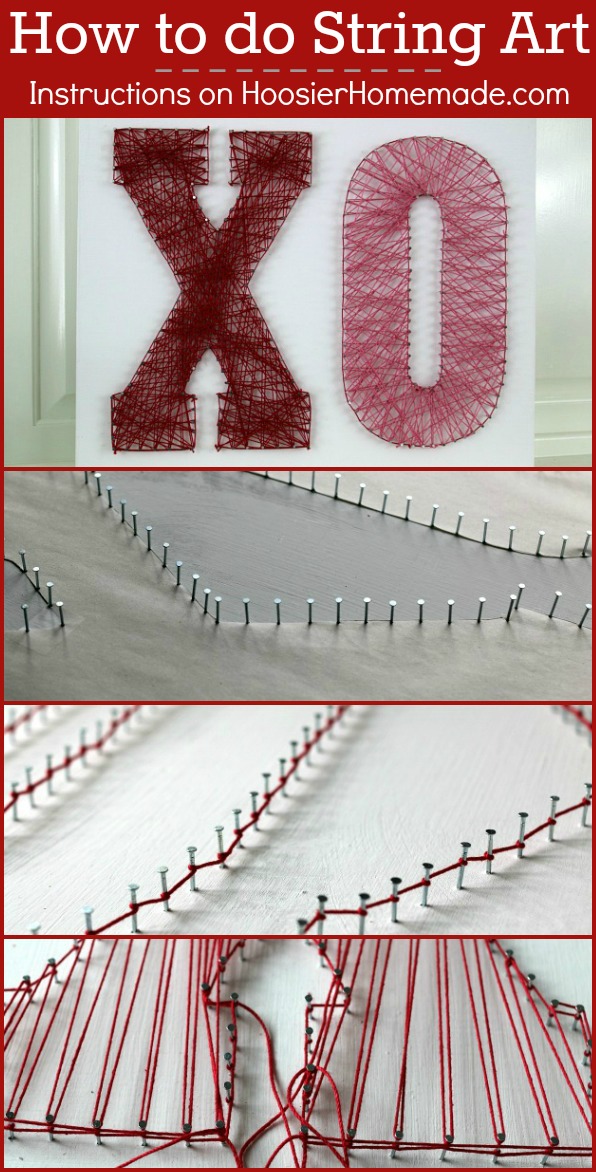
- Pattern – the pattern options are endless, we used letters that we bought at Michael’s craft store and traced them onto paper
- Nails – we used 5/8 inch wire nails from The Home Depot, you can use larger but I wanted the string to be the main focus, not the nails
- String – depending on the size of your pattern, you can use a variety of strings. Embroidery floss is great, but we weren’t sure there would be enough on a single skein, however, we probably could have used it, because we tied off the string several times and started with a fresh piece. We did use Crochet Thread, found at Michael’s near the embroidery floss. There are different thicknesses also, we used #3.
- Tools – pencil (for tracing) scissors and hammer
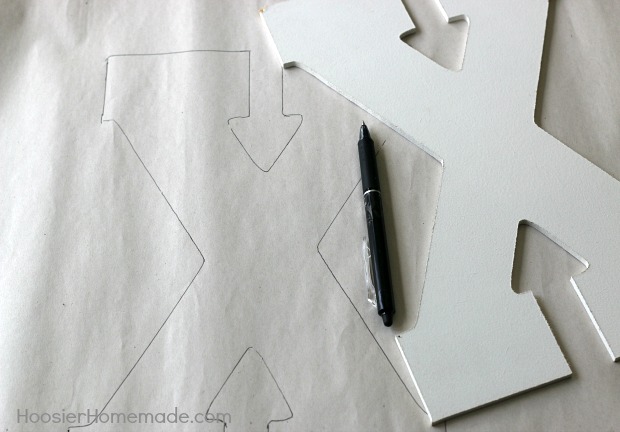
We traced the pattern onto paper so it could be removed easily and so there would not be a line on the string art project. Like I said above, the pattern options are endless, just about anything could be used for a pattern. There are also many free string art patterns available online.
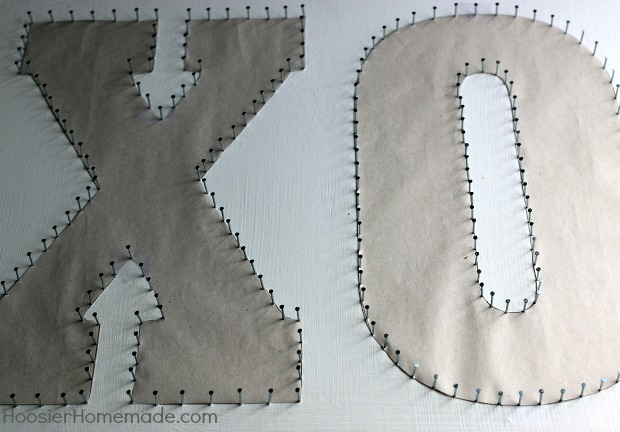
Next, you will need to hammer in the nails. The distance between each nail is totally up to you, it will depend on your pattern.
We hammered the nails around the edge of the pattern, very slightly onto the pattern and about 1/2 inch apart.
Then remove the paper pattern. If there are pieces of paper that get stuck around the nail, they can be removed with tweezers, like we did.
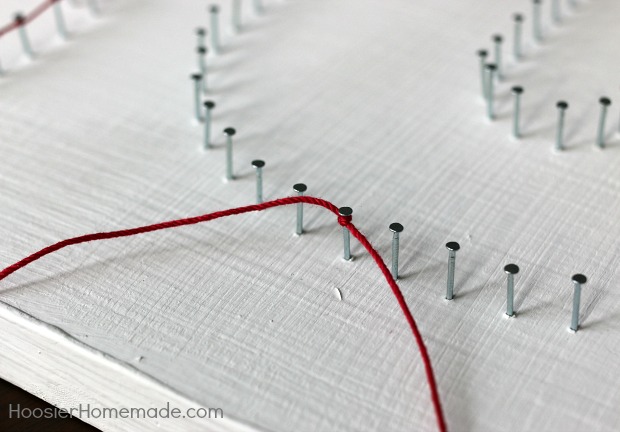
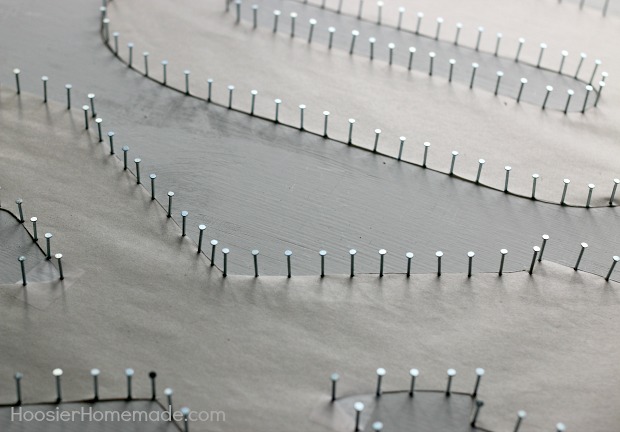
Now comes the fun, begin by tying the string to one of the nails, I started at the bottom. Be sure the string is knotted and on securely, you will be pulling the string tightly.
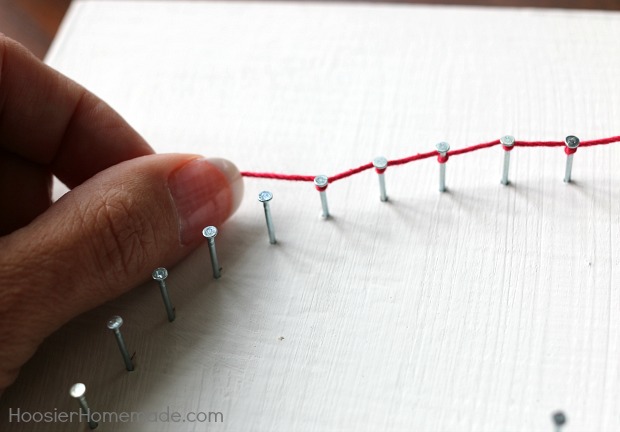
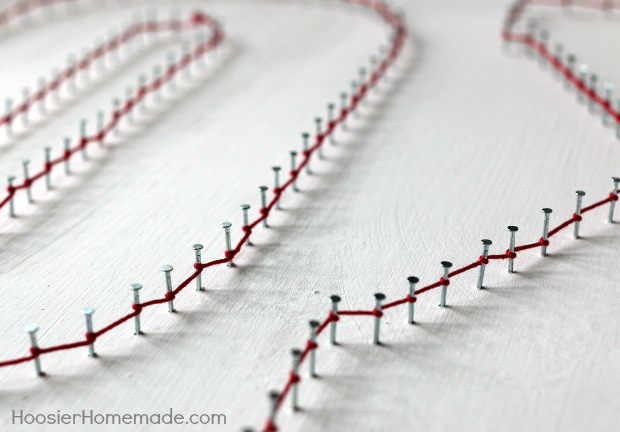
Continue to wrap the string around the outside, creating a border around your pattern.
After the border is complete, push the string down part of the way onto the nail making room for the other string.
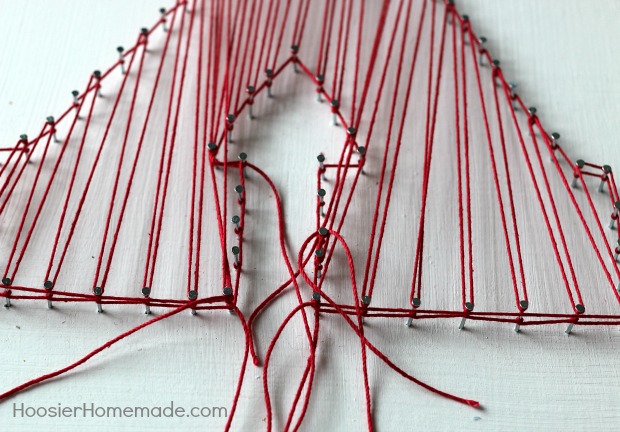
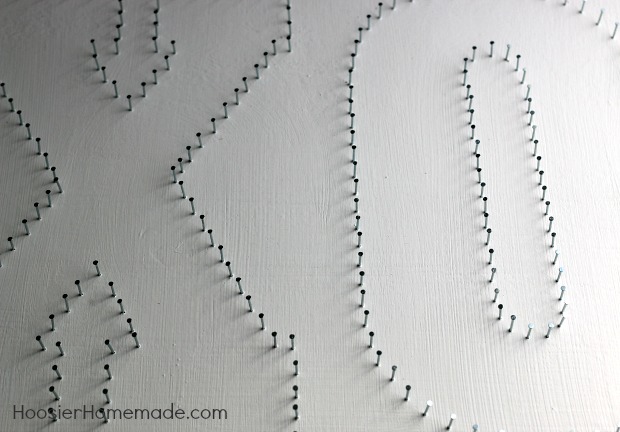
Now it’s time to fill in the center of your pattern. There really isn’t any special direction that you have to go, but I did learn a few tricks along the way.
- When you tie on the first knot, leave a couple inches of extra string, that way when you are ready to tie off, it’s easier to knot the 2 strings together.
- For the “X” pattern, I filled in the 4 ends first, then the center. It’s really just trial and error to find the pattern of string you like.
- Have the hammer close by, you may need to hammer a nail down farther, sometimes they are lose and when you begin pulling the thread around them they can pop out.
Continue adding string and fill in all the areas of the pattern. You may need to tie the string off and restart at some of the points. After you are all done, go through and push the string toward the top of each nail.

Add a few items to this String Art Project and you have the perfect Valentine’s Day decoration or gift!

Follow HoosierHomemade for your Valentine’s Day inspiration
I learnt alot from reading your tutorial. Thanks. I now feel confident to give it a.go.
I’m so glad Jacqui! Thanks for stopping by!
Hi! I’m Danielle and I blog over at sundaesandspaghetti.blogspot.com. I am creating a post of cool Valentine day decorations, and l really love your string art! May I use a picture in my collage? I will be sure to link your picture back to you. Thanks so much!
Hi Danielle, sure that’s fine. Thanks for asking!
~Liz