Spring Craft: DIY Home Decor
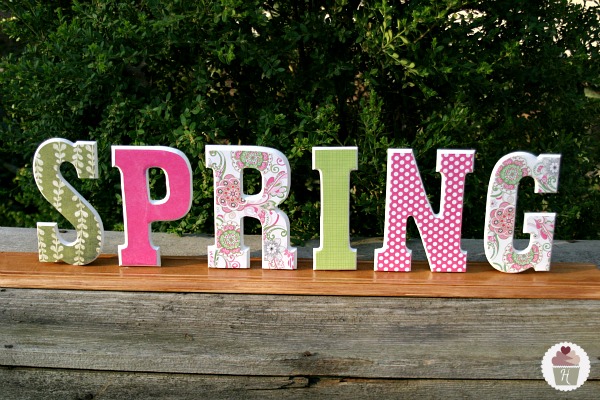
I love Spring! The warm weather, the flowers, the birds singing…and yes the crafts and decorating my home! Seems like we are getting the Spring Decorating done little by little this year. Hopefully the Spring Mantel is next, we are creating the pieces we want to put on the Mantel, and this Spring wood craft is one of them.
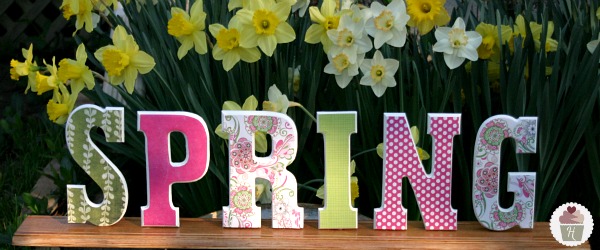
I just love how it turned out! Doug did an AMAZING job on it…don’t you think?
The concept for the scrapbook paper being applied to the wood is similar to the St. Patrick’s Day Door Hanging we made, but the letters were a little curved on the edge, so Doug had to cut out the paper before applying it to the wood. It was a little more time consuming, but well worth it.
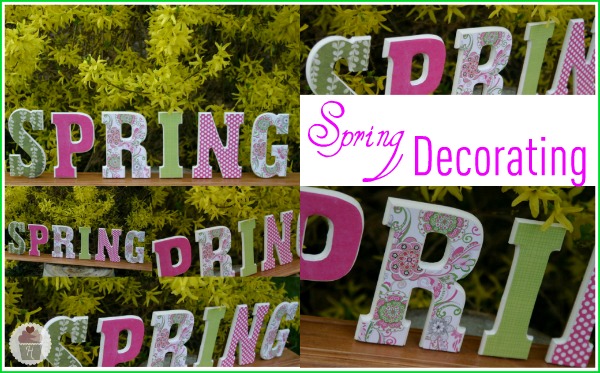
And we couldn’t help but take pictures outside in the beautiful Spring weather we have!
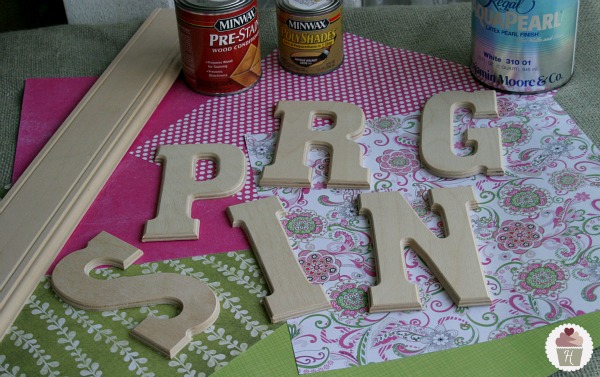
Let’s gather our supplies…
Spring Craft Supplies:
- Wood – We used a piece of baseboard from our local molding outlet (length will depend on how many letters)
- Letters
- Scrapbook paper
- White paint for the edges of the letters
- Pre-stain and stain for the wood
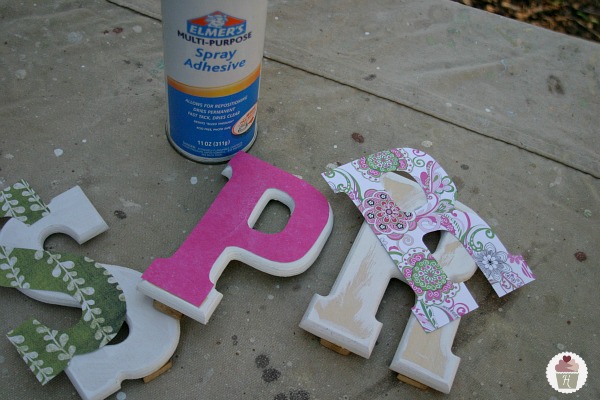
- Spray adhesive to apply paper {not pictured}
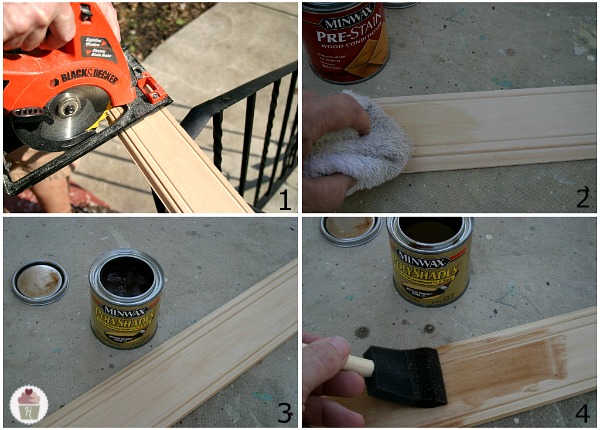
Wood Preparation:
- Cut your wood to length. Doug cut this piece, 5 inches longer than what we needed, leaving 2 1/2 inches on each end.
- Using a rag, apply the pre-stain. Pre-stain is needed when staining soft or porous types of wood to prevent the finish from being blotchy.
- Let sit 15-20 minutes to allow to soak in, wipe off any excess.
- Apply stain evenly with a foam brush and allow to sit for 5-10 minutes depending how dark you want the final product to be, carefully wipe and excess stain off. {We used a combination stain/polyurethane product to speed up the process}
Letter Preparation:
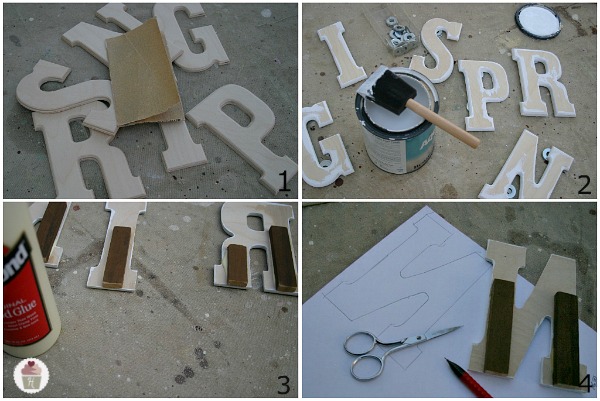
- Slightly sand the edges of the letters with 180 grit or finer sand paper. {the higher the number the finer the grit}
- Paint the edges (2 coats) we used a satin latex that we had on our shelf {the washers are just to keep the letters up off the drop cloth}
- Glue a small block of wood to the back side of the letters to give more area to glue to base.
- Trace the letter onto the back of the scrapbook paper and cut out
Decorating the Letters:
- Spray the back side of the paper with adhesive and carefully adhere to the wood letters
- To attach the letters to the wood, use a hot glue gun {note: Doug tried wood glue and even super glue, but the glue gun worked the best}
Linking to…Transformation Thursday, Show & Tell Friday, Weekend Wrap Up Party, Saturday Night Special, Saturday Sevens, Sundae Scoop, Make It Monday, Before and After Party


This is so cute!! I want to use the same idea for my daughter Isla’s nursery! Awesome tutorial. If you have a moment I’d love it if you could link this up on my party Destination: Inspiration going on now at Teagan’s Travels.
https://teaganstravels.blogspot.com/2012/03/destination-inspiration-linky-party-8.html
Cheers, Michelle
Nice project – would love for you to check out the name sign I made for my Grand-daughter’s room. It is very similar to what you did here.
Hugs –
Carol @arewethereyet
Love how springy and cheerful it is!
This is such a pretty sign!!! I love it!
I would really LOVE It if you shared it over at The DIY Dreamer.. From Dream to Reality!! 🙂
https://thediydreamer.blogspot.ca/2012/03/from-dream-to-reality-linky-party-8.html
I love how you glued them onto a board. Simple way to make them stand. I don’t know why I hadn’t thought of that before! 😉
Thanks for stopping by Coley! Happy Spring!
These look great! It looks like a project I need to try.
Thanks so much for stopping by Renonda! Happy Spring!