DIY Mobile Laundry Station
Laundry – the never ending task! Seems like no matter how many times we try to get caught up, the pile of laundry just keeps multiplying! What if you had an area that would keep all your laundry and the supplies organized? And even if you had laundry, there would be a spot to keep it all.
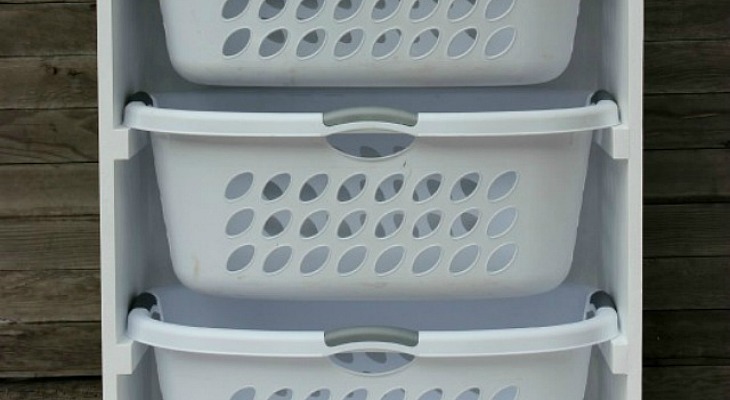
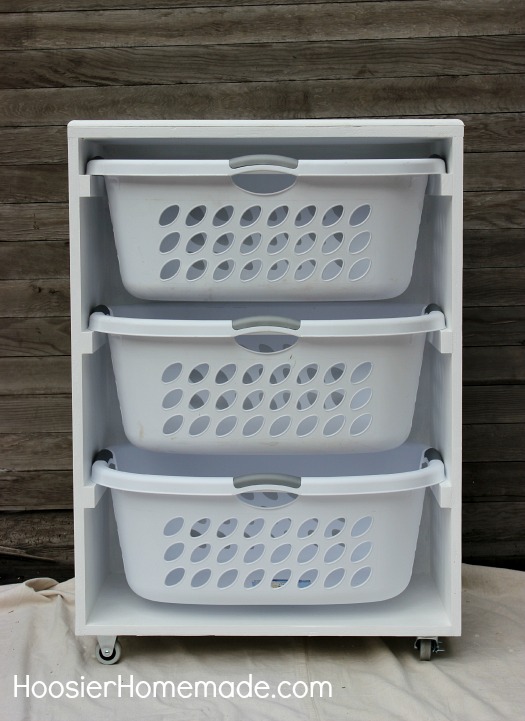
This Mobile Laundry Station keeps your laundry separated, so when you have time, you can tackle the pile that never seems to go away.
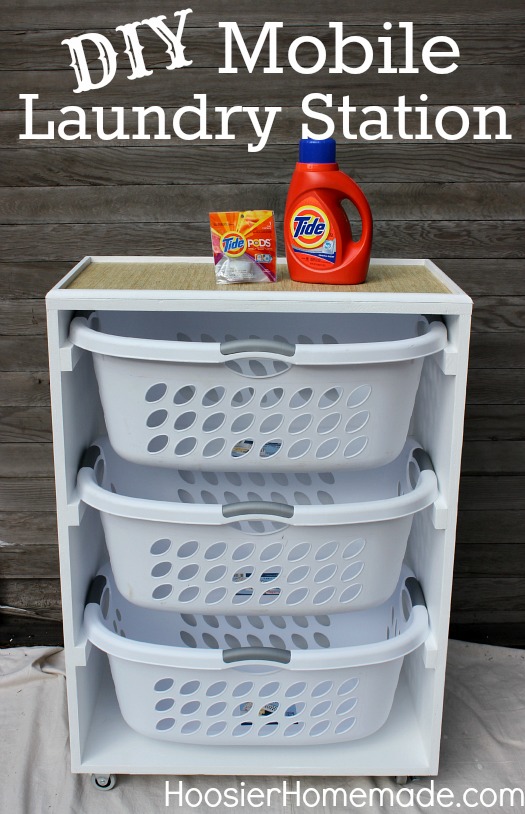
Isn’t she a beauty? Doug did a fantastic job on it. But it’s actually not for me – I will have to confess, I don’t do the laundry in our house. Yes, I’m very lucky to have my hubby do our laundry.
As part of the Brilliant HE Clean Ideas Bloggers, we were challenged to create a solution for our Laundry Room. Jenny Komenda shares her top 6 tips for Laundry Room Redesign, like Tip #4 – “A rolling laundry butler can be your best friend, doing triple duty with a hanging bar, a rolling basket and a drying rack.”
We took the rolling laundry butler a step further and created an organizing station that holds laundry baskets and a place on top to hold soap, stain remover and dryer sheets and created a Mobile Laundry Station.
We have lots to show you how to build this Mobile Laundry Station – so let’s get busy…
First let’s gather our supplies –
Mobile Laundry Station Supply List
- 4 x 8 foot sheet – 3/4 inch plywood
- 2 – 6 foot 1 x 2 inch pine boards
- 4 x 4 foot sheet – 1/4 inch plywood
- 8 foot – 1/2 inch x 3/4 inch shoe molding
- 2 – 2 inch medium duty swivel casters with brake
- 2 – 2 inch medium duty rigid casters
- Deck screws – 8 gauge by 1 1/4 inch
- Wood screws – 8 gauge by 3/4 inch
- Wood Glue
- Primer
- Paint
- Shelf Liner
Cut List
The measurements will depend greatly on the size of your laundry basket. We used 1.25 bushel Sterilite brand. It’s best to have the employees at The Home Depot cut the 3/4 inch plywood into 15 1/2 inch width pieces for you.
For the box – 3/4 inch plywood
- 1 – 15 1/2 inch x 26 inch (bottom)
- 1 – 15 1/2 inch x 27 1/2 inch (top)
- 2 – 15 1/2 inch x 36 inch (sides)
For the back – 1/4 inch plywood
- 27 3/8 inch x 35 3/4 inch
For the rails – 1×2 inch pine boards – the rails will be attached to each side once the box is built, at 10 inches from the bottom, then 21 inches from the bottom and 32 inches from the bottom measured at the top of the rails. Spacing will depend on the size of your laundry basket.
- 6 – 15 1/2 inch long
For the top – Shoe Molding (ends cut at 45 degree angles)
- 2 – 27 1/2 inch pieces
- 2 – 15 1/2 inch pieces
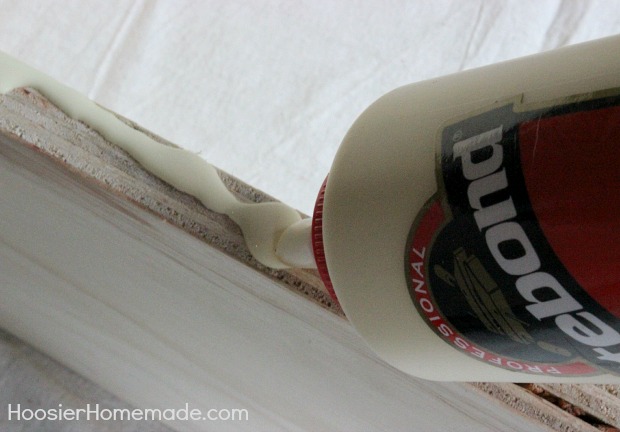
The construction is a simple box, attach the sides to the ends of the 26 inch wide bottom piece then cap the sides with the 27.5 inch wide top piece. The finished inside measurement should be 26 inchs.And finish with 1×2 inch pieces of wood to hold the laundry baskets. After cutting the pieces of wood, it’s best to apply wood glue to the joints before screwing them together.
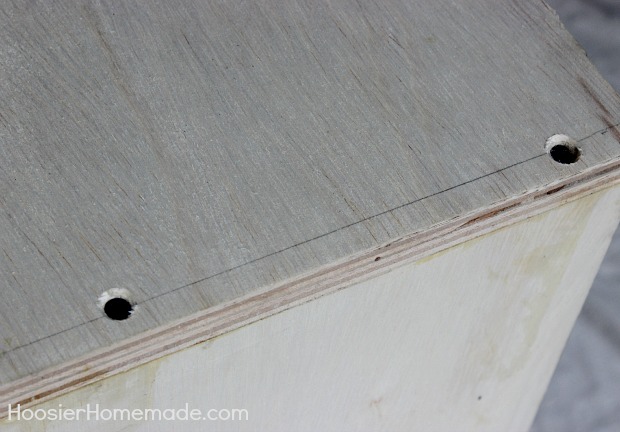
Pre-drill the screw holes with a small drill bit and countersink the holes for a clean finish. After glue is set and prior to painting, cover the screw heads with wood putty.
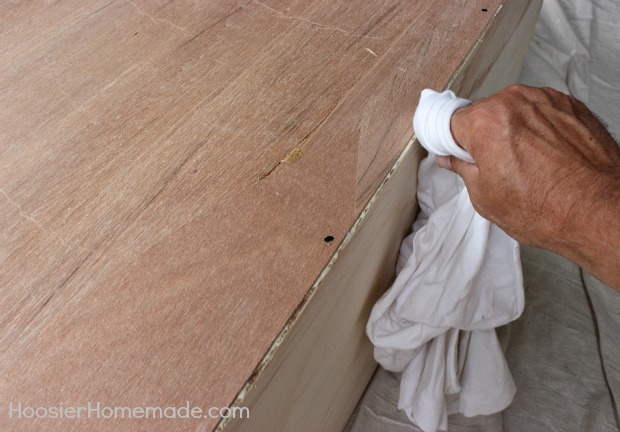
After you have built the sides of the box and attached the back, make sure to clean up any wood glue that has squeezed out of the joints with a clean wet rag.
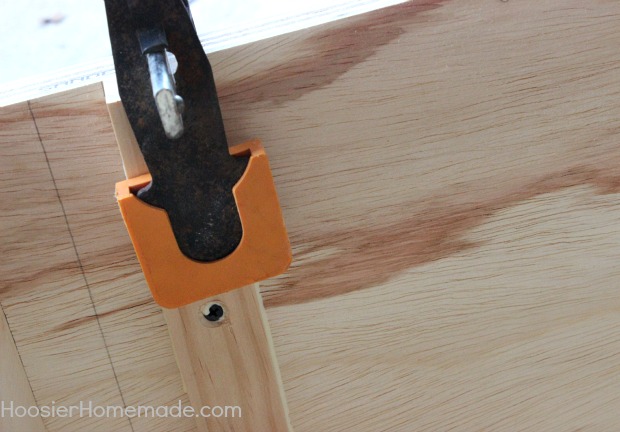
Now it’s time to build the rails that will hold the laundry baskets. Attach the rails to the inside of the box, use the supply list as a guide for spacing the rails. Use a clamp to help hold the rails in place while you glue and screw them to the side. Leave the clamps on until the glue has dried.
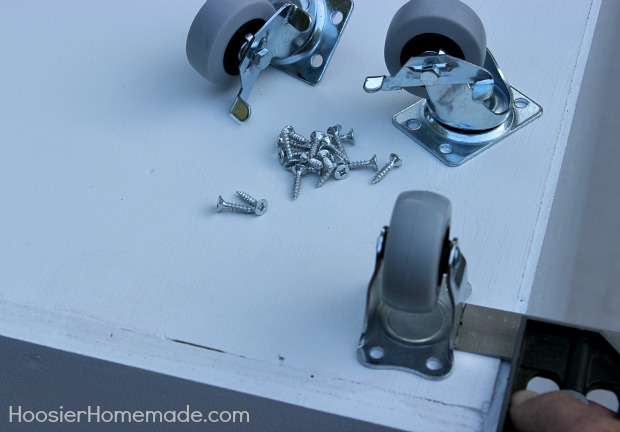
After the laundry station has been primed and painted, you can add wheels to the bottom if you like. Space the wheels 1 inch in from the corners.
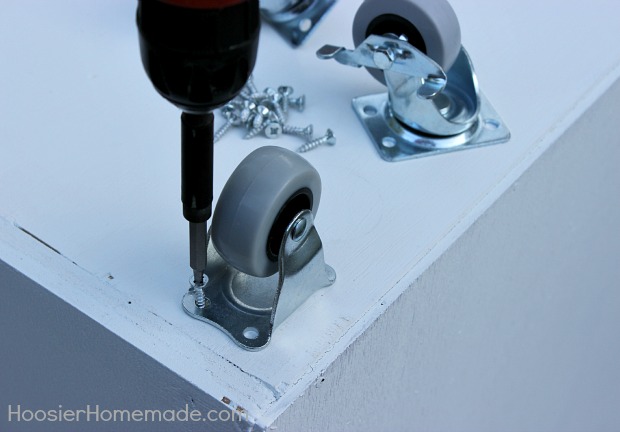
And attach them with the 3/4 inch wood screws.
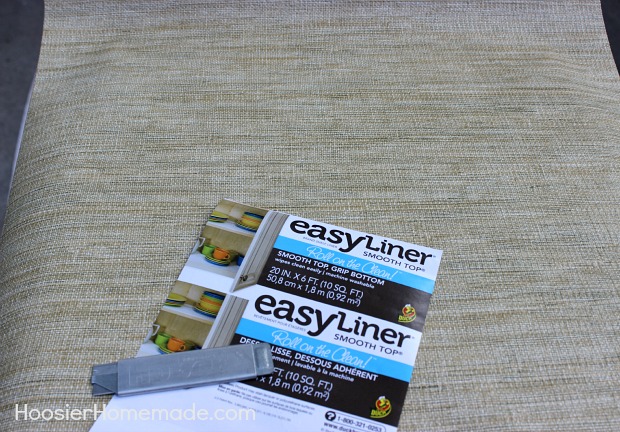
To make clean up easy, we added shelf liner to the top. This Duck Brand easy liner is sold in a roll and can be cut to fit the top. Secure with staples around the outer edge.

To finish the top, attach wood trim around the edge with finishing nails. This trim can also be glued, but we chose to nail it so it could be removed if the liner needed to be replaced.
Time to tackle Mount Washmore!
Love to Decorate?
Me too! Subscribe to get decor ideas for every season straight to your inbox!
Great idea! Love it! Laundry and sorting station.
Are the measurements for the positioning of the basket rails to the bottom of the boards or the top? Also, how many screws on each side do you use? i.e. attaching sides to bottom
Jeff – The measurements are to the top of the boards and 3 screws per side.
This is basic stuff. Home Depot might even do the cuts for you. Lowes generally just does simple cuts. Also check with your local community center. they might have woodworking classes and machines available. The hardest part will be patience, the second hardest, squaring corners. But you all can do it!
Yes we agree with you 100% Kathy, this type of project is what we share with our readers – simple, easy and creative.
Thanks for stopping by!
~Liz
Would you make a diy. video for this thanks
We are working on this Yesi. It will be coming soon!
Just a word of advice. I made this box exactly like the instructions, bought 1×2 pine boards and thought I was nearly done. I went to test fit my baskets (same exact ones you used) and they fell off the rails. You can’t use store bought 1×2 if it isn’t exactly 1×2 (even though it’s advertised as such. I’m going back to the drawing board now…
Luke, sorry you had some trouble. I’m working on improving the instructions and we are going to include detailed drawings soon.
I used railing balusters, for decks, from Lowes, they were 98 cents each and fit exact! They measure 1.5″ by 1.5″
Love the idea! But, shouldn’t your cut list have the top piece listed as 15 1/2 inch x 27 1/2 inch and your bottom piece listed as 15 1/2 x 26 inch. Your photos show the top overlapping the sides and the bottom in between the sides.
Hi Dee, yes you are correct. You can have the large piece on the bottom or the top, either way is fine. But yes, we do have the cut list showing it a different way than the photo, I will correct it now.
Thanks!
~Liz
Thanks
where in NWI do you live, I live in East Chicago, might your husband make me one, to buy. My elderly mom can use one of these, it would help her transport her laundry, she only gets around the house with a cane.
Hi Jerry, we live in LaPorte. Email me – [email protected] and we can chat.
~Liz
A trip to Wal-Mart or Target might be in order. I am going to look in the section where all the plastic containers and storage bins are. I know they have rolling carts there with drawers in them. Maybe not ideal then this one but better then nothing.
That’s a great idea Marge!
What are the overall dimensions? I’m hoping to find and esusting book shelf to convert!!
Hi Amanda, the overall size is 36 1/2 inches tall by 27 1/2 inches wide. My husband built the cart around the size of the laundry basket. So depending on the size of your baskets, you could certainly turn a book shelf into it.
~Liz
I need about 4 of these. One for the laundry and three for toys!!! Doug, you are a genius and Liz, thanks for sharing.