DIY Jewelry Organizer

Do you have necklaces, bracelets and earrings laying on your dresser? Let’s get them organized with this easy to make DIY Jewelry Organizer.
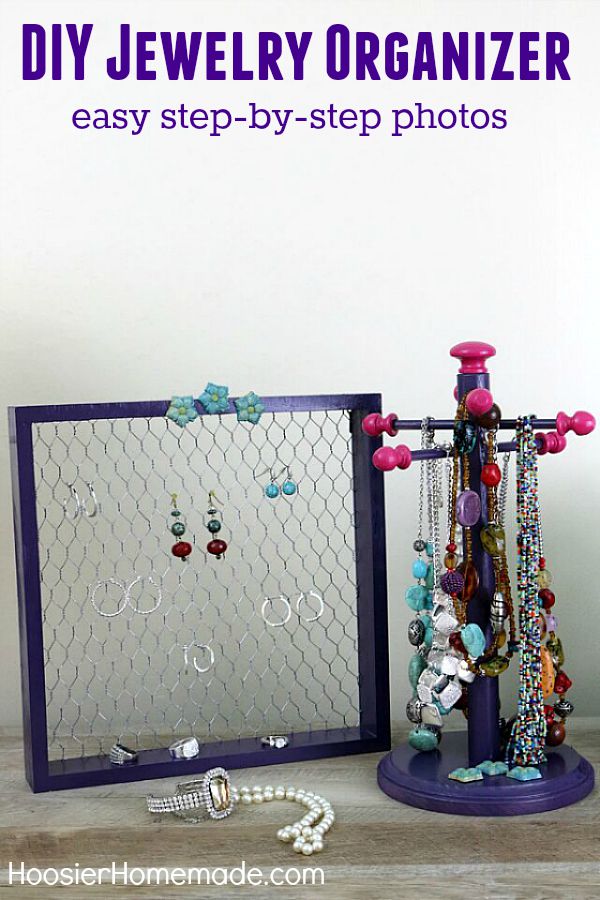
I don’t know about you, but my jewelry is one of those things that tends to get messy really quickly. By the time I take the necklace or earrings off, I’m so tired that I don’t want to be bothered with putting it away. Having a place to keep the jewelry organized is the key.
This DIY Jewelry Organizer is perfect! It’s easy to make too!
Is your jewelry already organized? This would make a fabulous gift too! It’s inexpensive, doesn’t take long to put together and can be customized for each person. You know the holidays are quickly approaching, right?
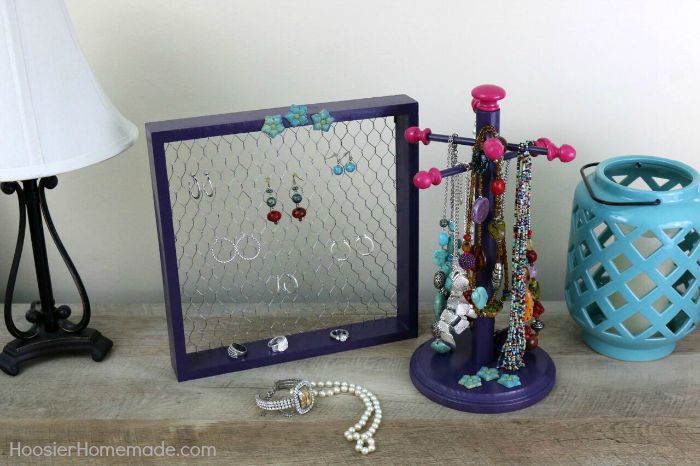
Not only is the Jewelry Organizer functional, I think it’s looks pretty on the dresser too. Let’s get started…
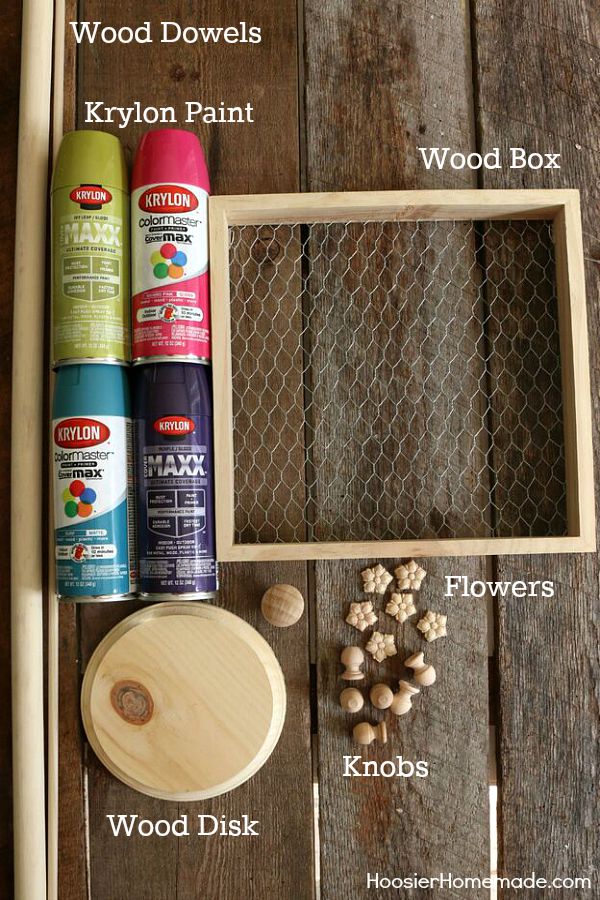
DIY Jewelry Organizer Supplies
We bought all the wood pieces at Home Depot, except the Wood Box and the Flowers are from Michael’s
- Wood Box
- Wood Dowels- 1 each of a 1 inch diameter and 5/16 inch diameter
- Wood Disk – 6 inch
- Wood Knobs – 1 inch dowel caps with 3/8 inch hole
- Wood Drawer Pull
- Flowers or other decoration
- Krylon ColorMaster Paint
- 1 – #8 x 2 inch Wood Screw
Tools Needed
- Drill
- Ruler
- Wood Glue
- Pencil
- Hand Saw
- Painter’s Tape like Frog Tape
- Q-tips
- Painter’s Tarp
- Sand Paper
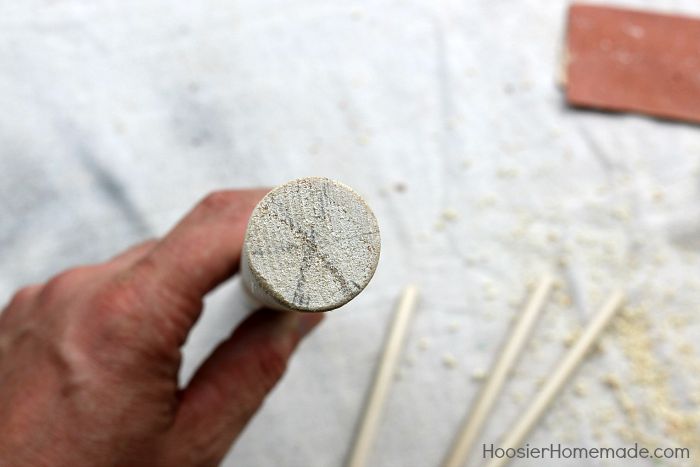
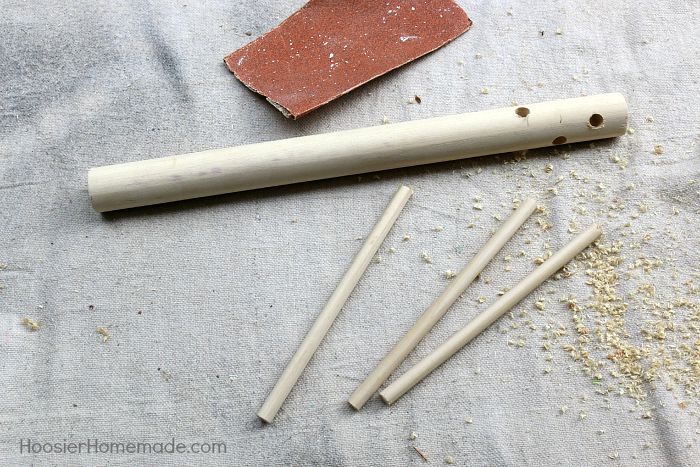
Step 1
Cut the pieces of wood dowels. Cut the 1 inch dowel 12 inches long. Cut 3 – 6 inch pieces from the 5/16 dowel
Mark the top of the 1 inch dowel, dividing it into 6 pie shape sections
Step 2
Mark down from the top in 3 places – 3/4 inch, 1 1/2 inch and 2 1/4 inch
Drill a 5/16 inch hole through the dowel, matching the markings.
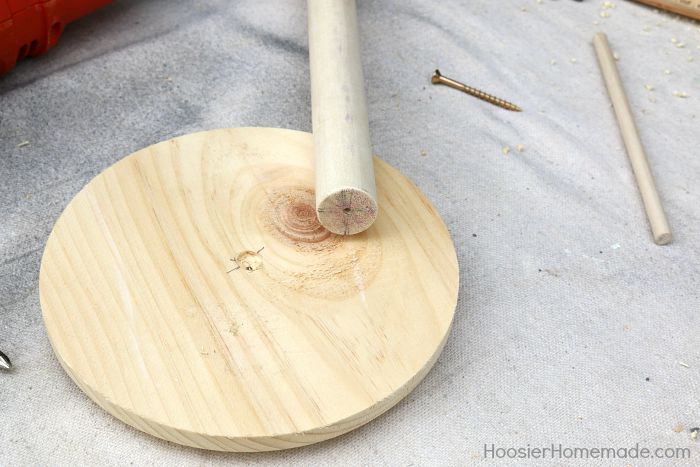
Step 3
Drill a pilot hole in the bottom of the wood dowel
Drill a pilot hole in the center of the wood disk and counter sink the screw into the base
After you have drilled the pilot holes, attached the dowel to the base with a #8 x 2 inch wood screw
Step 4
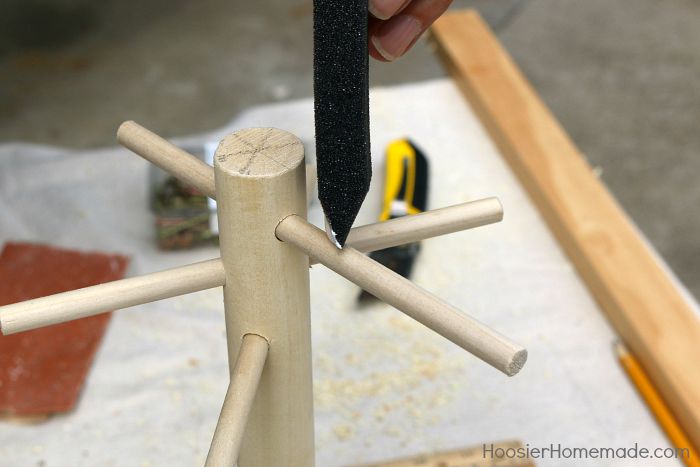
Slide the 5/16 inch wood dowel through the holes in the 1 inch dowel.
Add a dab of wood glue to the dowel at the center point.

Step 5
Push the dowel through the hole.
Measuring 2 1/2 inches exposed.
Wipe off excess glue with a wet rag.
Step 6
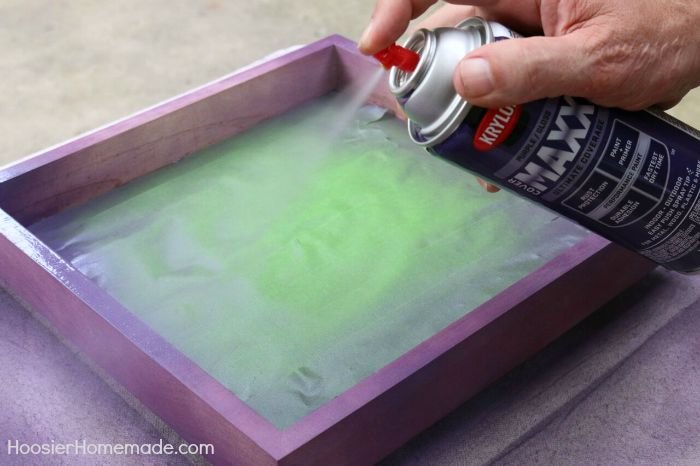
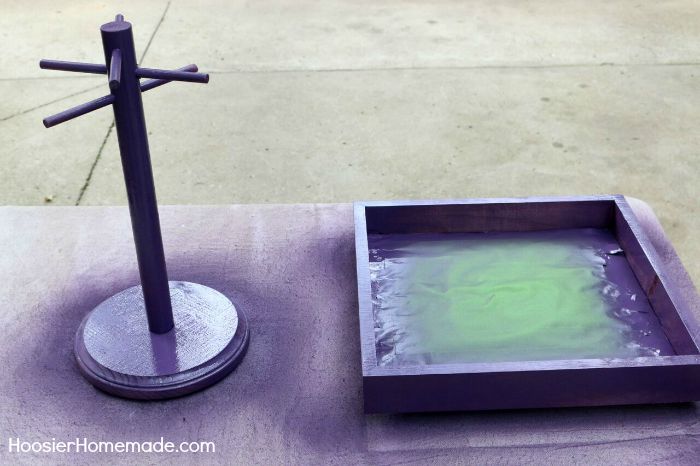
While the glue is drying you can paint the Earring Box.
Tape off the wire with painters tape, making sure the edges and corners are secure.
Paint with Krylon CoverMaxx Purple . You will need about 3 coats, make sure you let it dry between coats about 10 minutes.
Step 7
After the glue is dry, paint the Jewelry Organizer with 3 coats of paint, letting dry between coats about 10 minutes.
Both pieces have been painted and set aside to dry.
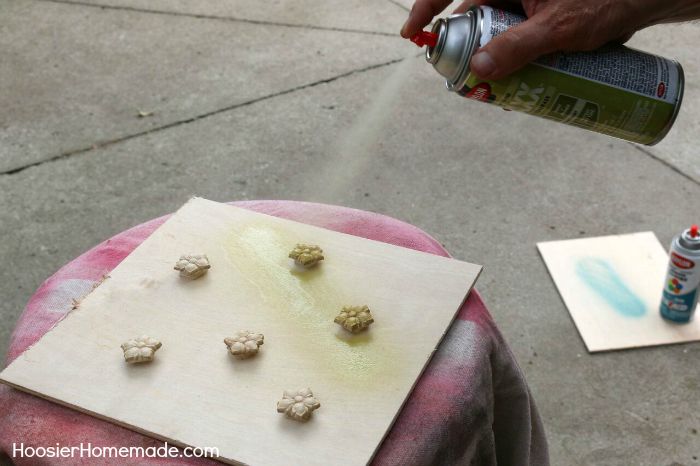
Step 8
Give the flowers a base coat of Krylon Ivy Leaf Green. We did this so when the second color was applied and wiped off, it would show through and give the flowers dimension.
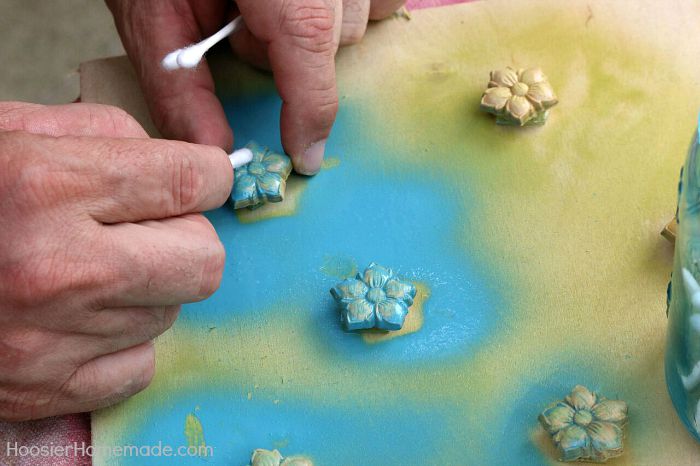
Step 9
Then the Krylon ColorMaster Surf is sprayed on and immediately wipe off the high points with a Q-tip.
Set aside to dry.
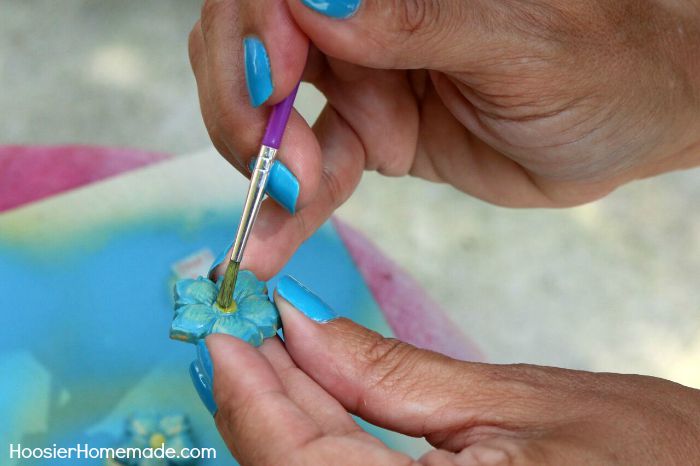
Step 10
Using a small paint brush, paint the inside of the flowers. We sprayed the Krylon Ivy Leaf onto a paper plate and then used the brush to hand paint the color we wanted so that it all matched.
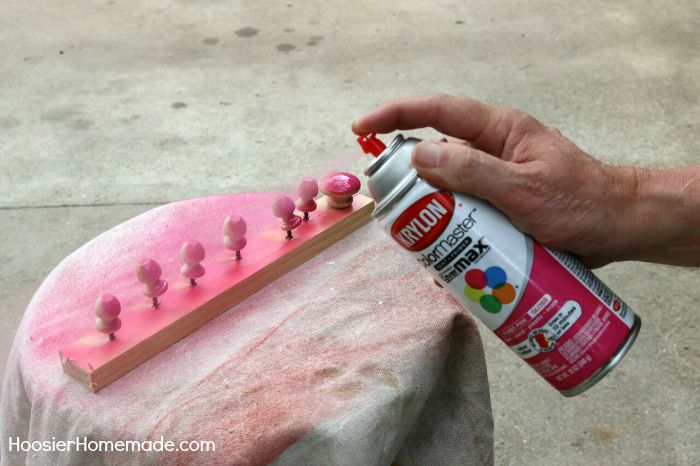
Step 11
Now it’s time to paint the wooden knobs. Doug used a scrap strip of wood with screws drilled through to hold the knobs and drawer pull. We decided on Krylon Mambo Pink as an accent color, not only because I love it, but it also reminds me of when I helped on the Krylon Spraydown.
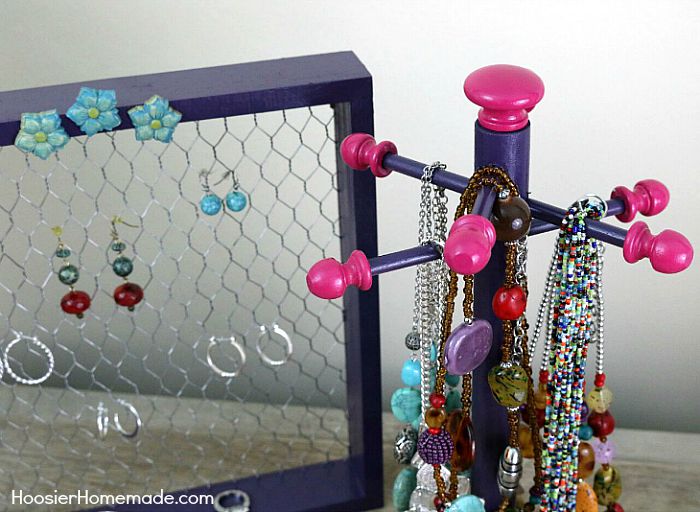
After all the pieces are dry, then use a glue gun to attach the knobs and flowers.
Visit the Krylon Facebook page and “like” them for more inspiration and to see all the great projects featuring the Color of the Month!
![]()
- Krylon ColorMaster Paint – Purple, Mambo Pink, Ivy Leaf and Surf
- Wood Box from Michael’s
- Wood Dowels and Drawer Pull from The Home Depot
- Wood Flowers from Michael’s

This is so cute ! Krylon paint really is the best. Pinning!
Great ideas! That little wood box is perfect for earrings!