Creepy Grim for Halloween
Our son Andrew has been writing a little for us lately. He is an amazing writer, so I turned him loose on Grim for Halloween. He loves to write, loves Halloween and fantasy. Enjoy his story about Grim…
Darkness falls upon a small suburban street as the street lamps fade out, one by one. Only the light of the moon is left to guide a little boy as he runs down the street, panting heavily. He’s dressed as his favorite hero, Batman; but not even Batman can be prepared for the terror that is stalking him tonight. The child can barely see through the darkness as he stumbles to the ground. Before he can recover, the beast reacts, setting upon him as a cat would to a mouse. The monster Grim rests on his successful hunt, sewing another trophy onto himself. The dark knight’s face is forever contorted in horror. Grim stands up and sets off; he is hungry yet again.

Thus is the story we set up for Grim. This Halloween we wanted to build something especially scary. After some looking and planning we decided on Grim: a monster inspired by old stories of monsters and head hunters. We decided Grim would awaken every Halloween, hunting down young trick-or-treaters and doing who knows what to them. He’d then take their masks and sew them onto his form, as both a twisted form of trophies and as a warning to those who would mock the holiday he resides in.

The construction process for Grim was fairly easy, but a little time consuming.

First we made the framework of his body out of wood. This was done just by cutting wooden boards and screwing them into place. Once we had the frame, we covered it in chicken wire, molding it into the general shape that Grim will take. It’s important to point out that while this step is fairly easy, it also takes the most care to complete, as the wire can cut you easily.

The hands were formed with cardboard, Duck Tape and chicken wire for the fingers.

The next step involves newspaper and a whole lot of Mod Podge. We just covered all the chicken wire in papermache’, making the skin for Grim. This can be the longest step. Getting everything covered takes quite a bit of time, and you may want to put an extra layer or so on.

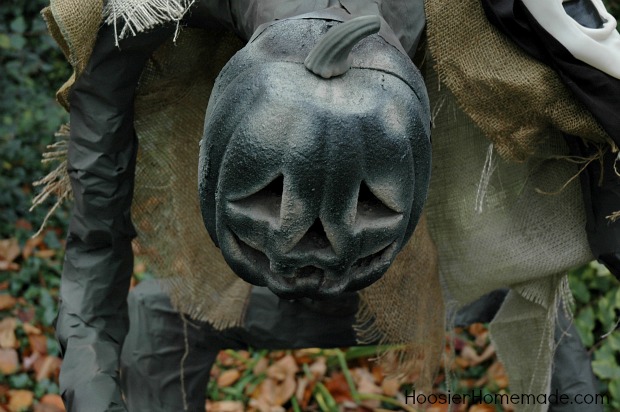
Once that was done, we attached the head. Anything creepy will do, but we decided to go with a foam jack o’ lantern. Once that got properly attached, we spray painted it.

We covered our Grim entirely with a forest green, then we darkened it with black, occasionally leaving darker spots for a splotched and natural look. Then we took some tan paint and sprayed random bits on, to give it some balance in shades.

Once we had the main form of Grim done, we worked on additional decorations to put on him. First we found some decorative skulls, and we tied them up with thick frayed rope. We then put the tied up heads in his hand, for him to carry as victims.
Then we made his trophy mantle. We took several burlap sheets of different sizes and colors. We put them together haphazardly to achieve a patchwork effect.

Then we used hot glue to attach a few masks onto this cover; the trophies of this monster. As a final touch, we used dry ice to make some fog, for additional creepiness.
Working on Grim has been one of our favorite Halloween projects to work on. It can be a fun DIY project that you can either do yourself, or with your entire family. Grim makes a great set piece for your lawn, or really anywhere in your Halloween decor. Just try not to get too frightened.

Halloween Crafts, Decorating and Treats on HoosierHomemade.com
Linking to…Sundae Scoop Party
I just wanted to know if it would come apart if it got wet being outside. It is only newspaper and mod podge. Will it ruin in the weather?
Hi Susie, We are still testing that. I will say though that Grim is very durable. We have had a wind storm knock him over and there was no damage. It has not rained yet, so we will update you. You could also put on a few coats of polyurethane, be sure to get a matte finish, unless you want him to look glossy.
Wow! Gorgeous stuff! I am your newest follower and was hoping that you would hop on over to my blog and return the favor!!
http://www.enjoyingtheepiphany.com
Thank you!
Sarah
Very creepy! Love it!
Only 3 days left till Halloween! I would love to invite you to post this over at my Halloween link party on The Purple Pumpkin Blog! Hope to see you there 🙂
Michelle xoxo
Wow! So creepy and scary and cool!
Great job!
I am a huge Halloween fan and just LOVE this, thank you!
This is so cooolll!!!
Very cool….love all of his accessories. Have a fun Holloween.
Pam